
Water stains on garage drywall are one of those problems that’s easy to overlook — until they spread, darken, or start to smell. Whether it’s a yellowish ring on the ceiling or a brownish streak running down the wall, these marks are more than cosmetic issues. They’re signs that moisture reached somewhere it shouldn’t have.
Knowing how to remove water stains from garage drywall the right way means more than grabbing a can of paint. It means finding the source of the moisture first, confirming the area is fully dry, and then treating the stain so it doesn’t bleed back through your finish. This guide walks you through every stage of the process — from inspection to final coat — so you fix the problem properly and don’t end up repainting the same wall six months from now.
Why Stains From Garage Drywall Matters
Painting over a water stain without addressing what caused it is one of the most common home repair mistakes. The stain comes back, the drywall continues to degrade, and the underlying moisture problem quietly gets worse.
Water-damaged drywall loses structural integrity over time. Wet gypsum becomes soft and crumbly, loses its ability to hold fasteners, and creates ideal conditions for mold growth if moisture is recurring. Garages are especially vulnerable because they’re exposed to temperature swings, roof drainage, plumbing runs, and door seal failures that interior rooms rarely experience.
Step-By-Step Guide To How To Remove Water Stains From Garage Drywall
Step 1: Find And Fix The Source Of The Moisture First
Before you touch the stain, you need to know where the water came from. Common sources in garages include roof leaks above the ceiling drywall, condensation from poor ventilation or temperature swings, plumbing lines running through the ceiling or wall, and failed garage door seals allowing rain intrusion along the bottom or sides.
Press the stained area gently with your fingers. If it feels soft, spongy, or crumbles, the drywall has taken on significant moisture and may need replacement rather than surface treatment. Do not start any cosmetic repair until you’ve identified and corrected the moisture source — otherwise the stain will return and the damage will continue.
Step 2: Confirm The Drywall Is Completely Dry
Once the source is fixed, the affected drywall must dry out fully before any primer or paint goes on. Applying finish over damp drywall traps moisture inside, which causes ongoing deterioration and makes the stain reappear within weeks. Depending on how saturated the area was, drying can take anywhere from a few days to a couple of weeks.

You can speed the process using a fan, a dehumidifier, or a portable heater directed at the area. A moisture meter — available at most hardware stores for under $30 — takes the guesswork out of it. The drywall surface should read below 12% moisture content before you proceed. Don’t estimate; confirm it.
Step 3: Inspect The Damaged Area Carefully Before Repairing
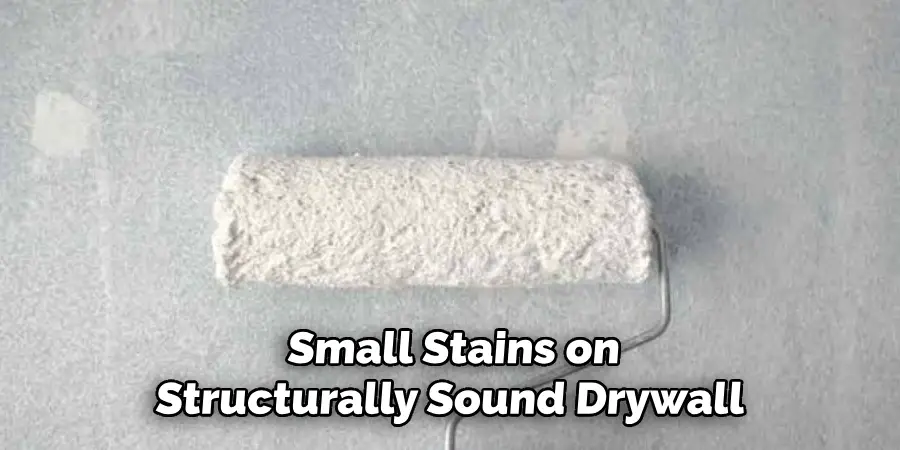
With the area dry, do a close inspection to decide whether surface treatment is enough or whether the drywall needs to come out. Look for any areas that remain soft or feel hollow when tapped, any visible mold growth, significant staining that extends across a large section, or paper facing that has bubbled, peeled, or separated from the gypsum underneath.
Small stains on structurally sound drywall are good candidates for the cleaning and sealing steps that follow. If you see dark spots that look fuzzy or greenish, or if the same spot has stained more than once, the drywall may have a mold problem that goes beyond surface treatment. In those cases, cutting out and replacing the affected section — or calling a professional — is the responsible path.
Step 4: Clean The Stained Surface Before Priming
Surface residue — mineral deposits, dust, and dried organic material left behind by the water — should be cleaned before applying any primer. Mix one part white vinegar with one part warm water, or use a mild TSP (trisodium phosphate) substitute solution available at hardware stores. Apply it to the stained area with a sponge or cloth, scrubbing gently.
Don’t saturate the drywall while cleaning — use just enough solution to loosen surface residue. Wipe the area dry with a clean cloth afterward and allow it to air dry completely before moving to the next step. This cleaning step also helps remove any faint odors the water event may have left behind in the paper facing.
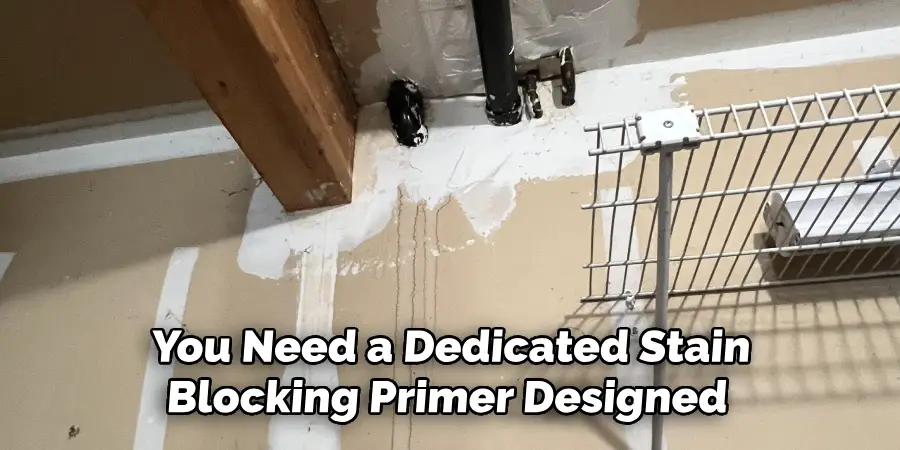
Step 5: Apply A Stain-Blocking Primer To Seal The Mark
This is the step that separates a lasting repair from one that fails in a few months. Standard latex paint will not stop a water stain from bleeding through — the minerals and tannins in the stain will migrate right through the finish and reappear. You need a dedicated stain-blocking primer designed to seal these types of marks.
Shellac-based primers (like Zinsser BIN) offer the strongest stain blocking and work on almost every surface. Oil-based stain-blocking primers are also effective. Water-based stain-blocking options work for lighter stains. Apply one even coat over the stained area, extending slightly beyond the visible mark. Allow it to cure fully according to the product label before painting — typically one to two hours for water-based, longer for oil and shellac.
Step 6: Drywall With The Right Paint Finish
Once the stain-blocking primer is cured, apply a finish coat of paint that matches the surrounding wall or ceiling. For garage ceilings and walls, a flat or eggshell latex paint is typical. If you’re painting just the patched area, feather the edges carefully to blend with the existing finish — painting edge-to-edge on a full wall or ceiling section gives the most seamless result.
Apply two coats if the primed area looks noticeably different in sheen or texture from the surrounding surface. Allow the first coat to dry fully before applying the second. Garages often have walls that haven’t been painted recently, so be prepared for the possibility that the repaired area looks fresher than everything around it — in which case repainting the full wall gives the cleanest outcome.
Step 7: Know When To Cut Out And Replace Instead Of Paint
Some drywall cannot be saved with primer and paint — and attempting to cover it creates more problems than it solves. If the drywall is soft, crumbling, or structurally compromised after drying, it needs to be replaced. Soft drywall won’t hold paint properly, won’t support fixtures, and will continue to deteriorate.
If mold growth is extensive — covering more than a small patch — or if you find mold on the back side of the drywall or on framing behind it, consult a professional before proceeding. Cutting out moldy drywall without proper containment can spread spores through the garage and into adjacent spaces. A professional assessment isn’t an overreaction in that scenario — it’s the safe, responsible choice.
Frequently Asked Questions
Can I Paint Over A Water Stain Without Using A Special Primer?
No. Standard latex paint will not seal a water stain. The minerals and organic compounds in the stain will bleed through the finish and reappear within weeks. A shellac-based or oil-based stain-blocking primer is necessary to stop migration before any topcoat is applied. Skipping this step almost always results in the stain returning visibly.
How Do I Know If My Garage Drywall Has Mold?
Mold on drywall often appears as dark spots — black, green, or grayish — that may look fuzzy or have an irregular pattern. A musty odor is another strong indicator. Small surface spots on otherwise solid drywall can sometimes be cleaned, but extensive or recurring growth, or mold on framing behind the wall, requires professional evaluation before any repair.
How Long Does Drywall Take To Dry After A Water Event?
Drying time depends on how saturated the drywall became and how much airflow the area gets. Mildly damp drywall may dry in two to four days with a fan running. More saturated areas can take one to two weeks. Use a moisture meter to confirm the reading is below 12% before applying any primer or paint.
What Causes Recurring Water Stains In The Same Spot?
Recurring stains almost always mean the moisture source was never fully corrected. Common culprits include a slow roof leak that only activates during heavy rain, a plumbing joint with intermittent dripping, or condensation from a seasonal temperature pattern. Identify and fix the specific source before repainting — otherwise the repair cycle will repeat indefinitely.
Is It Safe To Stay In My Garage During Water Stain Repairs?
Light cleaning and painting is generally safe with adequate ventilation. Open garage doors and windows while using shellac or oil-based primers, as they have strong fumes. If you suspect mold is present, wear an N95 respirator and avoid disturbing the area more than necessary until you’ve confirmed the extent of growth and whether professional remediation is needed.

Conclusion
Water stains don’t have to be permanent — but they do need to be taken seriously. The cosmetic fix is straightforward once you’ve done the important work first: finding and stopping the moisture source, confirming the drywall is fully dry, and using the right stain-blocking primer before any paint goes on.
Following this process for how to remove water stains from garage drywall gives you a result that actually holds. Start with a careful inspection, be honest about whether the drywall needs repair or replacement, and don’t skip the primer step. If anything you find suggests mold, structural damage, or a leak you can’t trace, bring in a professional before the problem grows. A small investment of time and the right materials now keeps a simple stain from becoming a much larger repair later.
I am Rick. I grew up helping my dad with his handyman service. I learned a lot from him about how to fix things, and also about how to work hard and take care of business. These days, I’m still into fixing things- only now, I’m doing it for a living.
I’m always looking for new ways to help people grow and develop. That’s why I have created this blog to share all my experience and knowledge so
that I can help people who are interested in DIY repair.