
A garage door opener that won’t respond is more than an inconvenience — it can disrupt your entire morning routine or leave your vehicle trapped inside. LiftMaster is one of the most reliable brands on the market, but even dependable systems run into problems over time. The good news is that many of the most common issues have straightforward solutions that don’t require a technician.

Knowing how to fix liftmaster garage door opener problems starts with understanding what’s actually wrong. A dead remote, a misaligned sensor, or a tripped circuit breaker each point to a different solution. This guide walks you through the most common causes of failure, how to diagnose them accurately, and which fixes are safe to handle yourself — so you spend less time guessing and more time getting your garage back to normal.
Why Garage Door Opener Matters
A malfunctioning garage door opener affects more than convenience. For most homes, the garage is the primary entry point — when the opener fails, you lose quick access, and your home’s security may be compromised if the door can’t close properly.
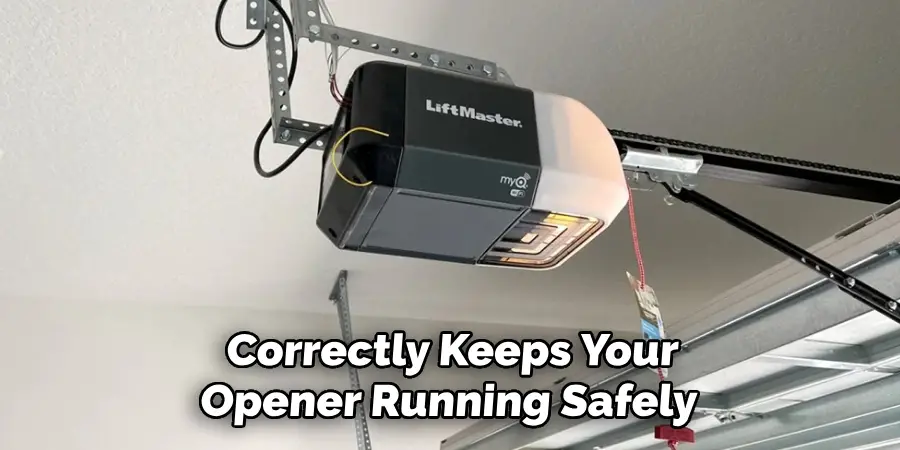
LiftMaster units are built to last, but skipping early troubleshooting often turns a minor issue into a more expensive repair. A sensor knocked out of alignment, a remote that needs reprogramming, or a tripped breaker are all fixable in minutes with the right knowledge. Ignoring them can lead to unnecessary service calls or, worse, a door that closes unexpectedly or won’t secure at all. Understanding the basics of your opener also helps you communicate clearly with a technician when a problem is beyond DIY scope — saving time and preventing misdiagnosis. Acting early and correctly keeps your opener running safely for years.
Step-By-Step Guide To How To Fix Liftmaster Garage Door Opener
Step 1: Check Power Before Anything Else
The most common reason a LiftMaster opener won’t respond has nothing to do with the unit itself — it’s a power issue. Start by checking whether the opener’s power cord is fully plugged into the outlet. Then test the outlet by plugging in another device, like a phone charger or lamp, to confirm it’s live.
If the outlet has no power, check your home’s circuit breaker panel for a tripped breaker. LiftMaster openers typically run on a dedicated circuit. Reset any tripped breaker and see if the unit powers on. Some garages also have a GFCI outlet nearby that may have tripped independently — check for a reset button on any outlets in the area.
Step 2: Inspect The Wall Button And Lock Button Status
If the opener has power but only the wall button is unresponsive — while remotes still work — the wall button itself may be faulty or disconnected. Check the wiring behind the wall button for any loose connections. A corroded or broken wire at the terminal can prevent the signal from reaching the motor unit.
Before assuming the button is broken, check for one commonly overlooked cause: the lock button. LiftMaster openers include a lock or vacation mode that disables all remotes and sometimes the wall button to prevent unauthorized access. If someone accidentally activated it, remotes will stop working entirely. Look for a lock icon on your wall console and hold the lock button for a few seconds to toggle it off.
Step 3: Diagnose And Fix Remote Control Issues
When a remote stops working, start with the battery. Even a battery that tests partially charged may not deliver enough current to trigger the opener reliably. Replace it with a fresh one and test. If the remote still fails, stand closer to the opener and try again — range problems can point to a weak antenna or signal interference.

Check the antenna wire hanging from the motor unit. It should hang straight down and be free of kinks or damage. A bent or tucked antenna dramatically reduces signal range. If the remote works up close but not from across the garage, antenna repositioning often resolves it. If the remote doesn’t work at all after a battery swap, it may need to be reprogrammed to the opener using the Learn button on the motor unit.
Step 4: Realign The Safety Sensors
LiftMaster safety sensors sit near the bottom of each garage door track and create an invisible beam across the door opening. If that beam is interrupted or the sensors fall out of alignment, the opener will refuse to close — and the wall button light may blink to signal the problem.
Each sensor has an indicator light. The sending sensor typically shows a steady amber light, and the receiving sensor shows a steady green light. If either light is blinking or off, the sensors are misaligned or obstructed. Loosen the wing nut on the affected sensor bracket, adjust it gently until the light becomes steady, then retighten. Clear any debris, spiderwebs, or dirt from the sensor lenses before testing again.
Step 5: Adjust The Travel Limit Settings
If the door opens but won’t close fully — or closes and then immediately reverses — the travel limit settings may be off. LiftMaster openers use limit adjustment screws or digital controls to tell the unit how far the door should travel in each direction. When these are set incorrectly, the opener either stops short or thinks it’s hitting an obstruction.
Locate the limit adjustment controls on the motor unit — usually labeled “Up” and “Down” with small screws or buttons. Make small adjustments and test the door after each change. Consult your model-specific manual for the exact procedure, since adjustment methods vary between older screw-drive models and newer MyQ-compatible units. Incremental changes prevent overcorrection.

Step 6: Test The Manual Release And Inspect The Drive System
If the opener runs but the door doesn’t move, the problem may be a disconnected trolley. Pull the red emergency release cord hanging from the rail — this disconnects the door from the drive system. Try lifting the door manually. If it moves freely by hand, the door itself is fine and the issue is with the trolley carriage or drive mechanism.
Inspect the chain or belt for visible slack, damage, or derailment. A loose chain can cause jerky operation or no movement at all. LiftMaster chain drives have an adjustment bolt at the front of the rail to take up excess slack — refer to your manual for the correct tension specification. A broken or severely worn belt requires replacement rather than adjustment, which is typically a straightforward part swap.
Step 7: Reset And Reprogram When Standard Fixes Don’t Work
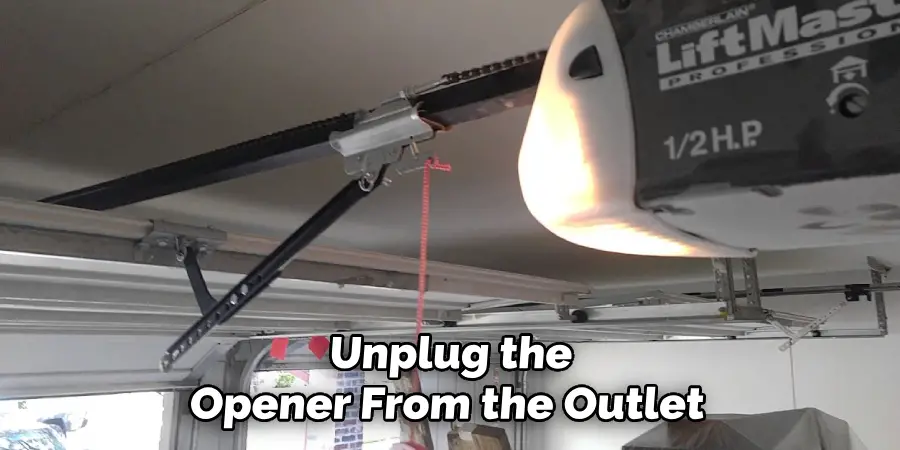
Sometimes the opener needs a full reset to clear error states or communication issues between the motor unit and its accessories. Unplug the opener from the outlet, wait 30 seconds, and plug it back in. This clears temporary faults and restores the unit to its default state without erasing remote programming on most models.
If remotes or keypads stopped working after a reset or battery swap, reprogram them using the Learn button on the motor unit. Press and release the Learn button, then press the button on your remote within 30 seconds — the opener light will flash to confirm pairing. For MyQ-connected units, the app may need to be re-linked through the same process. If none of these steps restore function, note any blinking light patterns on the unit, which serve as diagnostic codes explained in your model’s manual.
Frequently Asked Questions
Why Does My Liftmaster Opener Hum But Not Move The Door?
A humming motor with no door movement usually means the trolley is disconnected from the drive, or the door is physically stuck due to a broken spring or binding track. Check if the emergency release was pulled. Do not force the opener if the door won’t move manually — broken torsion springs require professional repair due to high tension risk.
How Do I Know If My Liftmaster Sensors Are The Problem?
Look at the indicator lights on both sensors near the base of the door tracks. A steady green on the receiver and steady amber on the sender means alignment is correct. If either light blinks or is off, the sensors are misaligned, obstructed, or wired incorrectly. Realigning the brackets usually resolves the issue in a few minutes.
Can I Reprogram My Liftmaster Remote Without The Manual?
Yes. On most LiftMaster models, press and release the Learn button on the motor unit — it’s usually near the antenna wire. Within 30 seconds, press and hold your remote button until the opener light blinks or you hear two clicks, confirming the pairing. Older models use a DIP switch system that requires matching switch positions between the remote and unit.
Why Does My Garage Door Reverse Before Closing Completely?
The most common causes are misaligned sensors detecting a false obstruction, incorrect down-limit settings, or too much closing force resistance. Check the sensor lights first. If sensors are fine, adjust the down-limit setting on the motor unit slightly. Also inspect the door tracks for debris or binding that creates resistance the opener interprets as an obstruction.
When Should I Call A Professional Instead Of Fixing It Myself?
Call a professional if the problem involves torsion or extension springs, internal motor components, or wiring inside the motor unit. These carry serious injury risk or require specialized tools. Also seek help if diagnostic codes appear that suggest circuit board failure, or if the door shows structural damage that no amount of opener adjustment will resolve safely.
Conclusion
Most LiftMaster opener problems are more manageable than they first appear. Power issues, sensor misalignment, remote reprogramming, lock mode activation, and travel limit adjustments are all within reach for a careful homeowner with a few minutes and a basic understanding of how the system works.
Working through the steps in this guide gives you a clear, logical path to diagnosing your specific problem — and knowing how to fix liftmaster garage door opener issues properly means you avoid the trial-and-error approach that wastes time and risks making things worse. Start with the simplest checks, follow the steps methodically, and recognize where DIY ends and professional help begins. Doing this right keeps your opener reliable, your door secure, and your garage functioning the way it should.
I am Rick. I grew up helping my dad with his handyman service. I learned a lot from him about how to fix things, and also about how to work hard and take care of business. These days, I’m still into fixing things- only now, I’m doing it for a living.
I’m always looking for new ways to help people grow and develop. That’s why I have created this blog to share all my experience and knowledge so
that I can help people who are interested in DIY repair.