Mice are expert hiders, and a cluttered garage gives them everything they need — warmth, nesting material, food scraps, and dozens of places to disappear. You might hear scratching at night, notice droppings near the wall, or find a chewed bag of birdseed before you ever see the mouse itself. That’s the challenge: the messier the garage, the harder the problem is to solve.
Knowing how to catch a hidden mouse in a messy garage requires more than setting a trap and hoping for the best. It means reading the signs correctly, reducing the mouse’s advantages without sending it deeper into hiding, placing traps where they’ll actually work, and following through until the problem is resolved. This guide walks you through every step clearly and practically — so you can handle this without guesswork.
Why Catch A Mouse Matters
A single mouse rarely stays a single mouse for long. Mice reproduce quickly, and a garage full of clutter gives a small population everything it needs to grow unnoticed for weeks. Beyond the numbers, mice cause real damage — they chew through wiring, insulation, cardboard storage boxes, and even rubber hoses on stored vehicles.
They also carry health risks. Mouse droppings and urine can contaminate surfaces and become airborne during cleanup if handled carelessly. In a garage where you store tools, sporting equipment, pet food, or anything that enters your home, that risk is worth taking seriously.
Step-By-Step Guide To How To Catch A Hidden Mouse In A Messy Garage
Step 1: Look For Signs Of Mouse Activity Before Touching Anything
Before you move a single box or set a single trap, spend time observing the garage as it is. Mouse droppings are the clearest sign — small, dark, and shaped like grains of rice. Look along walls, in corners, behind stored items, and near any food sources. Gnaw marks on cardboard, plastic packaging, or wood are another strong indicator.
Check for nesting material too, which mice build from shredded paper, fabric scraps, and insulation. Nests are usually tucked into deep, dark spots: inside stored appliances, beneath shelving units, or behind wall-mounted cabinets. Knowing where the mouse is most active before you start helps you place traps in the right locations instead of guessing.

Step 2: Reduce Clutter Carefully Without Scattering The Mouse
A messy garage gives mice an overwhelming number of hiding spots, so decluttering is part of the solution — but it needs to be done thoughtfully. Moving large piles of stuff suddenly can push the mouse into a new area of the garage or send it into the house. Work methodically, starting in areas where you found fewer signs of activity.
Wear gloves during this process. As you sort through items, look for signs of nesting or droppings and bag contaminated material immediately for disposal. Transfer any stored food — pet food, grass seed, birdseed — into sealed plastic or metal containers. Reducing access to food and shelter makes the garage far less appealing and forces the mouse toward your traps.
Step 3: Choose The Right Type Of Trap For Your Situation
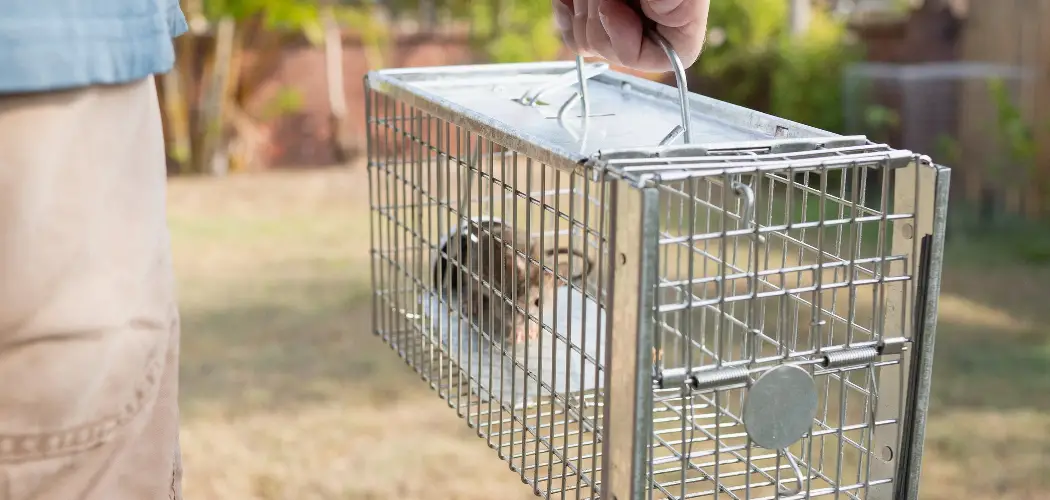
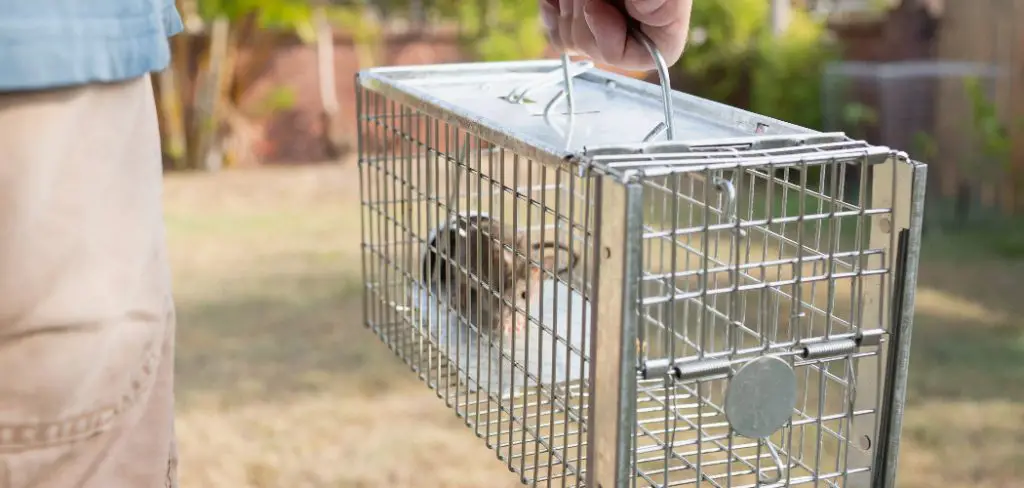
Two trap types work reliably without requiring you to handle chemicals: snap traps and live-catch traps. Snap traps are fast, inexpensive, and effective — modern versions are significantly safer and easier to set than older designs. Live-catch traps capture the mouse unharmed, which suits homeowners who prefer to relocate it.
Avoid using poison bait stations in a garage whenever possible. A poisoned mouse often dies inside the wall or beneath stored items, creating a serious odor problem that’s very difficult to resolve. There’s also secondary poisoning risk if a pet or bird of prey encounters the dead mouse. Mechanical traps are cleaner, more controllable, and far easier to manage in an enclosed space.
Step 4: Messy Garage With Smart Trap Placement
Trap placement matters far more than bait selection. Mice run along walls and travel close to edges rather than crossing open floor space. Place traps perpendicular to the wall with the trigger or opening positioned directly against the baseboard. Behind stored boxes, under shelving, and in corners where droppings were heaviest are all high-priority locations.
In a cluttered garage, also place traps behind large items that can’t be easily moved — water heaters, chest freezers, workbenches, and stacked lumber are all common travel routes. Use more traps rather than fewer: four to six traps in a standard two-car garage gives you much better odds than one or two placed in obvious spots. More coverage means faster results.

Step 5: Select Bait That Actually Works In A Garage Environment
Peanut butter is the most effective and widely available trap bait — it’s sticky, aromatic, and attractive to mice across seasons. Use a pea-sized amount applied directly to the trigger. Avoid large globs that a mouse can remove without triggering the mechanism. Chocolate hazelnut spread and small pieces of nesting material like cotton balls also work well as bait.
In a cold garage, mice may be less drawn to food-based bait and more attracted to nesting material. Try placing a small tuft of cotton or a strip of tissue paper on the trigger of a snap trap or inside a live trap. Experiment with what gets attention — if a trap goes untouched for three days, move it to a different location.
Step 6: Check Traps Frequently And Handle Catch Cleanup Safely
Traps should be checked at minimum once every 24 hours — more often in warm weather. A snap trap that has caught a mouse needs to be dealt with promptly to prevent odor and to avoid attracting other pests. A live trap left unchecked for too long causes unnecessary stress to the animal and reduces its chances of survival after relocation.
Always wear disposable gloves when handling traps, dead mice, or any surface contaminated with droppings or urine. Seal a dead mouse in a plastic bag before disposal in an outdoor trash bin. For surfaces where the mouse was active, clean with a disinfectant spray — do not sweep or vacuum dry droppings, as this can release particles into the air. Damp-wipe first, then disinfect.
Step 7: Seal Entry Points Once The Mouse Is Gone
Catching the mouse solves the immediate problem, but it doesn’t prevent the next one. Mice can enter through gaps as small as a quarter inch — around pipe penetrations, where the garage door meets the floor, at utility line entries, and through cracks in the foundation. Once trapping activity has stopped for at least a week, inspect the garage thoroughly for openings.

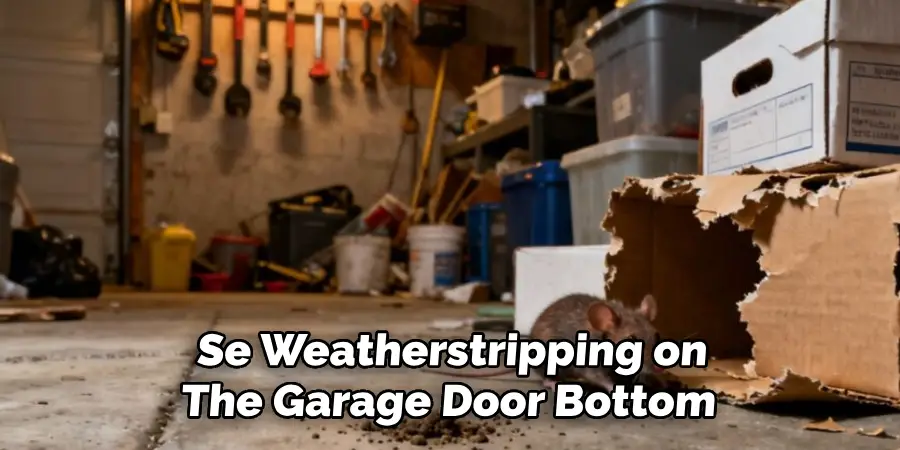
Seal gaps with steel wool packed tightly into the opening, then cover with caulk or expanding foam. Use weatherstripping on the garage door bottom if there’s daylight visible beneath it. Hardware cloth can cover larger openings around vents or utility entries. Excluding entry points is the only step that provides lasting protection — traps alone will not stop future mice from moving in.
Frequently Asked Questions
How Do I Know If There Is More Than One Mouse In My Garage?
Multiple droppings in different areas of the garage, signs of activity in more than one location, or traps triggering frequently all suggest more than one mouse. Mice rarely stay solitary for long if conditions are favorable. Setting several traps across different zones gives you a clearer picture of how many are present.
Is It Safe To Use Snap Traps Around Children Or Pets?
Standard snap traps can injure small fingers or paws if triggered accidentally. Keep them behind heavy items, inside enclosed bait stations designed for snap traps, or in areas children and pets cannot access. Enclosed snap trap housings are widely available, allow the trap to function normally, and add a meaningful layer of safety for households with kids or animals.
What Is The Best Bait For Catching A Mouse In A Cold Garage?
Peanut butter remains effective year-round, but mice in cold garages may respond strongly to nesting materials. A small piece of cotton, a strip of tissue paper, or a bit of pet fur placed on the trigger taps into their instinct to gather bedding. Combining food bait with nesting material on the same trap can improve results in winter conditions.
How Far Should I Release A Mouse If I Use A Live Trap?
Release a live-caught mouse at least one mile from your home, preferably in a natural area with vegetation and water nearby. Releasing too close allows the mouse to find its way back. Choose a location away from neighboring homes and release the mouse near ground cover so it has immediate shelter and a reasonable chance of survival.
Why Do I Keep Getting Mice In My Garage Even After Trapping?
Recurring mice usually means there’s an unsealed entry point bringing new ones in, or an ongoing food or shelter source that keeps attracting them. Check for gaps around the garage door perimeter, pipes, and foundation. Remove any remaining food sources and store everything in sealed hard containers. Trapping without exclusion is a short-term solution at best.
Conclusion
Mice in a cluttered garage are a solvable problem when you approach it with the right information and a clear plan. Start by reading the signs before disturbing anything, reduce clutter and food access methodically, place snap or live traps along walls where the mouse actually travels, and check them consistently. Cleanup matters as much as catching — handle everything with gloves and disinfect properly.
Understanding how to catch a hidden mouse in a messy garage also means finishing the job by sealing entry points so the problem doesn’t return. The trapping phase handles what’s already inside. The exclusion phase handles what comes next. Work through both, and you’ll have a garage that’s genuinely protected — not just temporarily quieter.
I am Rick. I grew up helping my dad with his handyman service. I learned a lot from him about how to fix things, and also about how to work hard and take care of business. These days, I’m still into fixing things- only now, I’m doing it for a living.
I’m always looking for new ways to help people grow and develop. That’s why I have created this blog to share all my experience and knowledge so
that I can help people who are interested in DIY repair.