
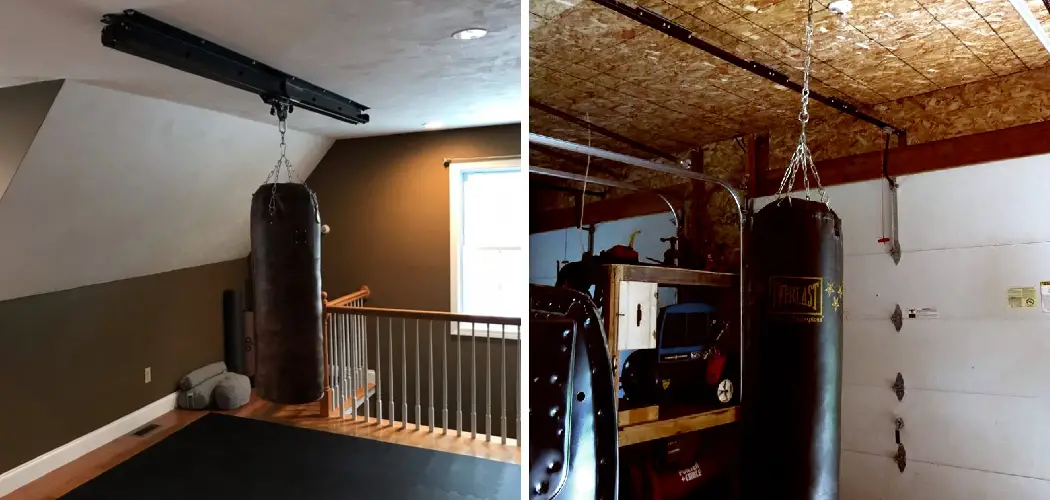
There is a distinct satisfaction in being able to walk a few steps from your living room, step into the garage, and unleash your energy on a heavy bag. It’s the centerpiece of any respectable home gym and the ultimate tool for stress relief. But unlike a treadmill that you simply plug in, or dumbbells that sit on a rack, a punching bag requires a bit of structural engineering to install correctly.
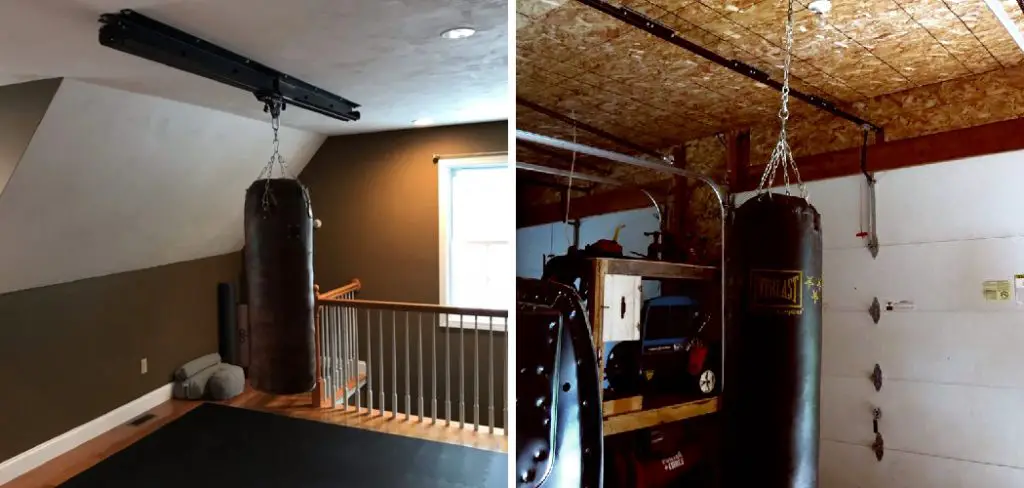
A heavy bag is exactly that—heavy. When you hit it, it swings, creating dynamic forces and vibrations that can rip through drywall or snap weak fasteners. If installed incorrectly, you aren’t just risking a broken piece of equipment; you are risking structural damage to your home or a serious injury to yourself.
This guide on how to hang a punching bag in garage will walk you through everything you need to know to securely hang a punching bag in your garage, ensuring it stays up no matter how hard you hit.
What Will You Need?
To do this job safely, you cannot rely on guesswork. You need specific tools to locate structural support and heavy-duty hardware to hold the weight.
Essential Tools:
- Stud Finder: This is non-negotiable. You must find the center of the ceiling joist or beam.
- Power Drill: A cordless drill with decent torque is ideal.
- Drill Bits: You will need wood bits for pilot holes.
- Socket Wrench or Impact Driver: To drive the heavy lag bolts into the wood.
- Tape Measure: To ensure proper spacing from walls.
- Step Ladder: A sturdy one—you don’t want to be balancing on a chair while holding a 100lb bag.
- Permanent Marker or Pencil: For marking drill points.
- Level: To ensure your mount isn’t crooked.
Required Materials:
- The Heavy Bag: Ranging from 70 to 150 lbs, depending on your size and skill level.
- Heavy Bag Mount/Hanger: There are specific brackets designed for ceiling joists. Do not use a simple eye hook from a hardware store unless it is rated for several hundred pounds of dynamic load.
- Lag Bolts and Washers: usually included with the mount, but if not, buy 3-inch or longer hex-head lag screws.
- Bag Chain or Strap Assembly: Usually comes with the bag.
- Swivel: A crucial piece of hardware that allows the bag to spin without twisting the chain.
- Heavy Bag Spring (Optional but recommended): This absorbs the shock and reduces noise and vibration throughout the house.
10 Easy Steps on How to Hang a Punching Bag in Garage
Safety is the priority here. If you are unsure about the structural integrity of your garage ceiling, consult a professional. If you are ready to DIY, follow these steps closely.
Step 1: Choose the Perfect Location
You need room to move. A heavy bag isn’t a stationary target; it swings, and you need to circle it. Ideally, you want 360-degree access to the bag. Measure out a circle with a radius of at least 24 inches from the center of the bag to the nearest wall or obstacle, though 36 inches is better. This ensures that when the bag swings wildly after a heavy combo, it doesn’t crash into your car, your workbench, or the drywall.

Step 2: Select the Right Mounting Method
In a garage, you typically have exposed beams or a finished drywall ceiling.
- Exposed Beams: This is the easiest scenario. You can strap a mount over the beam or drill directly into it.
- Finished Ceiling: You will need to locate the joists hidden behind the drywall.
- Wall Mount: If you don’t trust your ceiling or the ceilings are too high, a wall mount bracket is a good alternative, though it limits your movement to 180 degrees.
For this guide, we will focus on the most popular and versatile method: the ceiling mount.
Step 3: Locate the Support Beam
This is the most critical step. You must anchor the mount into a solid support beam or joist. You cannot hang a heavy bag from plywood, drywall, or flimsy strapping.
Use your stud finder to locate the beam. If you have an exposed ceiling, this is easy. If you have drywall, move the stud finder slowly to find the edges of the joist. Mark the left edge and the right edge. The strongest point is the dead center between these two marks.

Step 4: Measure and Mark Your Drill Holes
Once you have identified the center of the beam, hold your mounting bracket up against the ceiling. Align the holes in the bracket with the center line of the beam you just marked.
Take your pencil or permanent marker and color in the dots where the screws will go. Double-check that these marks are centered. If you drill into the edge of a beam, the wood can split under the weight of the bag, causing the mount to rip out.
Step 5: Drill Pilot Holes
Never drive a thick lag bolt directly into wood without drilling a hole first. The pressure can split the timber, weakening the very structure you are trying to use.
Select a drill bit that is slightly smaller in diameter than the shank of your lag bolts (the solid part of the screw, not the threads). Drill straight up into the beam at your marked locations. Ensure you drill deep enough to accommodate the full length of the bolt.
Step 6: Attach the Mount
Place the mounting bracket back over the holes. Place a washer on each lag bolt. The washer is important—it distributes the pressure and prevents the bolt head from crushing the metal bracket or digging too deeply.
Using your socket wrench or impact driver, tighten the lag bolts into the pilot holes. Crank them down until they are flush and tight, but be careful not to over-tighten to the point of stripping the wood fibers.
Step 7: The “Hang Test”
Before you lift the heavy bag, you need to test the mount. Grab the bracket (or the chain if you’ve attached it) and hang your body weight on it. Give it a few light bounces.
Listen for cracking sounds. Look for any movement in the bracket. It should feel rock solid. If the bracket wiggles or you hear wood crunching, stop immediately. You may have missed the center of the beam, or the wood may be compromised. It is better to find out now with your body weight than later when a 100lb bag comes crashing down.
Step 8: Assemble the Bag Hardware
Prepare the bag for hanging. Most bags have four nylon straps with metal loops (D-rings) at the top. You will connect these to your chain assembly.
The Swivel: Ensure you have a swivel mechanism between the mount and the chains. As you punch, the bag will naturally spin. Without a swivel, the chains will twist, shortening the length of the bag and creating tension that can snap the links or unscrew the mount.
The Spring: If you are using a heavy bag spring (highly recommended for noise reduction), attach it to the mount first, then attach the swivel to the spring.
Step 9: Hoist the Bag
This is usually a two-person job. Heavy bags are awkward and dead weight.
Have a friend lift the bag by the bottom while you stand on the ladder. Guide the S-hooks or carabiners of the chain assembly onto the swivel or spring loop.

If you are working alone, you may need to get creative. Some people place the bag on a high stool or box to reduce the distance they have to lift it while on the ladder. Be extremely careful to maintain your balance.
Step 10: Final Inspection and Height Adjustment
Once the bag is hanging, give it a push. Watch how the mount reacts. Listen for squeaks or rattles.
Check the height. For general boxing, the center of the bag should be roughly at your shoulder height. This allows you to throw head punches at the top section and body shots at the lower section. If it’s too low, you can remove chain links. If it’s too high, you may need to add a length of heavy-duty chain or a carabiner to lower it.
5 Things You Should Avoid
Even with a guide, people make common mistakes that can lead to property damage or injury. Here is what not to do.
- Mounting to Drywall: This is the cardinal sin of hanging heavy items. Drywall is basically chalk and paper; it has zero structural strength. If you screw a mount into drywall, it will rip a giant hole in your ceiling the moment you hit the bag. Always anchor to the wood joists.
- Using the Wrong Hardware: Do not use deck screws, drywall screws, or nails. They do not have the shear strength to handle the side-to-side forces of a swinging bag. Only use thick lag bolts or structural screws specifically rated for heavy loads.
- Ignoring Vibration: If your garage is attached to the house, the vibration from hitting the bag can travel through the joists and sound like an earthquake in the room above. If you have a bedroom above the garage, failing to use a heavy bag spring or a vibration-dampening mount will likely make you very unpopular with your family.
- Hanging It Too Close to Walls: A heavy bag swings more than you think. If you hang it 12 inches from a wall, you will inevitably punch it into the drywall, damaging both the house and your knuckles. Give it space.
- Skipping the Warm-up: This isn’t about the installation, but the usage. A heavy bag offers high resistance. Hitting it cold with full force is a recipe for wrist sprains and shoulder injuries. Always wrap your hands, wear gloves, and warm up your muscles before you start throwing haymakers.

Conclusion
How to hang a punching bag in garage is one of the best investments you can make for your physical fitness and mental well-being. It transforms a space used for storage into a dedicated training ground where you can sharpen your focus and build your strength.
By following these steps and prioritizing safety, you ensure that your setup is secure, functional, and ready for the long haul. Don’t rush the installation. Take the time to find the beam, drill the pilot holes, and secure the hardware correctly.
Once that bag is hanging, wrap your hands, put on your favorite playlist, and enjoy the workout. You’ve earned it.

I am Rick. I grew up helping my dad with his handyman service. I learned a lot from him about how to fix things, and also about how to work hard and take care of business. These days, I’m still into fixing things- only now, I’m doing it for a living.
I’m always looking for new ways to help people grow and develop. That’s why I have created this blog to share all my experience and knowledge so
that I can help people who are interested in DIY repair.