

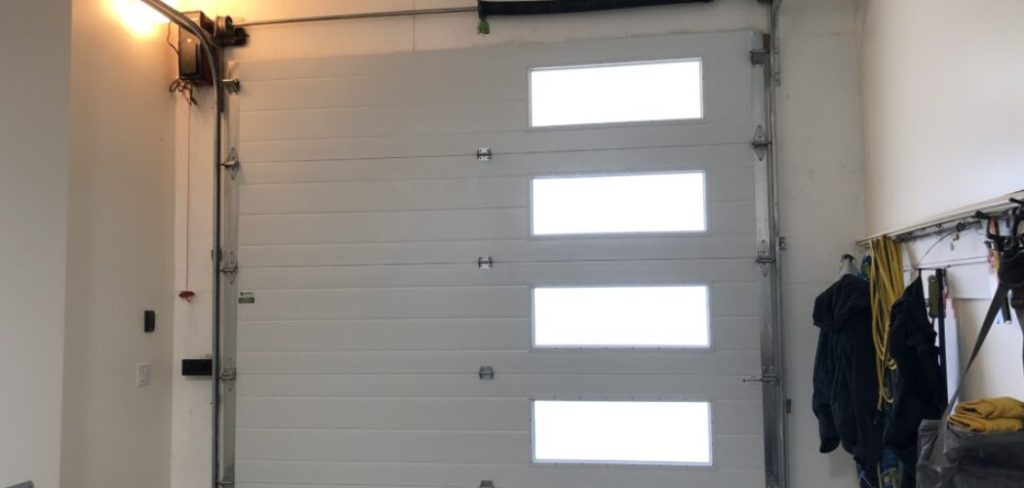
A garage door that hangs crooked does more than look bad. It puts stress on the whole system, wears down parts faster, and can even become a safety hazard. If you’ve noticed your door closing unevenly, leaving a gap on one side, or making strange grinding noises, chances are it’s no longer level.
The good news? You don’t always need to call a professional. With the right tools, a bit of patience, and clear instructions, you can level your garage door yourself in an afternoon. This guide on how to level a garage door walks you through everything you need to know, from the benefits of a level door to the exact steps you should follow. We’ll also cover the common mistakes people make so you can avoid them.
Let’s get your garage door back on track.
What Are the Benefits?
Leveling your garage door isn’t just about looks, though a straight, even door certainly adds to your home’s curb appeal. The real value lies in what it does for the health of your entire garage door system.
- Longer lifespan for your parts. When a door sits crooked, the rollers, tracks, springs, and cables all take on uneven pressure. Over time, this strain causes premature wear. A level door spreads the load evenly, helping every component last much longer.
- Better energy efficiency. An uneven door leaves gaps along the bottom or sides. Those gaps let cold drafts, heat, moisture, and pests slip into your garage. A properly leveled door seals tightly, keeping your space more comfortable and lowering your energy bills.
- Improved safety. A misaligned door can suddenly slip, jam, or fall. If the springs or cables fail under uneven tension, the results can be dangerous. Leveling reduces these risks and keeps your door operating the way it should.
- Quieter operation. Crooked doors often grind, squeak, and rattle as they move. Once everything is aligned, you’ll notice a smoother, quieter ride every time you open or close it.
- Fewer repairs and lower costs. Catching alignment problems early saves you from bigger, pricier repairs down the road. A little maintenance now prevents major headaches later.
What Will You Need?
Before you start, gather your tools and materials. Having everything within reach makes the job faster and safer. Here’s your checklist:
- A sturdy stepladder
- A level
- An adjustable wrench
- A socket set
- A rubber mallet
- A screwdriver set
- A tape measure
- Locking pliers or C-clamps
- Lubricant
- A pencil or marker
- Safety glasses and work gloves
- A flashlight or work light
If your door uses torsion springs and they need adjusting, you’ll also want winding bars. Never use a screwdriver in place of proper winding bars, as this is extremely dangerous.
10 Easy Steps on How to Level a Garage Door

Step 1: Inspect the Door and Identify the Problem
Start by taking a good look at your garage door in both the open and closed positions. Close the door fully and check where the bottom edge meets the floor. If one side sits higher than the other, or you see a gap on one end, that’s your sign the door is out of level. Step back and watch the door as it moves up and down. Note any spots where it hesitates, jerks, or grinds. Use your flashlight to examine the tracks, rollers, springs, and cables. Look for loose bolts, bent tracks, or worn parts. Understanding the exact problem before you touch anything saves time and helps you focus your effort where it matters most.
Step 2: Disconnect the Automatic Opener
Safety comes first. If your garage door has an automatic opener, disconnect it before doing any work. Pull the red emergency release cord, which usually hangs from the opener rail. This lets you operate the door manually and stops the motor from kicking in while your hands are near moving parts. Unplug the opener from the power outlet for extra peace of mind. Skipping this step is one of the fastest ways to cause an accident. Once disconnected, gently lift the door by hand to make sure it moves freely without the opener engaged.
Step 3: Secure the Door in Place
Before adjusting anything, lock the door so it can’t move unexpectedly. Open the door partway and clamp locking pliers or C-clamps onto the tracks just below the bottom rollers. This holds the door steady and prevents it from sliding down while you work. A garage door is heavy, and an unsecured door can drop suddenly, causing serious injury. Double-check that your clamps are tight and firmly gripping the track. Test by giving the door a light nudge. If it stays put, you’re ready to move on.
Step 4: Check the Tracks with a Level

Place your bubble level against the vertical tracks on both sides of the door. The tracks should be perfectly plumb, meaning straight up and down. Then check the horizontal tracks near the ceiling. They usually slope slightly toward the back of the garage, which is normal, but both sides should match each other. Mark any spots where the tracks are off. Compare the left and right sides using your tape measure to confirm they sit at equal distances from the door edge. This gives you a clear picture of what needs adjusting.
Step 5: Loosen the Track Mounting Bolts
Using your wrench or socket set, loosen the bolts that hold the tracks to the wall brackets. Don’t remove them completely. You want them loose enough that the track can shift slightly but still stay in place. Work on one section at a time so you don’t lose your reference points. If the bolts are rusted or stuck, apply a little lubricant and give them a moment before trying again. Loosening these bolts gives you the room you need to nudge the tracks into proper alignment.
Step 6: Adjust the Track Position

Now gently move the track until your level reads true. Use the rubber mallet to tap the track into position if needed. Small movements make a big difference here, so go slowly. Recheck with your level after each adjustment. Make sure the track stays parallel to the door and keeps an even gap with the rollers. The goal is a track that’s plumb on the vertical sections and evenly matched on both sides. Take your time and compare measurements against the opposite side as you go.
Step 7: Tighten the Bolts Back Down
Once the track sits level, tighten the mounting bolts firmly. Work in a crisscross pattern if there are several bolts, which helps hold everything evenly. Don’t overtighten, as this can strip the threads or bend the bracket. After tightening, recheck the level one more time to be sure nothing shifted while you worked. A properly secured track keeps your adjustment locked in for the long haul.
Step 8: Check and Adjust the Rollers
Inspect each roller to confirm it moves smoothly inside the track. Worn or damaged rollers can throw off the door’s balance, so replace any that look cracked or feel rough. If your rollers have adjustable brackets, loosen them slightly and reposition until the door hangs evenly. Make sure each roller sits fully seated in the track. Spin them by hand to check for smooth rotation. Even rollers keep the door gliding straight and level.
Step 9: Balance the Springs and Cables
Uneven spring tension is a common cause of a crooked door. Examine both cables to confirm they’re wound evenly and show no fraying. If you have extension springs, you can adjust the hook position to balance the tension. If you have torsion springs, adjust them only with proper winding bars and extreme caution, since these springs hold enormous force. If you’re unsure, this is the point where calling a professional is wise. Balanced springs let the door rest evenly at any height.
Step 10: Test and Fine-Tune
Remove your clamps and slowly lift the door by hand. It should move smoothly and stay put at any height without drifting. Close it fully and check that the bottom edge meets the floor evenly across its entire width. If you still see a gap, revisit the track and roller adjustments. Once satisfied, reconnect the automatic opener, plug it back in, and run the door through a few full cycles. Listen for smooth, quiet operation and watch for even movement.
5 Things You Should Avoid

1. Never adjust torsion springs without proper tools. These springs store incredible tension. Using the wrong tool can cause them to snap violently and cause serious injury. Always use winding bars, and when in doubt, hire a pro.
2. Don’t skip disconnecting the opener. Working on a live system risks the motor engaging while your hands are near moving parts. Always pull the release cord and unplug the unit first.
3. Avoid overtightening bolts. Cranking bolts too hard strips threads and warps brackets. Snug and secure is the goal, not maximum force.
4. Don’t ignore worn parts. Trying to level a door with cracked rollers, frayed cables, or rusted tracks won’t hold. Replace damaged components before making adjustments.
5. Never rush the process. Small, careful adjustments produce the best results. Forcing tracks or skipping the level check leads to sloppy work and repeat problems.
Conclusion
How to level a garage door is a rewarding project that pays off in smoother operation, lower energy bills, and a longer-lasting system. By following these ten steps carefully, you can fix an uneven door without breaking the bank or spending days on the job. Remember to prioritize safety at every turn, especially when dealing with springs and heavy components.
Take your time, use the right tools, and don’t skip the inspection steps. A little attention now keeps your garage door running well for years to come. If you ever feel unsure, especially with torsion springs, there’s no shame in calling a professional.
Now grab your level, gather your tools, and get that door standing straight and true. You’ve got this.

I am Rick. I grew up helping my dad with his handyman service. I learned a lot from him about how to fix things, and also about how to work hard and take care of business. These days, I’m still into fixing things- only now, I’m doing it for a living.
I’m always looking for new ways to help people grow and develop. That’s why I have created this blog to share all my experience and knowledge so
that I can help people who are interested in DIY repair.