
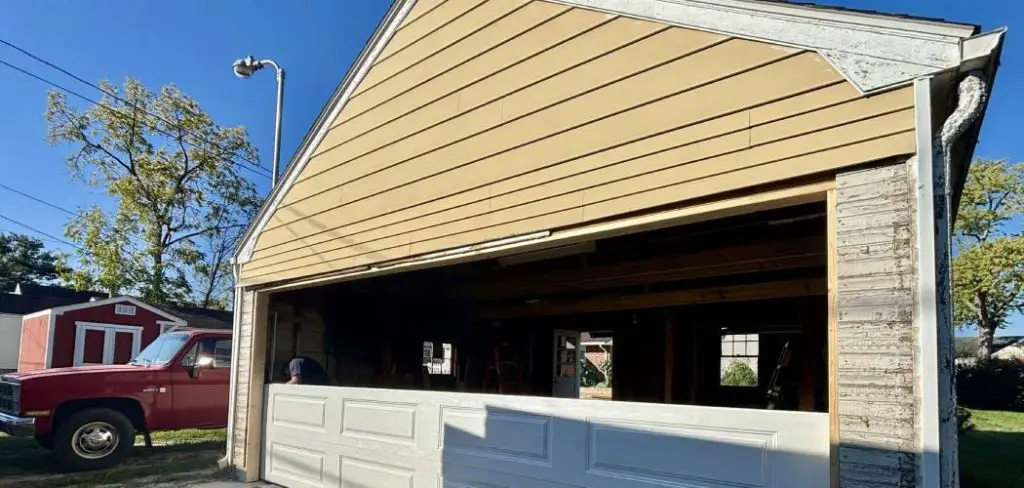
A home’s curb appeal makes a powerful first impression, and one of the largest and most prominent features of any modern home is the garage door. A plain, builder-grade door can make a house feel dated or uninspired, but a full replacement can be a costly and complex undertaking.
Fortunately, there is a fantastic way to achieve a high-end look without the high cost: garage door covers. These decorative overlays, which range from realistic vinyl decals to elegant magnetic panels, can instantly mimic the look of expensive carriage house doors, complete with faux windows and classic hardware.
This project is one of the most impactful and budget-friendly exterior upgrades a homeowner can make. The goal of this article is to provide a comprehensive guide for a successful and stunning installation.
Learning how to install garage door covers is a surprisingly straightforward DIY project that can dramatically enhance your home’s exterior in just a few hours. This guide will cover everything you need to know, from choosing the right type of cover for your door to detailed preparation and installation techniques that will ensure a professional, long-lasting finish.
Understanding the Types of Garage Door Covers
Before you start shopping, it is important to understand the different options available. The term “garage door cover” can refer to several distinct products, each with its own look, installation method, and level of permanence. Knowing the differences will help you select the perfect style for your home and skill level.
Vinyl Decal Overlays
Vinyl decal overlays are essentially large, high-quality stickers designed to adhere directly to the flat panels of your garage door. These are not simple bumper stickers; they are made from durable, weather-resistant vinyl and are printed with incredibly realistic graphics.
You can find decals that create the illusion of recessed panels, rich wood grain textures, or even full-blown murals for a truly unique statement. The most popular options are faux window decals, which give a plain door the classic look of a carriage house door with glass panes, all without compromising security or insulation.
Magnetic Decorative Hardware and Panels
If you have a standard steel garage door, magnetic covers are arguably the easiest and most popular option. These products use powerful magnets to attach directly to the door, making them completely non-permanent and adjustable.
The most common magnetic offerings are decorative hardware pieces, such as faux strap hinges and clavos (decorative nails) that give the door an old-world, rustic charm. You can also find magnetic faux window panels, which offer the same look as vinyl decals but with the incredible ease of simply placing them on the door. They hold firm through all weather conditions but can be removed or repositioned in seconds.
Full Fabric Covers (Billboards)
A third, more temporary option is the full fabric cover. These are essentially large banners or tarps made of weather-resistant fabric, printed with a single large image. Common designs include festive holiday scenes, sports team logos, or hyper-realistic images of luxury cars parked inside the garage. These covers are stretched across the entire face of the door and secured with a system of hooks and tensioners that attach to the door’s edges. While not a permanent design solution, they are a fun way to celebrate a season or special occasion.
Pre-Installation Checklist: Tools and Preparation
Proper preparation is the key to a professional-looking result that lasts. Rushing into the installation without the right tools and measurements can lead to a crooked, bubbly, or poorly adhered finish. Taking a few moments to get organized will make the entire process smoother.
Essential Tools and Supplies
The tools you need will depend on the type of cover you choose, but for most vinyl and magnetic applications, the list is simple. You will need a reliable tape measure and a level to ensure your placement is symmetrical and straight. A sturdy step ladder will be necessary to safely reach the upper panels of the door. For cleaning, have several clean, lint-free cloths and a good degreasing cleaner on hand—mild dish soap and water followed by isopropyl (rubbing) alcohol works perfectly. If you are installing vinyl decals, a plastic squeegee is an essential tool for achieving a smooth, bubble-free application.
Measuring Your Garage Door Panels
Accurate measurements are non-negotiable, especially when ordering custom-sized vinyl decals. Do not assume all panels are the same size. Use your tape measure to carefully record the height and width of each individual panel on your garage door. Pay attention to the indented, flat area where the decal will be placed, not the raised edges of the panel frame. Taking precise measurements ensures you order a product that fits perfectly within the panel, creating a more realistic and integrated look.
Choosing the Right Cover for Your Door and Climate
Not all garage door covers are universally compatible. The material of your door and the climate you live in are two critical factors that will influence your choice. Selecting the wrong product can lead to adhesion failure or rapid deterioration.

Material Compatibility (Steel vs. Wood vs. Fiberglass)
The material of your garage door is the most important factor. Magnetic hardware and window panels will only work on a steel garage door. To check if your door is compatible, simply see if a refrigerator magnet sticks to it. Vinyl decals are more versatile and can adhere to most smooth, non-porous surfaces, including steel, fiberglass, and smooth-finished wood. However, they can struggle to bond properly to doors with a deep, textured wood grain or a peeling paint finish. The surface must be clean and smooth for the adhesive to work effectively.
Considering Weather and UV Exposure
Your local climate plays a significant role in the longevity of your garage door covers. If your garage door faces the sun for most of the day, it is crucial to choose a product that is UV-resistant. High-quality vinyls will have a protective laminate layer that prevents the graphics from fading or cracking under intense sun exposure. Also, consider the temperature during installation. Extreme heat or cold can significantly affect how vinyl decals apply, which we will cover in more detail later.
The Crucial Step: Preparing Your Garage Door Surface
This is, without a doubt, the most important step in the entire process, especially if you are applying adhesive vinyl decals. A perfectly clean surface is the foundation for a strong, long-lasting bond. Any dirt, dust, wax, or oil left on the door will prevent the adhesive from sticking properly, leading to peeling and bubbles.
Thorough Cleaning and Degreasing
Begin by giving your entire garage door a thorough wash. Use a bucket of warm water with a mild soap, like dish soap, and a soft cloth or sponge to scrub away all the surface dirt, dust, and pollen. Pay special attention to the bottom panels, which tend to accumulate the most grime. Rinse the door completely with a hose and allow it to dry.
Once the door is dry, the degreasing step is next. Even a clean-looking door can have an invisible layer of wax or oils that will interfere with adhesion. Moisten a clean, lint-free cloth with a degreasing agent like isopropyl alcohol or a dedicated surface prep solution. Wipe down every panel where you plan to apply a decal. The alcohol will evaporate quickly, leaving behind a perfectly clean, residue-free surface.
Ensuring the Surface is Completely Dry
Never attempt to apply an adhesive decal to a damp or wet surface. Even a small amount of moisture will compromise the bond. After your final cleaning wipe-down, allow the door to air dry completely for at least an hour. If you are short on time, you can use a clean, dry microfiber cloth to wipe away any remaining moisture, but air drying is always the most reliable method.
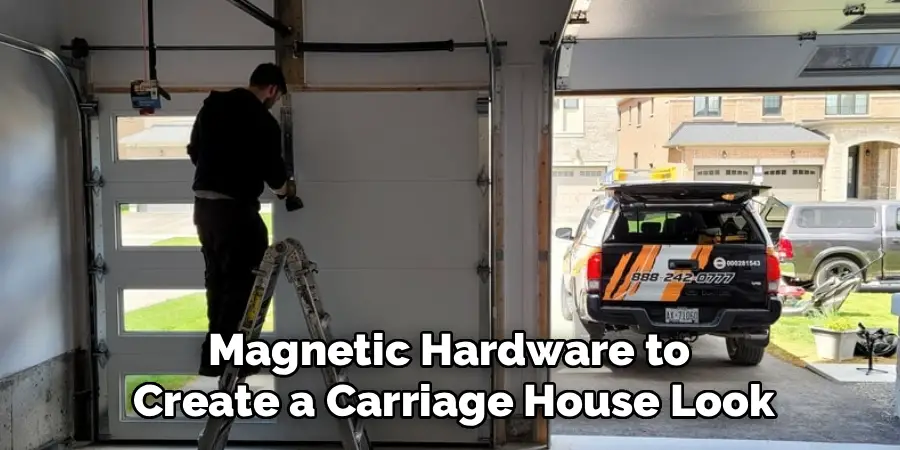
How to Install Garage Door Covers: A Step-by-Step Guide
With your door prepped and your tools at the ready, it is time for the transformation. This guide will focus on the most common application: installing vinyl faux window decals and magnetic hardware to create a carriage house look.
Step 1: Layout and Positioning
Before you peel any backings, lay out your decals or magnetic hardware on the ground in front of the door. This allows you to visualize the final look and confirm your spacing. Use your tape measure to determine the ideal placement. You want the windows and hardware to look symmetrical and balanced. Use a pencil or a dry-erase marker to make small, temporary guide marks on the garage door panels. A level is essential here to ensure your rows of windows are perfectly straight.
Step 2: The Hinge Method for Large Decals
For larger vinyl decals like window panels, the “hinge method” is the best technique for a foolproof application. Position the decal on the panel, using your guide marks to align it perfectly. Once you are satisfied with the placement, apply a long piece of masking tape vertically down the center of the decal, securing it to the garage door. This tape acts as a hinge, holding the decal in place while you work on one half at a time.
Step 3: Applying the First Half of the Decal
With the decal hinged in place, choose one side to apply first. Lift that side of the decal and carefully peel the paper backing off, stopping at the center tape hinge. Using scissors, cut away the removed piece of backing paper. Now, holding the vinyl taut and away from the surface, begin to apply it to the door. Use your plastic squeegee, starting from the center hinge and working your way outwards with firm, overlapping strokes. This pushes the air out from under the vinyl as you apply it.
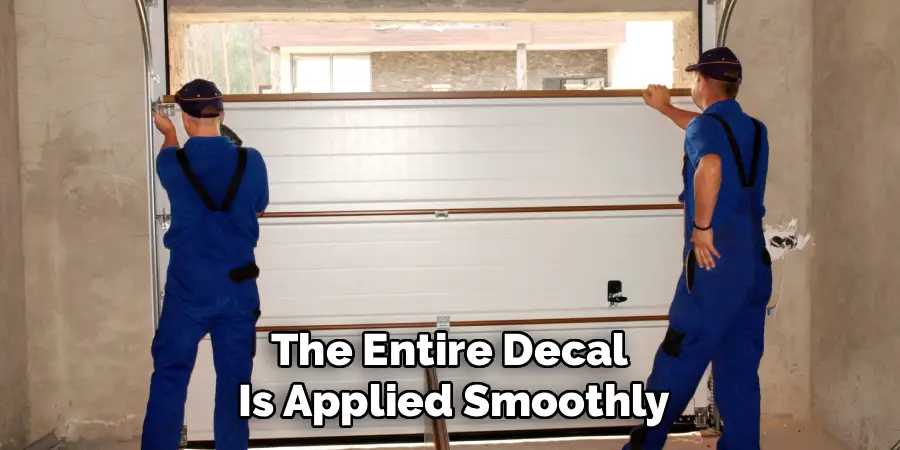
Step 4: Applying the Second Half
Once the first half of the decal is securely applied, you can remove the center masking tape hinge. Now, lift the second half of the decal and peel away the remaining backing paper. Continue the application process, starting from the center where you left off and squeegeeing outwards toward the edge until the entire decal is applied smoothly.
Step 5: Removing Bubbles and Final Touches
Even with careful application, you may end up with a few small air bubbles. Do not panic. You can use your squeegee to work most small bubbles toward the nearest edge. If you have a larger, more stubborn bubble, you can use a very fine pin or the tip of a craft knife to pierce a tiny hole in the center of the bubble. This will allow you to use your finger or the squeegee to press the trapped air out through the hole.
Step 6: Placing Magnetic Hardware
If you are using magnetic hinges and handles, this is the easiest and most satisfying step. Using your measurements and level as a guide, simply place the magnetic pieces onto the steel door. The strong magnets will hold them securely in place. The beauty of this method is its adjustability; if something looks slightly off, you can lift it and reposition it in seconds until the look is perfect.
Tips for Installing in Different Weather Conditions
The ambient temperature can have a major impact on how vinyl decals behave. Planning your installation around the weather will lead to a much better result.
Installing in the Cold
When vinyl gets cold, it becomes stiff and less pliable, and the adhesive does not activate as well. If you must install in weather below 50°F (10°C), you can use a hairdryer on a low setting to gently warm both the surface of the garage door and the decal itself. This will make the vinyl more flexible and help the adhesive form a stronger bond.
Installing in the Heat
Conversely, installing in direct, hot sunlight can be equally problematic. Heat makes vinyl overly soft and stretchy, which can cause it to deform as you apply it. The adhesive also becomes more aggressive, grabbing onto the surface instantly and making it difficult to reposition. If possible, plan your installation for a cooler part of the day, such as the early morning or evening, or wait for an overcast day.
Maintenance and Care for Your New Covers
To protect your investment and keep your newly decorated garage door looking great for years to come, a little bit of simple maintenance is all that is required.
Cleaning Your Decorated Door
You can wash your decorated door just as you would a normal one, but with a bit more care. Use a soft cloth or sponge with a mild soap and water solution. Avoid using a pressure washer, as the high-powered spray could potentially lift the edges of the vinyl decals. Also, steer clear of abrasive cleaners or harsh chemicals, which could damage the printed surface.
Longevity and Removal
High-quality, professionally installed garage door covers can last for many years. When it is time for a change, the removal process is straightforward. For vinyl decals, you can use a hairdryer to gently heat the surface. This will soften the adhesive, allowing you to slowly peel the decal off the door. Any remaining adhesive residue can be cleaned off with a product like Goo Gone or rubbing alcohol. Magnetic hardware, of course, can be removed in an instant with no residue at all.
Common Mistakes to Avoid During Installation
A few common pitfalls can turn this simple DIY project into a frustration. Being aware of them ahead of time will help you achieve a flawless finish.
Skipping the Cleaning Step
This is the number one mistake homeowners make. As emphasized before, any dirt, dust, or oil on the surface will prevent proper adhesion. Taking the extra 30 minutes to thoroughly clean and degrease the door is the single most important factor for a long-lasting application.
Not Using a Level
Trying to “eyeball” the placement of windows and hardware almost always results in a crooked, unprofessional finish that will be noticeable from the street. Take the time to measure and use a level for all placements. The precision will pay off in the final result.
Rushing the Application
When working with large vinyl decals, patience is key. Work slowly and methodically with your squeegee, using firm, overlapping strokes to push the air out as you go. Rushing the process is the primary cause of excessive bubbles and wrinkles.

Conclusion
Garage door covers offer one of the best and most cost-effective returns on investment when it comes to boosting your home’s curb appeal. This affordable project can take a plain, uninspired garage door and turn it into a statement piece that adds character and value to your entire property. By following the detailed instructions in this guide, any homeowner can confidently tackle this transformation.
The process is simple: choose the right product for your door, meticulously prepare the surface, and apply the covers with care and precision. In a single afternoon, you can achieve a dramatic facelift that will make you proud every time you pull into the driveway. Knowing how to install garage door covers correctly empowers you to create a welcoming and stylish exterior that looks brand new, without the expense and hassle of a full replacement.
I am Rick. I grew up helping my dad with his handyman service. I learned a lot from him about how to fix things, and also about how to work hard and take care of business. These days, I’m still into fixing things- only now, I’m doing it for a living.
I’m always looking for new ways to help people grow and develop. That’s why I have created this blog to share all my experience and knowledge so
that I can help people who are interested in DIY repair.