
It’s the first warm Saturday of spring. You pull the air compressor out of the corner to top off the bike tires and run a brad nailer, and it groans, hisses, and sprays rusty water across the floor.
That’s a good moment to learn how to store a compressor in garage conditions. Garages are hard on air compressors. Temperatures swing with the seasons, and dust drifts in from sanding and sweeping.
Humidity is the quieter problem. Every time the machine runs, moisture in the air turns into water inside the tank.
Good storage protects a lot: steady air pressure, a longer life for the motor and pump, lower repair bills, and safer operation. This guide covers why storage matters, the warning signs, compressor types, and the main storage factors. It then walks through a six-step routine, common mistakes, and a few expert tips. Setting up a protected, ready-to-run compressor usually takes one afternoon.
Why Proper Compressor Storage Matters
Getting Years of Dependable Performance
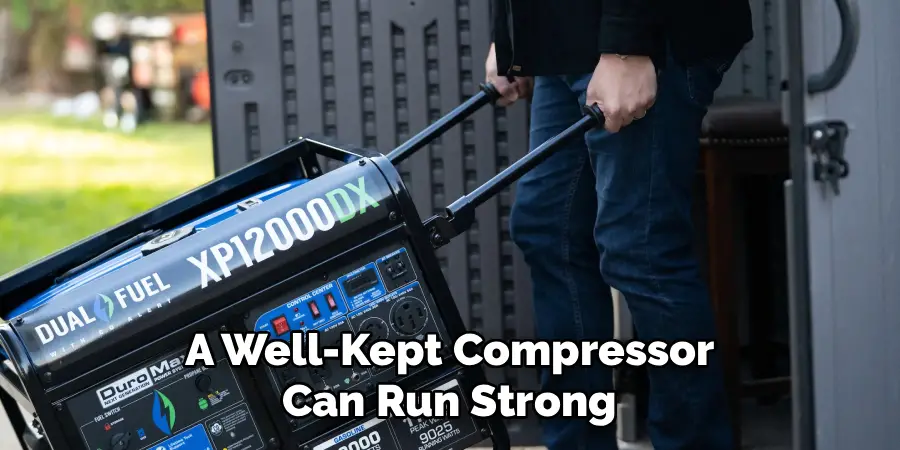
A well-kept compressor can run strong for a decade or more. A neglected one may struggle within a few seasons.
The damage usually happens out of sight. Water left in the tank causes hidden rust, dust clogs the intake filter, and old oil wears down pump parts.
Think of a lawn mower stored clean and dry versus one left outside all winter. Both might start in April. Only one tends to start without a fight, and a little care before storage makes that difference every single time.
Reducing Safety Risks in Your Garage
Safety is the other half of the story. A tank weakened by internal corrosion can fail under pressure, which is not a risk worth taking.
Damaged cords raise shock risks. A motor that sparks near gasoline or paint fumes creates a fire hazard.
Kids and pets can also bump or tip portable units. The reassuring part is that draining, unplugging, and choosing a sensible spot remove most of these risks.
Signs Your Compressor Is Stored Poorly
Rusty Water and Tank Corrosion

The tank itself often tells you what’s going on. Brown or orange water from the drain valve is the clearest warning.
Rust spots, blistered paint, or crusty buildup near the welds point the same way. Heavy rust near seams or the drain valve means the tank should get a professional look before its next use.
Air Leaks and Oil Problems
A steady hiss from fittings is easy to ignore until it isn’t. So is a tank that loses its pressure overnight.
Check under the pump for oil puddles. Milky or foamy oil suggests water contamination, which often comes from storing the compressor somewhere damp with poor airflow.
Slow Fill Times and Odd Noises

Longer fill times, a motor that cycles on too often, tripped breakers, and knocking sounds all deserve attention. They’re easy to blame on something else.
Plenty of people have cursed a weak impact wrench for months. Then they finally check the compressor and find a clogged intake filter doing most of the damage.
Types of Air Compressors and How Storage Differs
Small Portable Compressors
Pancake, hot dog, and small inflator-style units handle trim work, nail guns, and tires. Their compact size makes them easy to park on a shelf or cart.
Don’t let the small tank fool you, though. It still collects condensation, so draining after each use matters just as much.
Wheeled and Twin-Stack Compressors
These mid-size models serve framing, roofing, and bigger projects. Wheels and handles make them easy to roll into place.

Store them level on a rubber mat or low platform. That keeps them stable and off damp concrete.
Stationary Upright Compressors
Large vertical units with big tanks run spray finishing, sandblasting, and air tools all day. They usually stay in one permanent spot, often bolted down on vibration pads.
Because moving them later is a real chore, choosing the right location up front matters most with this type.
Key Storage Considerations for Your Compressor
Moisture, Humidity, and Condensation
Compressing air squeezes water out of it, and that water pools in the bottom of the tank. Humid garages speed up the rust that follows.
Cold concrete floors add to the problem by pulling moisture upward. Drain after every use, keep humidity near or below 50 percent with a dehumidifier or moisture absorbers, and lift the unit off the floor.
Temperature Swings and Seasonal Changes
Summer heat strains the motor. Freezing weather thickens oil and makes startups harder on the pump.
Many manufacturers suggest running compressors above roughly 40°F, so check your manual. An interior wall away from the garage door, windows, direct sun, and the water heater tends to offer the steadiest conditions.
Oil Care and Routine Maintenance
Oil-lubricated compressors need regular oil checks and changes. Oil-free models skip that chore, which is part of their appeal.
If yours uses oil, always store it upright so the oil stays in the crankcase. Cleaning the intake filter and checking belts on belt-driven models belong in the same simple routine.
Airflow, Clearance, and Power Supply
Leave about 12 inches of space around the compressor so heat can escape. Keep flammable liquids, oily rags, and fuel cans well away from it.
Power matters too. Plug into a properly rated outlet or dedicated circuit, and use a longer air hose instead of a thin extension cord, which can starve the motor.
Tools and Materials You’ll Need
Essential Tools
You’ll want an adjustable wrench, a screwdriver set, a drain pan, a flashlight, a soft brush, and shop rags. A drill with bits and a stud finder help with wall hooks. A hygrometer is the sleeper pick, since it shows whether your garage stays dry enough for safe storage.
Unplug the compressor before any cleaning or inspection. Every time.
Storage Supplies and Accessories
Plan on a rubber mat or wooden platform, a breathable cover, a hose reel or wide wall hook, and a cord hanger. Keep compressor oil and a spare intake filter on hand.
Thread seal tape fixes small fitting leaks, and an automatic tank drain is a worthwhile upgrade. Measure the storage area before buying anything, since “measure twice, buy once” saves return trips.
Step-by-Step Guide to How to Store a Compressor in Garage
These six steps should leave you with a clean, dry, ready-to-run compressor and a safer garage. Take them in order, because each one sets up the next.
Step 1: Power Down and Bleed the Air
Switch off the compressor, unplug it, and let the motor and pump cool completely. Warm metal under a cover is an invitation for condensation.
Release the stored air by opening the regulator or pulling the safety valve ring. Wear eye protection for this part.
Watch the tank gauge until it reads near zero. Storing without pressure eases the strain on seals, fittings, and the tank itself during downtime.
Step 2: Drain Every Drop From the Tank
Set a drain pan under the valve and open it slowly. Expect a bit of spray at first.
Tilt portable models gently toward the valve to push out the last of the water. Then look at what came out. Clear water is a good sign, while brown or orange suggests internal rust worth inspecting.
Leave the valve open for a few minutes so the tank can air out. Close it snugly afterward.
Step 3: Clean the Unit and Service the Oil
Wipe the tank, shroud, and handle with a dry rag. Brush dust out of the motor vents and cooling fins.
Pull the intake filter, tap it clean, and replace it if it still looks clogged. It’s a two-minute job that people skip for years.
On oil-lubricated models, check the sight glass or dipstick and top off as needed. If the oil looks dark or milky, change it before storage.
Step 4: Coil Hoses and Wrap Cords Loosely
Disconnect the air hose and check it for cracks, bulges, or worn couplers. Let any trapped moisture drain out.
Coil the hose in wide loops on a reel or broad hook. Tight coils create kinks that weaken the hose over time.
Wrap the power cord loosely and hang it nearby rather than cinching it around the tank. Next time, everything should unroll without a tangle.
Step 5: Set Up a Dry, Level Storage Spot
Choose an interior wall away from heat, sunlight, drafts, and flammables. Level ground matters, especially for oil-lubricated units.
Place the compressor on a rubber mat or low wooden platform so it never rests on bare concrete. Check humidity with your hygrometer, and add a dehumidifier if readings stay high.
For stationary units, anchor them to the floor with vibration pads. You’ll get better stability and noticeably quieter operation.
Step 6: Cover It and Plan Regular Checkups
Set the compressor upright and lock any wheels. Drape a breathable cover over it to keep dust out.
Skip plastic tarps. They seem protective, but they trap moisture against the metal.
Put a monthly reminder on your calendar to look for rust, check the oil, and listen for leaks. Do that, and the compressor should start right up whenever the next project calls.
Common Mistakes to Avoid
These slip-ups happen to almost everyone, and each one has an easy fix.
Forgetting to Drain After Quick Jobs
Even a two-minute tire top-off creates condensation in the tank. Drain it every single time. Skipped drains add up to hidden rust that shortens the tank’s safe working life.
Laying the Compressor on Its Side
Storing an oil-lubricated unit sideways can push oil into the cylinder or out through the breather. Keep it upright and level at all times. After any transport, check the oil before running it.
Storing It Beside Fuel and Chemicals
Motor sparks and intake suction make gasoline, thinners, and solvents a dangerous neighbor. Keep flammables in a separate metal cabinet across the garage. Distance here is cheap insurance.
Expert Tips for Long-Lasting Compressor Storage
Add an Automatic Drain Valve
An electronic or float-style drain releases water on a schedule or as it builds up. It takes over the maintenance task people forget most often. After a long day of framing or painting, it’s a relief knowing the tank is emptying itself.
Give It a Warm Start in Winter
On cold days, let the compressor sit in a heated space for a while before running it. Warmer oil flows more freely and eases the load on the motor. Some owners also switch to a cold-weather compressor oil, but only if the manufacturer approves.
Run It During Long Breaks
If the compressor sits for months, start it every month or two, let it build pressure, and then drain it. This keeps seals supple and spreads oil through the pump. It also tends to reveal small leaks early, before they become costly repairs.
Frequently Asked Questions
Is It Okay to Store a Compressor With Air in the Tank?
Most experts recommend releasing all pressure and draining the tank before storage. That reduces stress on the tank and lets moisture escape. A few manufacturers suggest keeping a small amount of pressure, so follow your owner’s manual.
Can a Compressor Handle an Unheated Garage?
Yes, with a few precautions. Condensation and thick oil cause most cold-weather trouble. Drain the tank, lift the unit off the floor, use a breathable cover, and let it warm up before starting in freezing weather.
How Can I Tell If My Compressor Tank Is Unsafe?
Watch for heavy rust near seams, pinhole leaks, bulging spots, or rusty water that never runs clear. Any of these calls for retirement or a professional inspection. Patching isn’t a smart option, since weld repairs on pressure vessels can be dangerous.
Conclusion
The routine comes down to a few steady habits. Bleed the air, drain the tank, clean the unit and check the oil, and coil hoses loosely. Then pick a dry, level spot, cover the compressor, and check on it regularly.
Figuring out how to store a compressor in garage conditions doesn’t take special equipment or a climate-controlled shop. You now have a clear roadmap, from spotting the first drops of rusty water to finishing all six steps with ease.
Picture a compressor that hums to life on the first try and keeps every nailer, sprayer, and tire inflator running without hesitation. So grab a drain pan today, open that valve, and give your compressor the care it deserves.

I am Rick. I grew up helping my dad with his handyman service. I learned a lot from him about how to fix things, and also about how to work hard and take care of business. These days, I’m still into fixing things- only now, I’m doing it for a living.
I’m always looking for new ways to help people grow and develop. That’s why I have created this blog to share all my experience and knowledge so
that I can help people who are interested in DIY repair.