
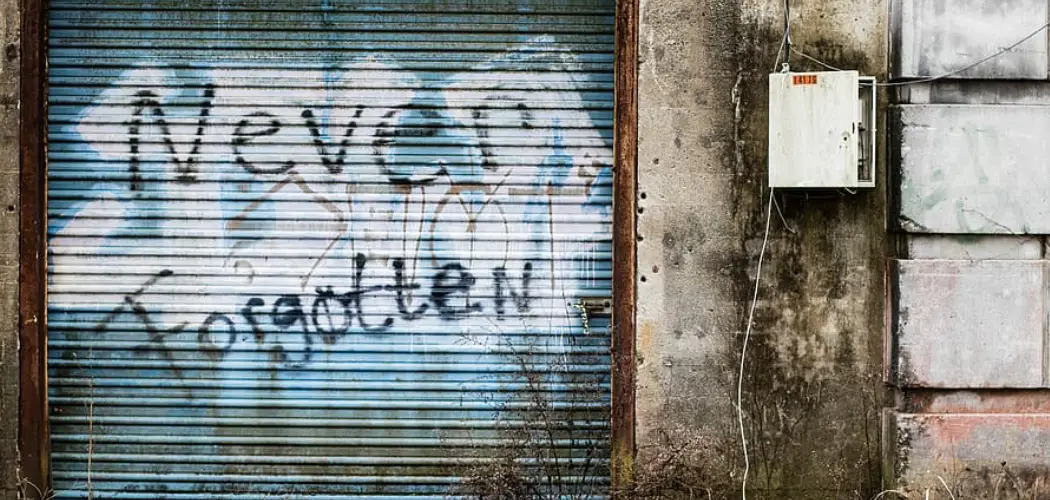
You walk out one morning, coffee in hand, and there it is: a splash of spray paint scrawled across your garage door. It’s frustrating, it’s unsightly, and it can make your whole property feel neglected. Graffiti has a way of turning up when you least expect it, and once it lands on your garage door, it demands attention fast.
The good news? You don’t need to call in a professional crew or replace the entire door. With the right approach and a little elbow grease, you can restore your garage door to its former glory. The key is acting quickly. Fresh paint is far easier to remove than paint that has baked in the sun for weeks. The longer graffiti sits, the deeper it settles into the surface, which makes the job harder and increases the risk of permanent staining.
This guide on how to remove graffiti off garage door walks you through everything you need to know. Let’s get your garage door looking clean again.
Benefits of Removing Graffiti Quickly

Tackling graffiti sooner rather than later brings a handful of real advantages. Here’s why speed works in your favor.
- Restores curb appeal. Your garage door takes up a big chunk of your home’s front-facing area. A clean, well-kept door makes the entire property look cared for, while graffiti drags down the visual impression the moment someone drives by.
- Protects property value. Buyers and appraisers notice details. Visible graffiti signals neglect and can lower how people perceive your home’s worth. Removing it keeps your property looking its best, which matters if you plan to sell.
- Prevents permanent staining. Spray paint contains pigments and solvents that seep into surfaces over time. Fresh paint lifts off with far less effort. Wait too long and the color can bond permanently, leaving a ghost image even after cleaning.
- Discourages repeat vandalism. Graffiti often attracts more graffiti. A tagged surface can act like an open invitation. Cleaning it up quickly sends a clear message that the area is watched and maintained, which makes it a less appealing target.
- Saves money. A quick DIY cleanup costs a fraction of professional restoration or door replacement. The faster you act, the fewer products and less labor you’ll need.
- Boosts neighborhood pride. A clean home lifts the look of the whole street. Your effort encourages neighbors to keep their spaces tidy too, creating a better environment for everyone.
What Will You Need?

Before you start, gather your supplies. Having everything ready saves time and keeps the process smooth. Here’s your checklist:
- Protective gloves
- Safety goggles
- A dust mask or respirator
- Graffiti remover
- Mild dish soap
- Warm water
- Soft cloths or microfiber towels
- A soft-bristle brush or sponge
- A plastic scraper .
- A garden hose
- Painter’s tape and drop cloths
- Pressure washer (optional)
- Touch-up paint
Match your products to your door material. Metal, wood, and vinyl each respond differently, so read labels carefully to avoid damage.
10 Easy Steps on How to Remove Graffiti Off Garage Door
Step 1: Assess the Surface and Paint Type
Start by taking a close look at the graffiti and your garage door. Note what your door is made of, whether metal, wood, vinyl, or fiberglass. Each material reacts differently to cleaning products. Then check how fresh the paint is. Fresh paint still looks glossy and lifts easily, while older paint appears dull and settled. This quick assessment helps you choose the safest, most effective method. If you’re unsure about your door’s finish, test a small hidden area first to see how it responds. Understanding what you’re working with prevents damage and sets you up for success.

Step 2: Gather and Prepare Your Supplies
Once you know what you’re dealing with, collect all your tools and materials in one spot. Refer back to the checklist above so nothing is missing. Lay out your gloves, goggles, cloths, brushes, and cleaning products within easy reach. Fill a bucket with warm water and a squirt of mild dish soap. Having everything prepared means you won’t have to stop mid-task to hunt for something. Preparation also keeps the job moving quickly, which matters when using products that work best within a certain time frame.
Step 3: Protect Yourself and the Surrounding Area
Safety comes first. Put on your gloves, goggles, and dust mask before opening any chemical products. Many graffiti removers give off strong fumes, so work in a well-ventilated space. Next, protect the area around the graffiti. Lay drop cloths on the ground to catch drips, and use painter’s tape to shield trim, weatherstripping, or nearby walls. This step keeps solvents from harming plants, driveways, or other surfaces. A little prep here saves you from a bigger cleanup later.
Step 4: Clean the Surface First
Before applying any remover, give the door a light wash with your warm soapy water. Use a soft cloth or sponge to wipe away dirt, dust, and grime around the graffiti. This clears the surface so the remover can work directly on the paint rather than the buildup on top of it. Rinse the soap off with clean water and let the area dry. A clean starting surface improves the effectiveness of whatever product you use next and gives you a clearer view of the paint you need to tackle.
Step 5: Test Your Graffiti Remover

Never apply a new product to the whole area without testing it first. Choose a small, hidden corner of the door and apply a little remover. Wait a few minutes and check the result. Look for any discoloration, warping, or damage to the finish. If the spot looks fine, you’re good to move forward. If it reacts badly, switch to a gentler product. This simple test protects your door from unexpected harm and saves you from a costly mistake across a larger area.
Step 6: Apply the Graffiti Remover
Now apply the remover to the graffiti according to the product instructions. Most removers work best when you spread a generous layer directly over the paint. Use a cloth, sponge, or the applicator that comes with the product. Cover the tagged area evenly, making sure every bit of paint gets contact. Avoid slapping it on too thick unless the label recommends it. Careful, even application helps the product break down the paint effectively and reduces waste.
Step 7: Let It Sit and Do Its Work
Patience pays off here. Let the remover sit for the time recommended on the label, usually anywhere from a few minutes to fifteen. This dwell time gives the chemicals a chance to break the bond between the paint and your door. Don’t rush this stage. Wiping too soon means the paint hasn’t loosened, and you’ll end up working harder. Keep an eye on the clock and watch as the graffiti starts to soften and lift from the surface.
Step 8: Gently Scrub Away the Paint
Once the dwell time is up, grab your soft-bristle brush or sponge and gently scrub the loosened paint. Work in small circles and apply steady, moderate pressure. For stubborn spots, use a plastic scraper at a low angle to lift paint without scratching. Avoid metal tools, which can gouge the surface. If the paint resists, reapply the remover and wait a little longer before trying again. Slow, careful scrubbing protects your door while clearing away the graffiti bit by bit.
Step 9: Rinse Thoroughly
After the paint lifts away, rinse the area completely with clean water. Use your garden hose for larger sections or a bucket and cloth for smaller ones. A pressure washer on a low setting can help with tough spots, but keep the nozzle at a safe distance to avoid damaging the finish. Rinse until all traces of the remover and loosened paint are gone. Leftover chemicals can harm the surface over time, so a full rinse is important for protecting your door.
Step 10: Dry, Inspect, and Touch Up
Finally, dry the area with a clean cloth and step back to inspect your work. Look for any faint stains or spots you missed. If some graffiti remains, repeat the process on those areas. Once the door is clean and dry, check whether the finish looks even. If the remover dulled a small patch, apply matching touch-up paint to restore the look. Admire your results, and enjoy your fresh, graffiti-free garage door.
5 Things You Should Avoid
Even with the best intentions, a few common mistakes can make the job harder or cause damage. Steer clear of these pitfalls.
- Avoid using harsh metal tools. Wire brushes, metal scrapers, and steel wool can scratch and gouge your door. Stick to soft brushes and plastic scrapers to protect the surface.
- Avoid skipping the test patch. Applying a strong remover across the whole door without testing first can strip the finish or discolor the material. Always test a hidden spot.
- Avoid working in direct sunlight or extreme heat. Heat causes removers to dry too fast, reducing their effectiveness and making cleanup messier. Work in the shade or during cooler hours when possible.
- Avoid using too much pressure with a power washer. High-pressure settings held too close can dent metal, crack vinyl, or strip paint. Keep the setting low and the nozzle at a safe distance.
- Avoid letting graffiti sit too long. Procrastination is your biggest enemy. The longer paint stays, the harder it bonds. Act quickly for the easiest possible cleanup.
Conclusion
Graffiti on your garage door is an unwelcome surprise, but it doesn’t have to become a permanent problem. With the right tools, a bit of patience, and the steps in this guide, you can restore your door and protect your home’s appearance. The most important lesson is simple: act fast. Fresh paint comes off easily, while old paint fights back.
Start by assessing your door and gathering your supplies. Protect yourself and the surrounding area, test your remover, then apply, wait, scrub, and rinse. Finish by drying, inspecting, and touching up any spots. Along the way, avoid harsh tools, skip nothing, and never let graffiti linger.
Keep your supplies ready, so you’re prepared if it ever happens again. With this guide on how to remove graffiti off garage door in your back pocket, you can handle graffiti confidently and keep your property looking its best.

I am Rick. I grew up helping my dad with his handyman service. I learned a lot from him about how to fix things, and also about how to work hard and take care of business. These days, I’m still into fixing things- only now, I’m doing it for a living.
I’m always looking for new ways to help people grow and develop. That’s why I have created this blog to share all my experience and knowledge so
that I can help people who are interested in DIY repair.