
Garage door sensors are a necessary part of any garage door installation. They keep the door from closing on people or things and provide an extra level of safety for your home. But what happens when they stop working? In most cases, fixing them by simply lining them up correctly is easy. This article will show you how to line up garage sensors. Keep reading to learn more.
Summary: Aligning garage sensors is an essential task that ensures the proper functioning of your garage door. To begin with, check the power source and make sure the sensors are free of debris. Once they are clean, adjust them horizontally so that they are equal to each other using a level to ensure that they are straight. Then, adjust the sensors vertically so that they face each other and are level to the ground.
What Causes Garage Door Sensors to Misalign?
Several things can cause garage door sensors to misalign. The most common is simply bumping them out of place. Another common cause is dirt or debris build-up on the sensors, preventing them from working properly. This can be a problem if you live in an area with a lot of dust or pollen. Also, if your garage is attached to your house, changes in the foundation can cause the sensors to misalign.
Additionally, extreme temperatures can cause the sensors to expand or contract, resulting in misalignment.
The other primary cause of misalignment is worn and tear over time. As the age of the sensor, they can become less accurate, eventually leading to misalignment. Lastly, if you have an automatic garage door opener, the opener can become out of sync with the sensors, resulting in misalignment.
Why Is It Important to Line Up Garage Door Sensors?
Garage door sensors are an important safety feature. They prevent the door from closing on people or things and can help to prevent accidents. Additionally, they can help prolong your garage door’s life by preventing it from being overworked. When the sensors are not lined up correctly, the door will have to work harder to close, which can wear it out over time. Make sure to line up your garage sensors correctly to keep your family safe and your garage door in good working condition.
Another thing to consider is that your automatic opener may not work correctly when the garage door sensors are not lined up. This can cause the door to open or close unexpectedly, which can be dangerous. Make sure to line up your sensors correctly to avoid any accidents. Finally, when the garage door sensors are not lined up, it can cause the door to close too slowly. This can be frustrating and may cause you to miss your cue to leave in the morning. So, make sure to line up the sensors correctly to avoid this problem.

Step by Step How to Line Up Garage Sensors
1. Open Garage Door
The first thing you need to do is open your garage door. If your door has a manual release, make sure to pull it so that the door can be opened. To do this, first, locate the manual release handle.
This is usually a red cord hanging from the garage door opener. If you can’t find it, consult your owner’s manual. Once you’ve found the handle, pull it until the door is fully open. If your garage doesn’t have a manual release, you can open it with your garage door opener.
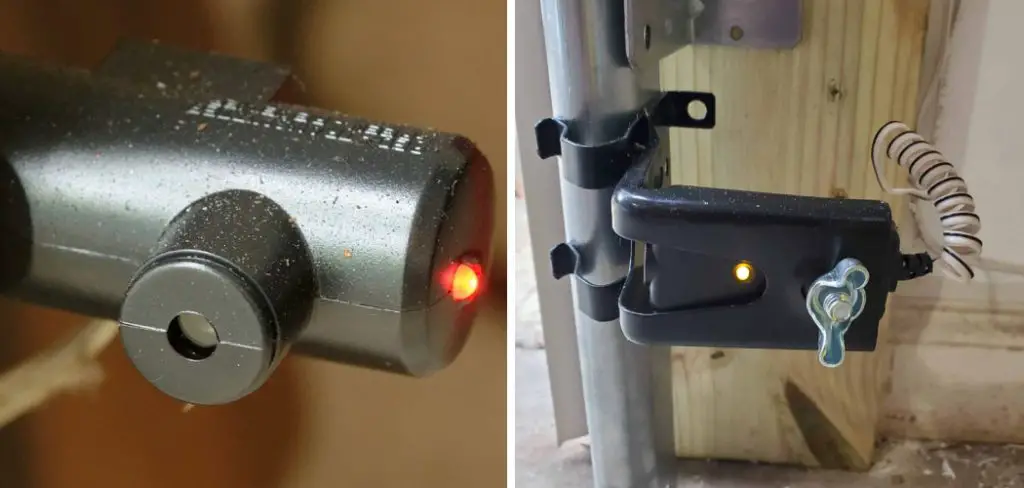
2. Inspect the Sensors
The next step is to inspect the sensors. First, take a look at the sensors themselves. If they are cracked or damaged in any way, they will need to be replaced. Next, check the wiring to make sure it is secure and not damaged. If the sensors or wiring are damaged, you will need to consult a professional for help. Finally, try to avoid bumping or moving the sensors, as this can cause them to misalign.
3. Clean the Sensors
If the sensors are not damaged, the next step is to clean them. First, use a soft cloth to remove any sensor dust or debris. Next, use a mild soap and water solution to clean the sensors. Be sure to dry them thoroughly afterward. If the sensors are still not working correctly, you may need to replace them. Avoid using harsh chemicals or solvents on the sensors, as this can damage them.

4. Check the Alignment
The next step is to check the alignment of the sensors. The door will not close properly if the sensors are not lined up correctly. To check the alignment, first, open the garage door.
Next, place a level on the ground in front of the door. The level should be placed so that it is perpendicular to the door. Finally, check to see if the sensors are level with each other. If they are not, they will need to be adjusted. Avoid moving the sensors too much, as this can cause them to misalign.
5. Adjust the Sensors
If the sensors are not aligned correctly, the next step is to adjust them. First, locate the adjustment screws on the sensors. These are usually located on the back of the sensors.
Next, use a screwdriver to turn the screws until the sensors are level with each other. Try to avoid moving the sensors too much, as this can cause them to misalign. If the sensors are still not aligned correctly, you may need to replace them.
6. Check the Rollers and Brackets
The next step is to check the rollers and brackets. First, check the rollers to make sure they are not damaged. Next, check the brackets to ensure they are secure and not damaged. If the rollers or brackets are damaged, you will need to consult a professional for help. Avoid continuing with the following steps if you are not confident in your ability to replace the damaged parts.
7. Tighten All Bolts and Screws
The next step is to tighten all bolts and screws. First, check the brackets to make sure they are secure. Next, check the rollers to ensure they are not loose.
Finally, check the sensors to make sure they are not loose. If any of the parts are loose, you will need to tighten them. If you find that the sensors are loose, you may need to replace them. Avoid over-tightening the bolts and screws, as this can damage the garage door.
8. Test The System
Once you have completed all of the previous steps, the next step is to test the system. First, open the garage door. Next, place a level on the ground in front of the door. The level should be placed so that it is perpendicular to the door. Finally, check to see if the sensors are level with each other. If they are not, the system is not working correctly, and you will need to adjust the sensors.

9. Call a Professional
If you still have trouble aligning the garage door sensors, the next step is to call a professional. A professional will be able to help you troubleshoot the problem and make the necessary repairs. Try to avoid making any repairs yourself, as this can void the warranty on your garage door.
Tips and Warnings on How to Line Up Garage Sensors
Tips
- It is always best to reference the manufacturer’s instructions when lining up garage sensors.
- Always ensure the garage door is fully closed before attempting to line up the sensors.
- If one sensor is not working, it is possibly not lined up properly. Try readjusting it and see if that fixes the issue.
- If there are still issues, it is possible that something is blocking the sensor’s view. Try removing any obstacles and see if that helps.
Warnings
- Do not attempt to line up garage sensors while the door is open, as this can be dangerous.
- Make sure no one is in the way of the sensors before starting the process, as they may get hurt if the door closes unexpectedly.
- Do not try to line up the sensors without reading the instructions first, as this could damage the door or sensors.
- If you are unsure of what to do at any point during the process, stop and consult a professional for help.

How Much Does It Cost To Line Up Garage Sensors?
The cost of lining up garage sensors will vary depending on the type of sensors you have, the number of sensors, and the job’s complexity. Generally, you can expect to pay between $100 and $300 for the entire process. If you hire a professional, the cost may be higher. However, if you are comfortable doing the work yourself, you can save money by doing it yourself.
Conclusion
So there you have it! Everything you need to know about how to line up garage sensors. Following the tips and advice in this article, you can ensure that your sensors are lined up correctly and working properly. Remember, it is always best to consult a professional for help if you are unsure about anything. Good luck!
I am Rick. I grew up helping my dad with his handyman service. I learned a lot from him about how to fix things, and also about how to work hard and take care of business. These days, I’m still into fixing things- only now, I’m doing it for a living.
I’m always looking for new ways to help people grow and develop. That’s why I have created this blog to share all my experience and knowledge so
that I can help people who are interested in DIY repair.