If you have a Chamberlain garage door opener, then you know that it’s a great opener. But did you also know that it has sensors to keep the door from closing on something or someone?
The problem is that if the sensors are not aligned properly, they can’t do their job. In this blog post, we will show you how to align chamberlain garage door sensors so your garage door will work perfectly. So read on!
Summary: To align a Chamberlain garage door sensor, start by cleaning the sensor lenses and checking the wiring connections. Then, adjust the sensor brackets so that they are level and facing each other directly. To ensure accuracy, use a bubble level and measure the distance between the sensor eyes using a tape measure.
What Is a Chamberlain Garage Door Sensors?
Chamberlain garage door sensors help to prevent your door from closing if there is an obstruction in the way. The sensors are placed on either side of the door, and they emit an invisible infrared beam. If the beam is interrupted, the door will automatically reverse direction.
This helps to protect your car and belongings from being damaged, and it also prevents injury to anyone who might be in the way of the door. Chamberlain garage door sensors are a reliable and affordable way to improve the safety of your garage.
Why It’s Important to Align Chamberlain Garage Door Sensors?
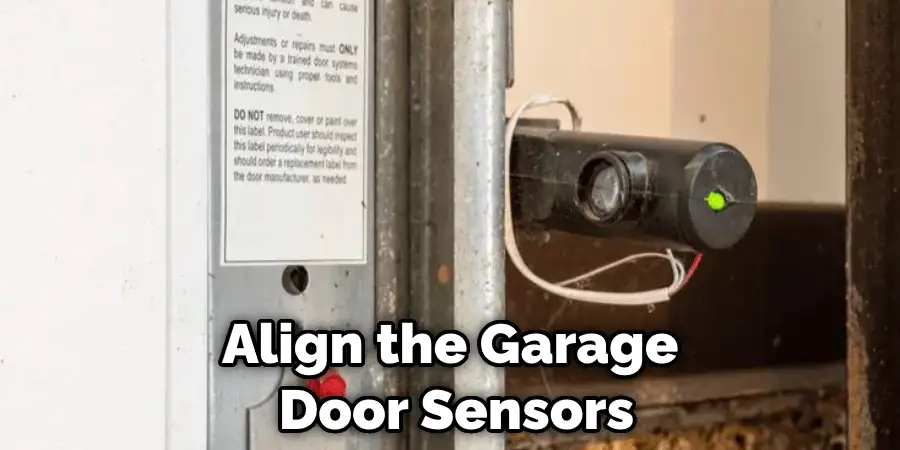
Chamberlain garage door sensors are an important part of the safety and security of your garage door opener system. The sensors are located at the bottom of the garage door opener unit, and they help prevent the door from closing if there is an object in the way. As a result, it is important to make sure that the sensors are properly aligned.
If the sensors are not aligned, the door may close on an object and cause damage or injury. In addition, properly aligned sensors will help prolong the life of your garage door opener by preventing wear and tear on the components. As a result, it is well worth taking the time to align your Chamberlain garage door sensors.
How to Align Chamberlain Garage Door Sensors Step by Step Guide
Step 1: Locate the Sensor
In order to align your garage door sensors, you will first need to find them. The sensors are usually located on the sides of the garage door near the bottom. Once you have found them, you will need to clean off any dirt or debris that may be obstructing them.
Step 2: Check the Wires
Next, you will need to check the wires connecting the sensors to the garage door opener. Make sure that the wires are not damaged or frayed in any way. If they are, you will need to replace them before proceeding.
Step 3: Adjust the Sensors
Once you have verified that the sensors are clean and the wires are intact, you can begin adjusting the sensors. The first thing you will need to do is make sure that the sensors are level with each other. You can do this by using a level or a tape measure. Once they are level, you will need to adjust the sensitivity of the sensors. This can be done by turning the adjustment screws on the sensors themselves.
Step 4: Test the System
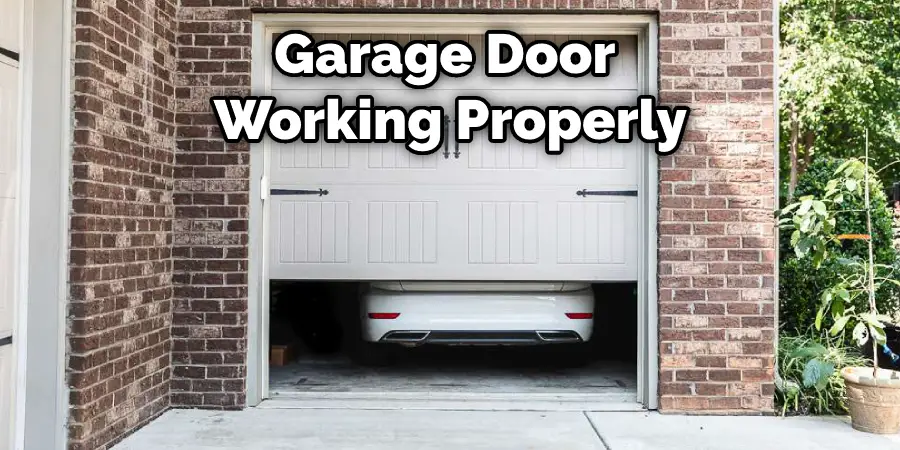
After you have finished adjusting the sensors, you will need to test the system to make sure that it is working properly. To do this, close the garage door and see if the sensors are triggered. If they are, then your garage door sensors are properly aligned. If not, you will need to readjust the sensors and try again.
Step 5: Enjoy Your Peace of Mind
Once your garage door sensors are properly aligned, you can enjoy peace of mind knowing your garage is secure. You no longer have to worry about whether or not the door will close properly when you leave.
Step 6: Call a Professional
If you are having difficulty aligning your garage door sensors, or if they seem to be malfunctioning, it is always a good idea to call a professional. They will be able to help you troubleshoot the problem and get your garage door working properly again in no time.
Now that you know how to align Chamberlain garage door sensors, you can rest assured that your garage is secure. However, if you are having difficulty with the alignment or if the sensors are malfunctioning, be sure to call a professional.
How to Fix a Garage Door Sensor
1. Check the Door Opener
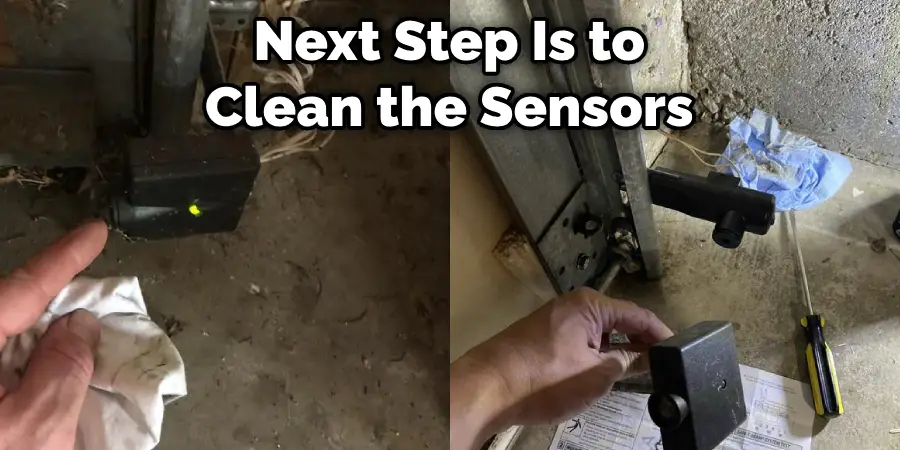
Check the garage door opener to see if the LED light is blinking. If it is, the infrared sensor is not receiving the proper signal from the remote control. So the first thing you’ll want to do is clean the sensors.
2. Check the Battery
Next, check to make sure that the batteries in your garage door sensors are fresh and working properly. If they are not, this could be causing your alignment issues. Replace the batteries and see if that fixes the problem.
3. Check the Wiring
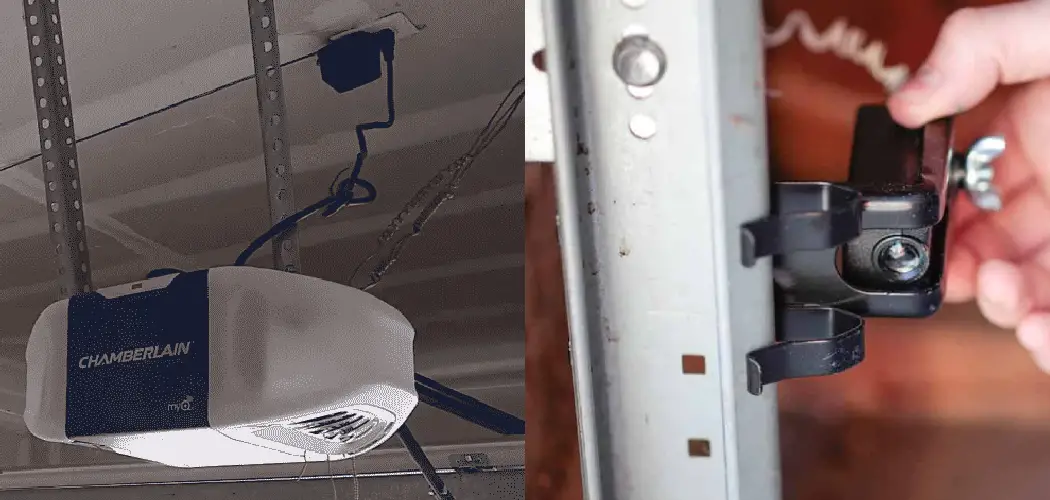
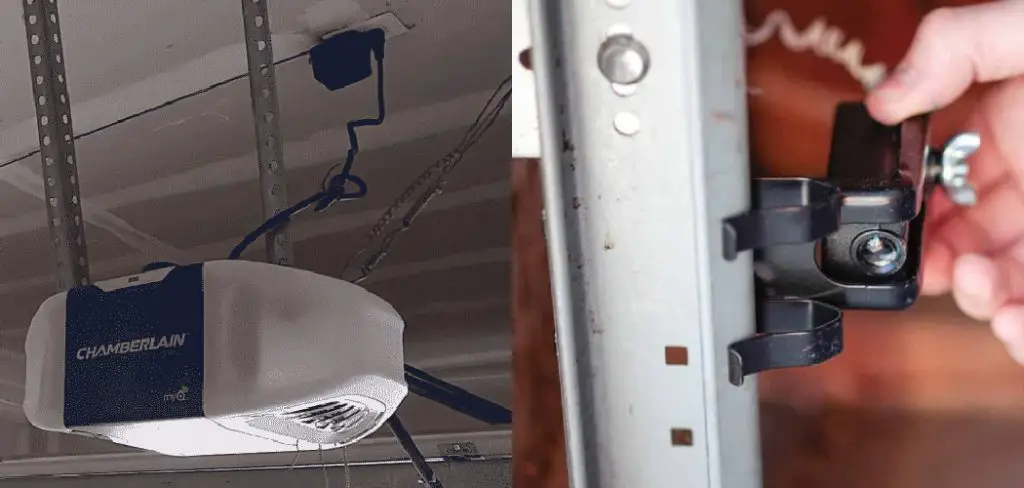
If the batteries are fine, then the next thing you will want to check is the wiring. Most garage doors have two sensors on each side of the door. The wires from each sensor run to the opener unit, which is usually mounted on the ceiling near the front of the garage. If you have a Chamberlain opener, a green and white wire will come from each sensor. These are the ground and power wires, respectively. If you have a different brand of the opener, the colors of the wires may be different.
If the sensors are not working, the wires may have come loose or are otherwise damaged. Try to locate the source of the problem by checking the wires at each connection point. If you find a loose wire, try to tighten it or replace it with a new one. If the wires are damaged, you may need to cut out the damaged section and splice in a new piece.
4. Clean the Sensors
If you’ve checked the batteries, wiring, and everything else seems to be in working order, the next step is to clean the sensors. Over time, dust and dirt can build up on the sensors, causing them to malfunction. Use a soft cloth or brush to wipe away any debris to clean the sensors.
5. Adjust the Sensors
If you’ve tried all of the above and the garage door still won’t open or close, then it’s time to adjust the sensors. To do this, you’ll need to access the sensor’s mounting bracket, which is usually located near the floor on each side of the door.
Once you’ve located the bracket, loosen the screws and adjust the sensor until the LED light is no longer blinking. Then, retighten the screws and test the door to see if it is now working properly.
If you have followed all of these steps and the garage door isn’t working, you may need to replace the sensors. Sensors are relatively inexpensive and can be found at most hardware stores. Simply remove the old sensors and install the new ones in the same location.
Be sure to test the door before you close it to make sure that the new sensors are working properly. Keep reading for more information about how to align chamberlain garage door sensors.
How Do You Reset Garage Door Sensors?
If your garage door sensors malfunction, it can be a frustrating experience. Fortunately, there are a few simple steps you can take to reset the sensors and get your door working again.
The first step is to check the alignment of the sensors. If the sensors are misaligned, they will not be able to detect obstacles in the door’s path properly. To fix this, simply realign the sensors to be level with each other.
If the problem persists, you may need to clean the lenses of the sensors. Over time, dust and debris can build up on the lenses, preventing them from properly detecting obstacles. A quick wipe-down with a microfiber cloth should do the trick.
Finally, if your garage door still won’t close after trying these steps, you may need to replace the batteries in the sensors. Unfortunately, dead batteries are often the culprit for malfunctioning garage door sensors. However, with a little troubleshooting, you should be able to get your garage door sensor working again in no time.
Frequently Asked Question
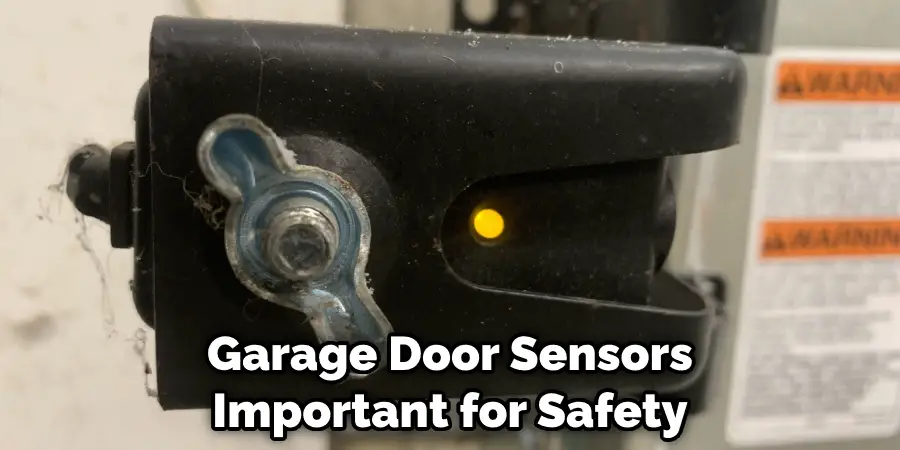
Should Both My Garage Door Sensors Be Green?
Yes, both of your garage door sensors should be green. If one or both of them are not, you will need to realign the sensors. To do this, you will need to remove the sensor from the mounting bracket.
Hold the sensor so that the arrow points up the top, then press and release the test button. If the light does not turn green, twist the sensor until it does. Once both sensors are green, replace them in the mounting bracket and make sure they are secure.
How Long Do Garage Door Sensors Last?
Garage door sensors are important for safety and should be kept in good condition. They usually last for about five years, but this may vary depending on how often they are used.
Can You Bypass Garage Door Sensors?
There is no definitive answer, as each garage door sensor system is different. However, many people have bypassed their sensors by using a hanger or other metal object to trigger the sensor beam.
This can be a dangerous solution, as it could potentially cause the garage door to close while someone is still in the way. If you need to bypass your sensors, we recommend calling a professional garage door technician for assistance. Thank you for reading!
Conclusion
Chamberlain garage door sensors are a great way to improve the security of your home. By following these simple steps, you can make sure that they are always in alignment and working properly. Thanks for reading our post about how to align chamberlain garage door sensors.
I am Rick. I grew up helping my dad with his handyman service. I learned a lot from him about how to fix things, and also about how to work hard and take care of business. These days, I’m still into fixing things- only now, I’m doing it for a living.
I’m always looking for new ways to help people grow and develop. That’s why I have created this blog to share all my experience and knowledge so
that I can help people who are interested in DIY repair.