


Your garage holds more than just your car. Tools, bikes, sports gear, and sometimes even a doorway straight into your home all sit behind that big door. Yet many people leave their garage protected by nothing more than a flimsy automatic opener. Adding a manual garage door lock gives you an extra layer of security that thieves can’t easily bypass.
The good news? You don’t need to be a professional handyman to get the job done. With a few basic tools, a little patience, and clear directions, you can install a garage door lock in an afternoon. This guide on how to install garage door lock walks you through everything from the benefits and supplies to a step-by-step process and the common mistakes to avoid.
By the time you finish reading, you’ll feel confident tackling this project yourself and enjoy the peace of mind that comes with a well-secured garage.
Benefits of Installing a Garage Door Lock
Before you grab your drill, it helps to understand why this upgrade is worth your time. A garage door lock offers plenty of practical advantages:
- Stronger security. Automatic openers can fail or be hacked with the right tools. A manual lock physically holds the door in place, making forced entry much harder.
- Protection during power outages. When the electricity goes out, your automatic opener stops working. A manual lock keeps the door secure no matter what.
- Peace of mind while traveling. Heading out of town? A locked garage door means one less thing to worry about. You can lock it and leave without stress.
- Deterrent effect. Visible locks discourage would-be burglars. Many thieves look for easy targets, and a locked door signals that your home is protected.
- Affordable upgrade. Compared to full security systems, a garage door lock is inexpensive. It delivers big benefits for a small cost.
- Extra safety for valuables. If you store expensive tools, equipment, or a second vehicle, a lock adds serious protection against theft.
Simply put, this small addition makes a real difference in how safe your home feels and functions.
What Will You Need?

Gathering your supplies before you begin saves time and frustration. Here’s what you’ll want on hand:
Tools:
- Power drill with drill bits
- Screwdriver set (Phillips and flathead)
- Measuring tape
- Pencil or marker
- Level
- Adjustable wrench
- Safety glasses and work gloves
Materials:
- Garage door lock kit (T-handle lock, slide lock, or deadbolt style)
- Mounting screws and bolts (often included in the kit)
- Lock cylinder and keys
- Cable or lock bars (if included with your kit)
Optional but Helpful:
- Ladder or step stool
- Anti-seize lubricant
- Clean rag
Choose a lock that matches your door type. Most metal and wooden garage doors work well with a standard T-handle lock kit. Read your kit’s instructions too, since some brands include unique parts. Once everything is ready, you’re set to begin.
10 Easy Steps on How to Install Garage Door Lock
Step 1: Read the Instructions and Inspect Your Kit
Start by opening your lock kit and laying out every piece on a flat surface. Compare the contents to the parts list in the manual. You should find the lock handle, cylinder, mounting hardware, lock bars, and keys. Checking now prevents surprises halfway through the job. Take a moment to read the manufacturer’s directions, since designs vary between brands. Understanding how the parts fit together gives you a clear picture before any drilling begins. If anything is missing or damaged, contact the seller before you start.
Step 2: Choose the Right Location for the Lock
Most garage door locks install at the center of the door, roughly waist height. This placement lets the lock bars extend evenly toward the tracks on both sides. Stand in front of your closed door and pick a spot that feels comfortable to reach. Make sure the area is flat and free of dents or panels that might get in the way. Look behind the door too, checking that the lock bars will have a clear path to the side tracks. Choosing a smart location now makes the rest of the install smoother.
Step 3: Mark Your Drill Points

Hold the lock handle against your chosen spot and use a pencil to mark where the screws and center hole will go. A level helps you keep everything straight, which matters for both looks and function. Double-check your marks by measuring the distance from each edge of the door. Symmetry ensures the lock bars line up properly with the tracks. Take your time here. Accurate marks lead to a clean, secure installation and save you from redrilling later. Once your marks look right, you’re ready to make holes.
Step 4: Drill the Center Hole
Put on your safety glasses and gloves before you begin drilling. Choose a drill bit that matches the size of the lock cylinder, usually specified in your manual. Position the bit on your center mark and drill slowly and steadily through the door. Keep the drill straight to avoid an angled hole. If your door is metal, apply gentle pressure and let the bit do the work. For wooden doors, drilling is usually faster. Clean away any debris or shavings once the hole is complete so the cylinder fits smoothly.
Step 5: Drill the Mounting Holes
Next, drill the smaller holes you marked for the mounting screws. Use a bit slightly narrower than your screws so they grip firmly. Keep these holes straight and aligned with your handle placement. If your kit uses bolts instead of screws, you may need to drill all the way through the door and add a backing plate on the inside. Wipe away dust after drilling. These holes hold your lock in place, so accuracy matters. Once done, hold the handle up again to confirm everything lines up.
Step 6: Install the Lock Handle and Cylinder

Slide the lock cylinder through the center hole from the outside of the door. On the inside, secure it according to your kit’s instructions, often with a clip or nut. Then position the handle over the mounting holes and insert your screws or bolts. Tighten them with a screwdriver or wrench until the handle sits snug against the door. Avoid overtightening, which can strip the screws or crack a panel. Give the handle a gentle wiggle to confirm it’s firmly attached and doesn’t shift under pressure.
Step 7: Attach the Lock Bars
The lock bars are the horizontal rods that slide into the side tracks to hold the door shut. Connect these bars to the mechanism behind your handle, following the kit’s diagram. Most designs use a spring or lever that pushes the bars outward when you turn the key. Attach each bar carefully, making sure they can move freely without catching. Line them up so they aim directly at the slots in your door tracks. Loose or crooked bars won’t lock properly, so take a moment to get them right.
Step 8: Align the Bars with the Track Slots
Now check that the lock bars reach the tracks on both sides. Turn the key or engage the handle to extend the bars and watch where they land. Ideally, each bar should slide neatly into a slot in the track. If your tracks don’t have slots, you may need to drill small holes for the bars to enter. Mark those spots, then drill carefully. Proper alignment is the heart of a working lock, so adjust the bars as needed until they engage smoothly every time.
Step 9: Test the Locking Mechanism
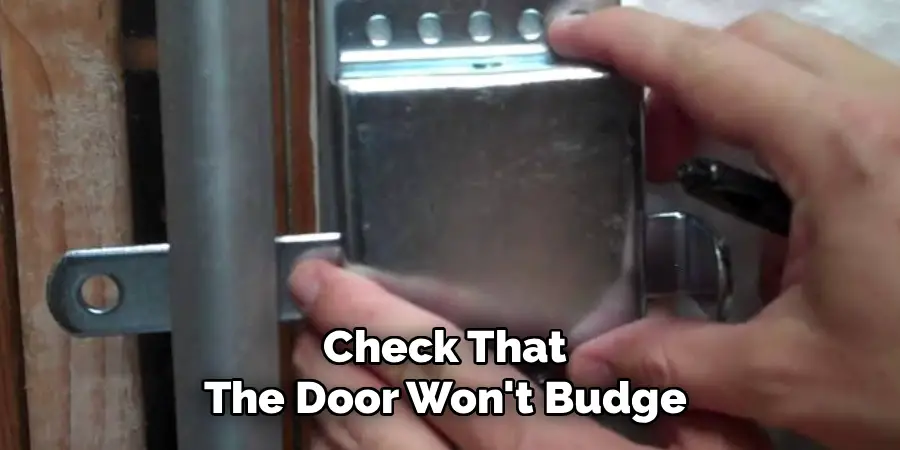
With everything in place, it’s time to test your work. Insert the key and turn it to extend the bars, then close and check that the door won’t budge. Try lifting the door gently to confirm the lock holds. Next, unlock it and make sure the bars retract fully so the door opens freely. Repeat this a few times to be sure the action feels smooth. If the key sticks or the bars catch, adjust the alignment or add a little lubricant to the moving parts.
Step 10: Make Final Adjustments and Clean Up
Once your lock works reliably, tighten any loose screws one last time. Wipe down the door and remove any leftover dust or shavings. Apply a small amount of anti-seize lubricant to the key cylinder and bars to keep them moving freely over time. Store your spare key in a safe spot away from the garage. Step back and admire your work. Your garage now has a solid manual lock that adds real security. Give it a final test to end the project with confidence.
5 Things You Should Avoid
Even simple projects can go wrong if you rush. Keep these common mistakes in mind:
- Skipping the instructions. Every lock kit is a little different. Ignoring the manual can lead to missing steps or improper installation.
- Drilling crooked holes. Angled or misaligned holes make your lock look messy and work poorly. Always use a level and measure twice.
- Overtightening screws. Cranking screws too hard can strip threads, crack panels, or warp the handle. Tighten just until snug.
- Ignoring bar alignment. If the lock bars don’t line up with the track slots, the lock won’t hold. Test the alignment before finishing.
- Forgetting to lubricate. Dry mechanisms rust and stick over time. A quick application of lubricant keeps your lock smooth and lasting.
Avoiding these slip-ups keeps your installation safe, clean, and long-lasting.
Conclusion
How to install garage door lock is one of the smartest and most affordable upgrades you can make for your home’s security. It protects your belongings, works even during power outages, and gives you peace of mind whether you’re home or away. Best of all, it’s a project you can complete on your own with just a few tools and a little patience.
By following the ten steps in this guide, you now know how to choose a location, drill your holes, mount the handle, and test the mechanism for a secure fit. Remember to avoid common mistakes like crooked drilling and overtightening, and keep up with simple maintenance to make your lock last.
Take your time, work carefully, and enjoy the confidence that comes with a well-protected garage. Your safer home is only an afternoon of work away.

I am Rick. I grew up helping my dad with his handyman service. I learned a lot from him about how to fix things, and also about how to work hard and take care of business. These days, I’m still into fixing things- only now, I’m doing it for a living.
I’m always looking for new ways to help people grow and develop. That’s why I have created this blog to share all my experience and knowledge so
that I can help people who are interested in DIY repair.