


A cluttered, grimy garage doesn’t just look bad. It makes finding tools harder, chips away at your usable space, and—depending on what’s been piling up—can quietly become a safety hazard. A proper deep clean can turn even the most chaotic garage into something genuinely functional.
This guide on how to deep clean garage covers everything: the tools you’ll need, a clear step-by-step process, mistakes worth avoiding, and a rough sense of what it might cost you. By the end, you’ll have a concrete plan and enough know-how to actually follow through.
What Does “Deep Cleaning a Garage” Actually Mean?

Deep cleaning a garage goes far beyond sweeping the floor and tossing a few boxes. It means decluttering every corner, cleaning surfaces from ceiling to floor, tackling built-up grease and grime, and thoughtfully reorganizing what’s left. The goal isn’t cosmetic tidiness—it’s restoring the space to something genuinely usable.
Most garages accumulate years of dust, oil stains, pest debris, and disorganized clutter. A deep clean addresses all of it, systematically. Unlike a quick tidy-up, the process typically takes several hours to a full day, depending on the size of your garage and how long things have been building up. Planning ahead and having the right materials ready makes a noticeable difference.
Tools and Materials You’ll Need Before You Start
Pulling together your supplies before you begin prevents the kind of mid-clean interruptions that stall momentum.
Cleaning Supplies
- Heavy-duty degreaser or concrete cleaner
- All-purpose cleaning spray
- Baking soda and white vinegar (if you prefer natural alternatives)
- Bucket and warm water
- Mop and scrub brush
Protective Gear
- Rubber gloves
- Safety goggles
- Dust mask or respirator
- Old clothes or a work apron
Organization and Disposal Tools
- Heavy-duty garbage bags
- Cardboard boxes or plastic bins for sorting
- Labels and a marker
- Broom and dustpan
- Wet/dry vacuum (shop vac)
- Pressure washer (optional, but noticeably effective on floors)
- Shelf brackets or pegboards, if you’re reorganizing storage
7 Steps on How to Deep Clean Garage
Step 1: Clear Everything Out—All of It
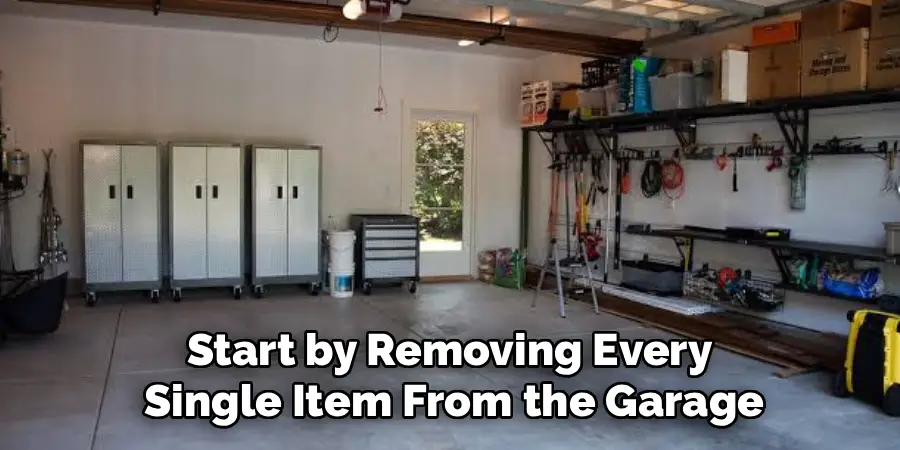
Start by removing every single item from the garage. Park the car in the driveway, then pull out tools, boxes, sports equipment, seasonal items, and anything else occupying floor or shelf space. A completely empty garage means no area gets accidentally skipped during cleaning.
As you pull things out, sort them into four piles: keep, donate, sell, and throw away. Be honest. Items you haven’t touched in two or more years are strong candidates for removal, even if parting with them feels slightly uncomfortable.
Step 2: Sort, Declutter, and Dispose Properly
With everything outside, go through each pile. Group similar items—gardening tools with gardening tools, automotive supplies with automotive supplies. This makes reorganizing significantly faster when items go back in.
For hazardous materials like old paint, motor oil, and household chemicals, check your local council’s guidelines for proper disposal. These items should never go into regular trash bins or down drains.
Step 3: Dust and Sweep From Top to Bottom
Before introducing any liquids, do a thorough dry clean of the space. Start at the ceiling—brush down cobwebs and dust from rafters, light fixtures, and vents using an extendable duster. Work your way down to the walls and shelving, then finish with the floor.
Sweep debris toward the center of the garage and collect it with a dustpan or shop vac. Working top to bottom matters here: it stops you from re-dirtying surfaces you’ve already cleaned.
Step 4: Wipe Down the Walls and Shelves

Wipe walls with an all-purpose cleaner and a damp cloth or sponge, paying particular attention to areas near workbenches where grease and fingerprints accumulate. Wooden shelves do well with a mild soap solution; metal shelving may need a degreaser if oily residue has built up over time.
If you spot mold—common in garages with poor ventilation—treat the affected area with a diluted bleach solution (one part bleach to ten parts water). Allow it to dry completely before moving on.
Step 5: Scrub and Degrease the Floor
The floor is usually the most demanding surface. Concrete absorbs oil and grease over time, leaving stains that a regular mop won’t touch.
Apply a commercial concrete degreaser, or a paste made from baking soda and water, directly to stained areas. Let it sit for 10–15 minutes, then scrub firmly with a stiff-bristle brush. Rinse thoroughly with water—a pressure washer speeds this step up considerably. For particularly stubborn stains, a second application may be necessary. The floor needs to dry completely before anything goes back in.
Step 6: Clean the Garage Door and Windows
Garage doors collect dust and grime on both sides. Wipe each surface down with an all-purpose cleaner and a microfiber cloth. While you’re at it, check the door tracks—debris buildup affects how smoothly the door operates. Clean the tracks with a damp rag and apply a track lubricant if needed.
For windows, glass cleaner and a lint-free cloth do the job. Check the weatherstripping around the door frame, too. Damaged weatherstripping lets in moisture, pests, and cold air, and replacing it is a small fix that carries a surprisingly large impact.

Step 7: Reorganize Thoughtfully Before Bringing Things Back In
This is where the effort pays off. With a clean, empty garage, you have a real opportunity to set things up better than they were before. Group items by category and store frequently used things at eye level or within easy reach. Pegboards work well for tools; wall-mounted hooks handle bikes efficiently; labeled bins keep seasonal items from becoming a jumble.
Keep heavy items low to the ground and leave clear pathways throughout. If your garage doubles as a workshop, keep that zone separate from general storage. A well-organized garage stays cleaner longer—mostly because everything has a designated place to return to.
Following these steps on how to deep clean garage, you can transform your cluttered and dirty space into a functional and well-organized area. With regular maintenance and upkeep, your garage will not only be clean but also stress-free to use.
Common Mistakes That Undermine the Whole Process
One of the most frequent missteps is skipping the declutter phase and cleaning around existing clutter. This delays the problem rather than solving it. Another common error is cleaning the floor before addressing the ceiling and walls, meaning dust and debris fall onto surfaces you’ve already tackled.
Avoid using harsh chemicals without proper ventilation. Open the garage door and any windows before applying degreasers or bleach-based products. And don’t rush the drying process—returning items to a damp floor or shelves can encourage mold growth, which somewhat defeats the purpose of the exercise.
When Does It Make Sense to Hire a Professional?
For most homeowners, a garage deep clean is a manageable DIY project. That said, certain situations warrant professional help. If your garage contains significant mold growth, hazardous material buildup, or structural damage, professionals have the equipment and expertise to handle it safely—and legally, in some cases.
Professional services may also be worth considering if the garage is exceptionally large, heavily soiled, or if time or mobility constraints make a full clean impractical. In those scenarios, the cost of hiring someone often justifies itself through the quality of the result and the hours saved.
How Much Will It Cost?
A DIY deep clean can cost as little as $20–$50 if you already own most of the tools and only need to pick up cleaning supplies. Renting a pressure washer typically adds $40–$80, depending on your location and the rental duration.
Professional garage cleaning services generally range from $150 to $500 or more, depending on the size of the garage, the level of soiling, and your geographic area. Garages requiring hazardous waste removal will sit toward the higher end of that range. Either way, the result—a functional, organized space you can actually use—tends to make the investment feel worthwhile fairly quickly.
Frequently Asked Questions
How Long Does It Take to Deep Clean a Garage?
Most garages take between four and eight hours to deep clean, depending on size and how cluttered the space is. Breaking the job into two days—decluttering on day one and cleaning on day two—can make the process more manageable and less exhausting.
How Often Should I Deep Clean My Garage?
A full deep clean once or twice a year is generally sufficient for most households. A light tidy-up every one to two months helps maintain the results and prevents clutter from quietly accumulating again between deep cleans.
What Is the Best Way to Remove Oil Stains From a Garage Floor?
Apply a commercial concrete degreaser or a thick baking soda paste directly to the stain. Let it sit for 10–15 minutes, scrub with a stiff-bristle brush, and rinse with hot water. For older, set-in stains, you may need to repeat the process or use a pressure washer to get the best result.
Do I Need a Pressure Washer to Deep Clean My Garage Floor?
A pressure washer helps considerably, but it’s not strictly necessary. A stiff-bristle brush, a good degreaser, and hot water can handle most stains with enough scrubbing. That said, renting a pressure washer for $40–$80 is often worth it for larger garages or heavily soiled floors.
Is It Safe to Use Bleach Inside a Garage?
Diluted bleach (one part bleach to ten parts water) is safe for treating mold spots on garage walls and surfaces, provided the space is well-ventilated. Open the garage door and any windows before applying it, and avoid mixing bleach with other cleaning products—particularly ammonia-based ones.
Your Garage Deserves Better Than a Quick Sweep
A deep-cleaned garage is a safer, more functional part of your home. These seven steps on how to deep clean garage give you a structured approach that delivers real results, whether you’re clearing out years of accumulated clutter or doing a seasonal reset.
If the full job feels overwhelming, start with two or three steps in a single afternoon. Progress, even partial progress, moves things meaningfully forward. Once the space is clean and organized, maintaining it becomes far simpler—and you may find yourself using it far more than you expected.

I am Rick. I grew up helping my dad with his handyman service. I learned a lot from him about how to fix things, and also about how to work hard and take care of business. These days, I’m still into fixing things- only now, I’m doing it for a living.
I’m always looking for new ways to help people grow and develop. That’s why I have created this blog to share all my experience and knowledge so
that I can help people who are interested in DIY repair.