
A Thule roof box is a fantastic investment for road trippers, campers, and outdoor enthusiasts. It frees up cabin space, keeps gear secure, and makes traveling with bulky items a breeze. But when the adventure is over, and you return home, you’re faced with a common dilemma: where do you put this massive, awkwardly shaped accessory?
Leaving your roof box on your car year-round isn’t ideal. It increases wind drag, lowers fuel efficiency, and exposes the material to unnecessary UV damage and weather wear. Proper storage is essential to prolonging the life of your carrier and ensuring it’s ready for your next trip.
In this guide on how to store thule roof box, we’ll walk you through everything you need to know about storing your Thule roof box correctly, from the tools you’ll need to a detailed, step-by-step process.

What will You Need?
Before you begin the removal and storage process, gather the following items to make the job easier and safer:
- Cleaning Supplies: Mild soap (car wash soap or dish soap), water, a bucket, a soft sponge or microfiber cloth, and a towel for drying.
- Lubricant: Silicone spray or a similar lubricant for the locks and hinges.
- Storage System: This depends on your chosen method. It could be a wall mount, a ceiling hoist/lift system, or sturdy straps.
- A Helper: Roof boxes are bulky and can be awkward to handle alone. Having a second pair of hands prevents injury to you and damage to the box or your car.
- Step Stool or Ladder: To comfortably reach the mounting hardware on top of your vehicle.
10 Easy Steps on How to Store Thule Roof Box
Storing your cargo box involves more than just tossing it in the corner of the shed. To keep it in pristine condition, follow these ten detailed steps.
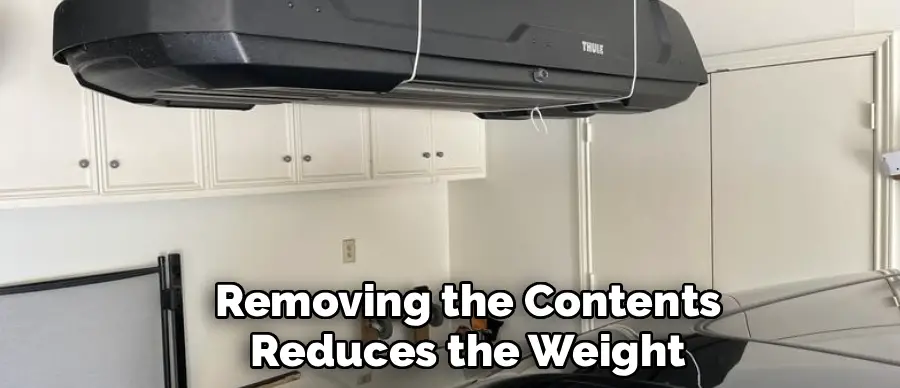
1. Empty the Box Completely
It might seem obvious, but it is easy to forget small items tucked into the corners of your carrier. Before you even loosen a bolt, open the box and remove every single item. Check for loose straps, camping gear, or debris. Removing the contents reduces the weight, making it easier to lift, and prevents loose items from shifting around and damaging the interior walls during the removal process.
2. Clean the Interior and Exterior
Once the box is empty, it needs a thorough cleaning. Road trips expose your car to bugs, tar, sap, bird droppings, and road salt. If left on the surface, these contaminants can eat away at the finish or plastic over time.
Mix mild soap with warm water. Using a soft sponge, gently scrub the exterior. Pay special attention to the front of the box where bugs accumulate. Rinse it off with a hose. Next, wipe down the interior to remove dust or sand. Dry the box completely with a soft towel. Storing a wet box, especially if you close the lid, is a recipe for mold and mildew growth.
3. Lubricate the Moving Parts
Your Thule box has several mechanical components that can seize up if neglected. While the box is clean and accessible, take a moment to lubricate the locks and the hinges.
Use a silicone-based spray or a specialized lock lubricant. Spray a small amount into the keyhole and work the key in and out a few times to distribute it. Then, lubricate the hinges that hold the lid open. This simple maintenance step ensures that when you’re ready for your next trip, the key won’t snap in a frozen lock, and the lid will open smoothly without squeaking or resisting.
4. Loosen the Mounting Hardware
Now you are ready to detach the box from your roof rack. Open the lid and locate the mounting clamps or claws (Thule often uses the PowerClick or FastClick systems).
Unscrew the knobs or release the levers to disengage the clamps from the crossbars. Do not fully remove the hardware if you don’t have to; just loosen them enough so the claws hang free of the bars. If your specific model has removable mounting hardware, take them out and place them in a labeled bag. Tape this bag to the inside of the box so you never lose the essential parts required to mount it.

5. Enlist Help to Lift the Box
Thule boxes aren’t necessarily heavy—they usually weigh between 30 and 50 pounds—but they are incredibly unwieldy. Trying to lift one off a tall SUV by yourself is a recipe for scratching your car’s paint, dropping the box, or hurting your back.
Ask a friend or family member to help. Position one person at the front of the vehicle and one at the back. Lift straight up to clear the crossbars, then carefully walk the box away from the vehicle. If you must do this alone, be extremely cautious and try to slide it onto a soft surface, but a two-person lift is always the gold standard for safety.
6. Choose Your Storage Location
Decide where the box will live. The ideal environment is cool, dry, and out of direct sunlight.
- The Floor: If you have ample space, you can store it flat on the floor. However, place it on a mat or cardboard to prevent scratches.
- The Wall: Wall mounts are excellent for saving floor space. The box hangs vertically, usually flush against the wall.
- The Ceiling: This is often the most efficient method for garages. Hoist systems allow you to lift the box straight off the car and up to the ceiling, keeping it completely out of the way.
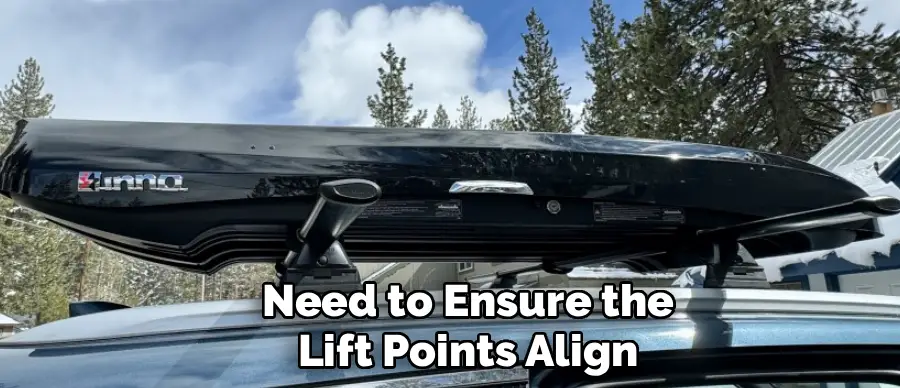
7. Install the Storage System (if Applicable)
If you are using a wall mount or ceiling hoist, install it according to the manufacturer’s instructions.
For wall mounts, ensure you are drilling into studs. The arms of the mount should be padded to protect the box’s finish.
For ceiling hoists, accurate measurement is key. You need to ensure the lift points align with the box’s structure so it doesn’t warp over time. Ensure your ceiling joists can support the weight.
If you are improvising with straps, make sure they are heavy-duty and won’t degrade over time.
8. Position the Box for Storage
How you orient the box matters.
- Floor Storage: Store it flat on its base. Do not store it on its side or end without support, as this can warp the plastic over time.
- Wall Storage: Most wall mounts hold the box vertically. Ensure the weight is distributed evenly on the mounting arms.
- Ceiling Storage: The box usually sits flat, supported by straps or a platform.
Crucial Tip: If storing the box flat, ensure nothing is placed on top of it. Heavy items can crush or dent the lid.
9. Secure the Box
Once the box is in position, double-check that it is secure.
If it’s on a wall mount, utilize any straps provided to ensure it doesn’t tip forward.
If it’s on a ceiling hoist, engage the safety locking mechanism so the box cannot accidentally lower.
If it’s on the floor, place it in a corner where it won’t be kicked, bumped by car doors, or tripped over.
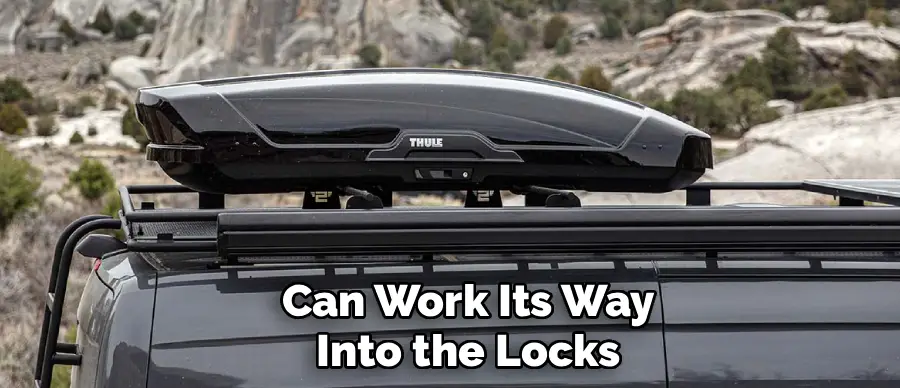
10. Cover It Up
Dust is the enemy of long-term storage. Even in a clean garage, dust settles and can work its way into the locks and hinges.
Cover your Thule box with a dedicated cover (Thule sells these) or an old sheet. A cover protects the finish from scratches and keeps the dust off. Ensure the cover is breathable so moisture doesn’t get trapped underneath. If you are storing it in a shed where mice might be present, ensure the box is fully closed and locked to prevent critters from nesting inside.
5 Things You Should Avoid
To keep your roof box in top shape, steer clear of these common mistakes:
- Storing on Its Side Without Support: While it saves space, leaning the box against a wall can cause the plastic to warp and lose its shape, making it difficult to close properly later.
- Leaving It Securely Locked: If storing indoors, leave the box unlocked or slightly unlatched (if possible without warping) to relieve pressure on the locking mechanism and gaskets. However, most people lock it to keep the key safe—if you do, just ensure the key is stored somewhere memorable.
- Storing Near Heat Sources: Don’t place the box next to a water heater, furnace, or radiator. Excessive heat can deform the plastic.
- Using Harsh Chemicals: Avoid bleach or strong solvents when cleaning. These can degrade the UV coating on the plastic.
- Forgetting Where You Put the Keys: This happens more often than you think. Tape the keys to the side of the box or put them in your vehicle’s glove compartment immediately.
Conclusion
Properly storing your Thule roof box is the best way to protect your investment. By taking the time to clean, lubricate, and securely store your cargo carrier, you ensure it remains durable and functional for years to come.
Whether you choose a simple floor spot or a fancy ceiling hoist, the key is keeping the box dry, safe, and out of the sun. With these ten easy steps, you’ll be ready to hit the road the moment adventure calls.
Hopefully, this guide on how to store thule roof box has provided you with the information you need to know about storing your Thule roof box. Remember, being mindful of weight limits and proper installation is crucial for both safety and performance. Keep these tips in mind and enjoy stress-free travels with your Thule roof box!
I am Rick. I grew up helping my dad with his handyman service. I learned a lot from him about how to fix things, and also about how to work hard and take care of business. These days, I’m still into fixing things- only now, I’m doing it for a living.
I’m always looking for new ways to help people grow and develop. That’s why I have created this blog to share all my experience and knowledge so
that I can help people who are interested in DIY repair.