
We rely on our garage door openers daily, often taking their smooth operation for granted. But when your Overhead Door Odyssey 1000 stops responding or behaves erratically, it can be a source of significant frustration. Whether you’ve recently moved into a new home, experienced a power outage, or simply lost a remote, knowing how to perform a factory reset is a valuable skill for any homeowner.
Resetting your garage door opener isn’t just about fixing a glitch; it’s about security and peace of mind. The Odyssey 1000 is a robust and reliable machine, but like all technology, it sometimes needs a fresh start. This process erases all previous codes and settings, allowing you to reprogram your remotes and keypads from scratch.
Let’s dive into how to reset odyssey 1000 garage door opener.

What Will You Need?
The good news is that resetting an Odyssey 1000 requires very little in the way of specialized equipment. However, being prepared will make the process faster and safer. Here is a checklist of items to have ready before you begin:
- Stepladder: You will need to reach the motor head unit mounted on the garage ceiling. Ensure your ladder is sturdy and tall enough to reach the unit comfortably.
- Flashlight or Headlamp: Garage lighting can be dim, and the buttons on the motor unit are small. A dedicated light source will help you see the indicator lights clearly.
- Your Remotes and Keypads: Gather every remote, wireless keypad, and vehicle transceiver (HomeLink) you intend to use. You will need to reprogram them immediately after the reset.
- Safety Glasses (Optional): While not strictly necessary, it is always good practice to protect your eyes when working overhead, just in case dust or debris falls from the motor unit.
- A Helper (Optional): Having a second person can be helpful to hand you items or test the door from the wall console while you remain on the ladder.
10 Easy Steps on How to Reset Odyssey 1000 Garage Door Opener
This section is the core of the process. We have broken this down into ten detailed steps to ensure you don’t miss a beat. Please read through all the steps before you climb up the ladder.
Step 1: Locate the Motor Head and Program Button
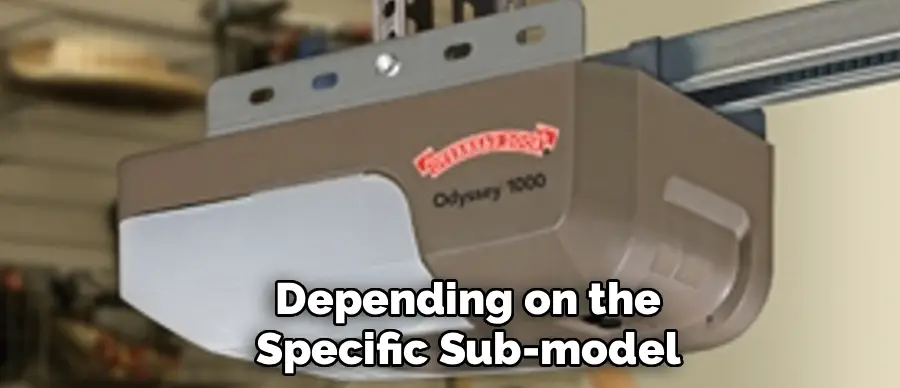
First, set up your stepladder securely under the Odyssey 1000 motor head unit. This is the main box attached to the ceiling of your garage. You are looking for the programming interface, which is typically located on the bottom or the back panel of the unit, depending on the specific sub-model and installation orientation.
Locate the “PROGRAM” button. It is usually a square or rectangular button, often accompanied by LED indicator lights. These lights are crucial as they communicate the status of the opener during the reset process. You might see two LEDs, often labeled as “LONG” and “SHORT” (referring to the LEDs, typically blue and purple). Familiarize yourself with these buttons and lights before proceeding. If it’s too dark, use your flashlight to clearly identify the labels.
Step 2: Clear the Memory (The Reset)
This is the moment where you wipe the slate clean. Press and hold the “PROGRAM” button (sometimes labeled as the “SET” button depending on the version, but usually the main square button) until both LEDs turn blue and then switch off. This usually takes about several seconds.
Continue holding the button. The LEDs might flash or change color. Specifically for the Odyssey 1000, you are generally looking to hold the button until the blue LED lights up and then goes out, or until you see a specific flash pattern indicating the memory is cleared. Consult your specific manual if the light pattern differs, but generally, a long press (10-15 seconds) is the standard method to erase all programmed remote codes. Once the lights go out, release the button. All previous codes are now erased.
Step 3: Prepare to Reprogram the Limits (If Necessary)
Sometimes a hard reset might affect the travel limits (how far the door opens and closes). While a simple code reset usually doesn’t affect limits, it is good to be in “programming mode.” To enter programming mode for limits (if the door isn’t closing all the way), you typically press and hold the PROGRAM button again until the long LED turns blue. Release the button. The long LED should flash purple, indicating the opener is ready to set the open travel limit. If your door is already opening and closing correctly and you only want to erase remotes, you can skip to Step 6. However, for a full factory reset experience, checking limits is recommended.
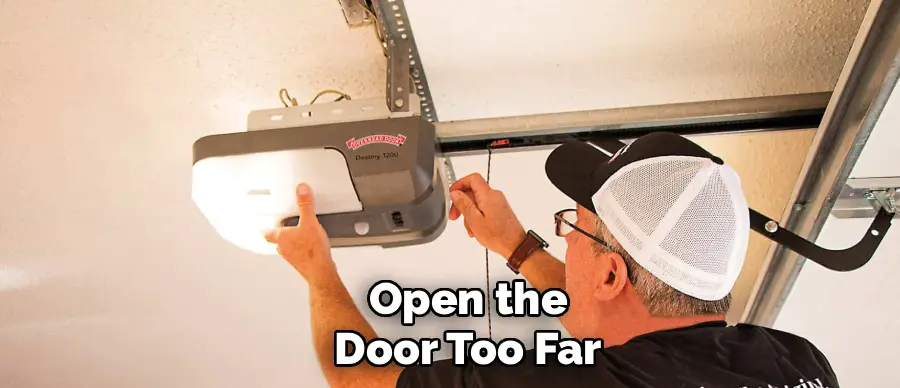
Step 4: Set the Open (Up) Position
If you are resetting limits: With the LED flashing purple, use the “OPEN” and “CLOSE” buttons (usually represented by + and – signs) on the motor unit to jog the door to the desired fully open position. Press and hold the + button to move the door up. Release the button when the door is where you want it to stop when fully open.
Be careful not to open the door too far so that the carriage does not hit the stop bolt. Once you have the door in the perfect open position, press and release the PROGRAM button. The LEDs will change, indicating the open limit is saved.
Step 5: Set the Close (Down) Position
Now, the LED should be flashing purple again (or a different indicator depending on the exact board version), signaling it’s time to set the closed limit. Use the “CLOSE” (-) button to move the door downward. Hold the button until the door touches the ground.
You want the door to seal against the floor, but not push so hard that the rail bows upward. Once the door is resting firmly on the ground, press and release the PROGRAM button again. Both LEDs should light up blue and then turn off, confirming the limits are set.
Step 6: Set the Force Profile
The Odyssey 1000 is smart; it needs to “learn” how much force is required to move your specific door. After setting limits, you usually need to run the door through two full cycles.
Press the wall console button or the button on the motor head to open the door fully. Let it stop on its own. Then, press the button to close it fully. Watch the door carefully. It should move smoothly. Do this one more time (Open and Close). The opener measures the weight and resistance of the door during these cycles and automatically sets the force sensitivity. This is a critical safety feature.
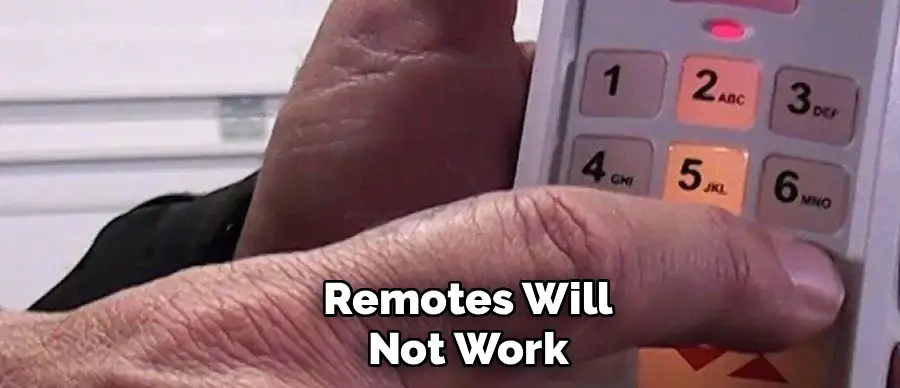
Step 7: Reprogramming Your Remotes
Now that the internal memory is clear and the door limits are set, your remotes will not work. You must re-sync them. Press and hold the PROGRAM button on the motor unit for about 2 seconds until the round LED turns blue (or the long LED, depending on the version). Release the button. The LED should be flashing purple.
Take your remote control. Stand at least 5 feet away from the antenna to prevent signal saturation. Press and release the button on the remote you want to use. The LEDs on the motor unit will verify the signal (usually by turning solid or flashing). Press and release the remote button a second time. The LEDs should flash blue and turn off. Press the remote button a third time; the door should operate. Your remote is now programmed.
Step 8: Reprogramming the Wireless Keypad
If you have a keypad outside, the process is similar but involves a PIN. Press the PROGRAM button on the motor unit again for 2 seconds until the LED turns blue, then release. It will flash purple.
Walk quickly to your keypad. Enter your desired PIN code. Press the Up/Down or Start button on the keypad. The motor unit LEDs will acknowledge the signal. Press the keypad button again. The motor LEDs will confirm. Press the keypad button a third time, and the garage door should move. Note: You typically have a 30-second window to complete this after pressing the button on the motor unit.
Step 9: Reprogramming HomeLink (In-Car Systems)
If your car has built-in buttons (HomeLink), clear the car’s buttons first (usually by holding the two outer buttons for 20 seconds). Then, use a handheld remote you just programmed in Step 7. Hold the handheld remote near your car’s buttons. Press and hold both the remote button and the desired car button simultaneously until the car’s light flashes rapidly.
Once the car learns the remote signal, you likely need to bridge it to the opener. Press the PROGRAM button on the garage motor unit (LED flashes purple). Within 30 seconds, return to your car and press the newly programmed car button three times (hold for 1 second, release, repeat). The door should move.
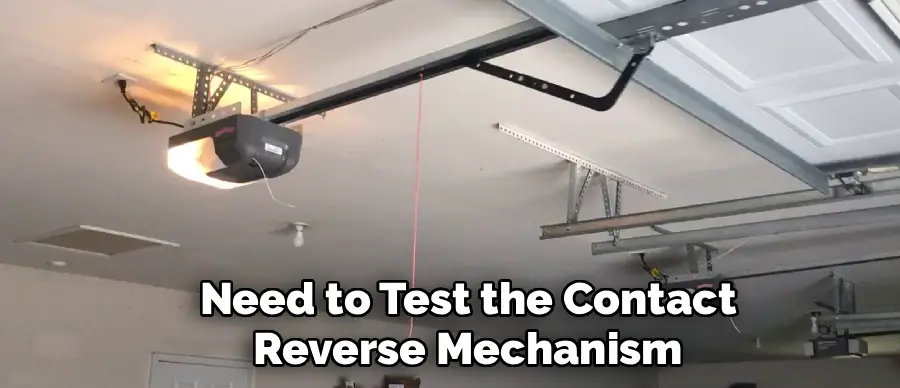
Step 10: Final Safety Test
The final step is the most important for safety. You need to test the contact reverse mechanism. Open the door. Place a 2×4 piece of wood flat on the ground in the center of the door opening. Close the door using your remote.
When the door makes contact with the wood, it must stop and reverse direction automatically. If the door stops but does not reverse, or if it pushes down hard on the wood, you need to revisit the “Close Limit” and “Force Profile” steps. This mechanism prevents injury and property damage, so do not skip this test.
Conclusion
How to reset odyssey 1000 garage door opener is a manageable task that empowers you to take control of your home’s security and functionality.
By following the steps outlined above, you can resolve persistent glitches, ensure that only authorized remotes have access, and keep your system running smoothly.
Remember that regular maintenance, including checking the safety reverse mechanism and keeping sensors clean, will prolong the life of your opener. You now have the knowledge to handle this essential maintenance task, saving you the cost of a service call and providing the peace of mind that your garage is secure.
I am Rick. I grew up helping my dad with his handyman service. I learned a lot from him about how to fix things, and also about how to work hard and take care of business. These days, I’m still into fixing things- only now, I’m doing it for a living.
I’m always looking for new ways to help people grow and develop. That’s why I have created this blog to share all my experience and knowledge so
that I can help people who are interested in DIY repair.