
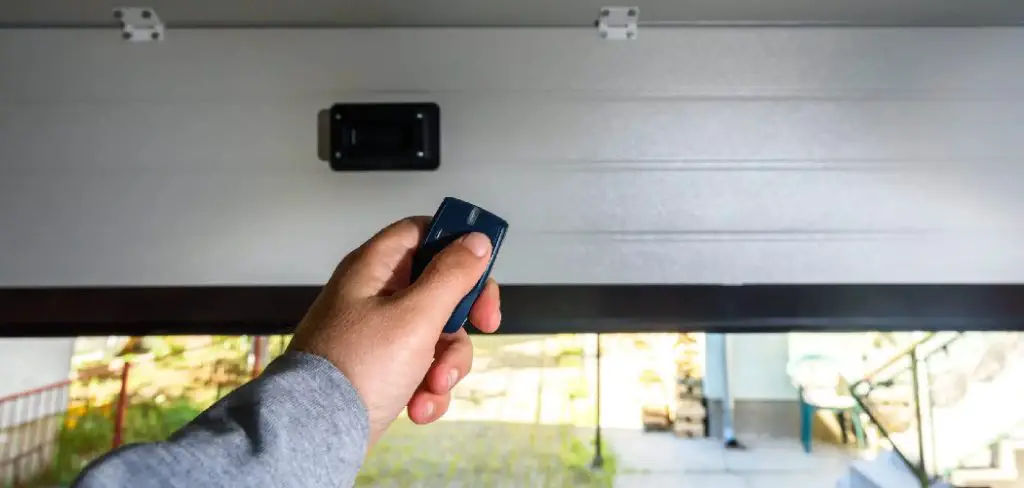
Your garage is more than just a place to park your car or store holiday decorations; it is a primary entry point into your home. While many homeowners obsess over high-tech front door smart locks and security cameras, the humble garage door often gets overlooked. Yet, securing this massive entryway is critical for protecting your family and your belongings.
If you have a manual garage door or a T-handle lock system, knowing exactly how to engage the mechanism correctly is vital. A lock that isn’t fully engaged offers a false sense of security.
This guide on how to lock garage door with handle walks you through the precise process of locking your garage door using the handle, ensuring that your home remains impenetrable to unwanted guests.
What are the Benefits?
Taking the time to properly secure your garage door handle offers several immediate and long-term advantages:
- Enhanced Home Security: The most obvious benefit is deterring break-ins. A physically locked handle engages slide bars that latch into the door track, making it nearly impossible to pry the door open from the outside.
- Protection of Valuables: Garages often house expensive items like vehicles, power tools, bicycles, and lawn equipment. A locked handle acts as the first line of defense for these assets.
- Safety During Power Outages: If you rely solely on an automatic opener to keep your door closed, you might be vulnerable during a blackout. Manual locks provide a mechanical backup that works 100% of the time, regardless of electricity.
- Peace of Mind: Knowing your garage is mechanically secured allows you to sleep better at night and travel without worrying about the vulnerability of your home’s largest entrance.
What Will You Need?
Before you begin, gather the following items to ensure the process goes smoothly. While locking a door seems simple, having maintenance tools on hand can prevent frustration if the mechanism is sticky or old.
- The Correct Key: Ensure you have the specific key for the T-handle or L-handle lock.
- Lubricant: A silicone-based spray or graphite spray (avoid standard WD-40 as it attracts dust) to keep the lock cylinder moving freely.
- A Clean Rag: To wipe away excess grime or lubricant.
- Flashlight: Helpful if you are locking up at night or inspecting the internal slide bars in a dark garage.
- Stiff Brush: To clean any debris from the locking mechanism or handle crevice.
10 Easy Steps on How to Lock Garage Door with Handle
Follow these detailed instructions to ensure your garage door is securely locked.
Step 1: Clear the Threshold and Tracks
Before you even touch the handle, you must ensure the garage door can close completely. A manual lock relies on the door sitting flush against the ground. If there is debris, rocks, leaves, or snow built up on the threshold, the door may not align correctly with the locking slots in the track. Use a broom to sweep the area where the door meets the concrete.
Additionally, inspect the vertical tracks for any obstructions that might prevent the door from lowering fully. If the door isn’t 100% closed, the slide bars connected to the handle won’t line up with the receiver slots, and the lock will not engage.

Step 2: Fully Close the Garage Door
Pull the garage door down until it makes solid contact with the ground. If you have an automatic opener that has been disengaged to use the manual lock, ensure the trolley is completely disconnected so the door moves freely. Apply a small amount of downward pressure on the handle to verify it is seated firmly against the weatherstripping. You want to eliminate any gap at the bottom.
Visually inspect the sides to ensure the rollers are at the bottom of the tracks. This alignment is crucial because the locking mechanism typically extends metal bars into specific holes in the track; if the door is floating an inch off the ground, these bars will hit the metal track instead of the slot.
Step 3: Inspect the Handle Mechanism
Take a moment to look at the T-handle or L-handle on the exterior of the door. Check for signs of rust, damage, or tampering. If the handle feels loose or wobbly before you even insert the key, the internal screws may need tightening from the inside.
A loose handle can make locking difficult because the internal cam won’t rotate efficiently to push the locking bars out. If the keyhole looks packed with dirt or corrosion, use your stiff brush to clean it out. Attempting to force a key into a dirty lock is a recipe for snapping the key off inside the cylinder.
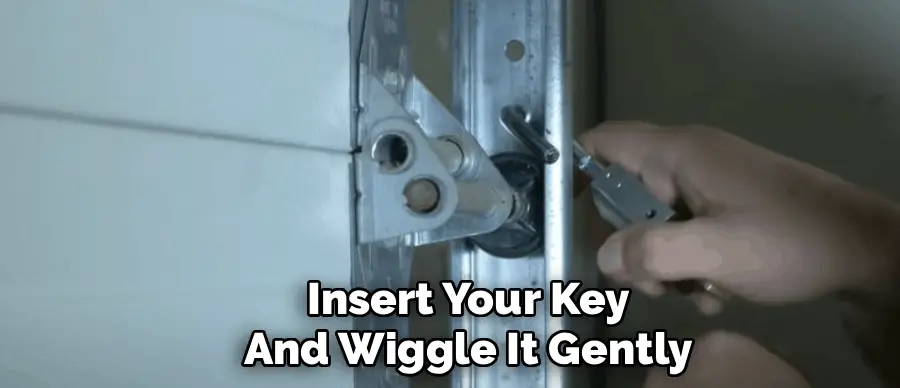
Step 4: Apply Lubricant if Necessary
If the lock hasn’t been used in a while, it will likely be stiff. Before inserting your key, spray a small amount of graphite or silicone lubricant directly into the keyway. You should also spray a little on the shaft of the handle where it enters the door.
Insert your key and wiggle it gently without turning it to distribute the lubricant inside the pins. Remove the key and wipe it off with your rag. This step ensures that the turning action is smooth and prevents stress on the metal key. Smooth operation is key to knowing whether resistance is caused by a jam or just friction.
Step 5: Insert the Key Correctly
Insert your key into the cylinder. Most garage door handles require the key to be vertical or horizontal to enter, depending on the brand. Push the key in firmly until it stops. Do not force it. If it stops halfway, wiggle it slightly as you push.
The key needs to seat fully against the back of the cylinder to engage the tumblers. If the key is not inserted all the way, it will not turn, and applying torque will bend the key. Verify that the key is sitting flush and feels “connected” to the internal mechanism.
Step 6: Rotate the Handle to the ‘Closed’ Position
Depending on your specific mechanism, you may need to turn the handle itself before turning the key, or vice versa. For a standard T-handle, rotate the handle until it is in the vertical position (usually perpendicular to the ground). This action physically moves the internal cables or bars toward the tracks.
You should feel mechanical resistance as the springs stretch and the bars push out. If the handle spins freely with no resistance, the internal cable or bar may be disconnected. The handle must be in this specific orientation for the key lock to engage the cylinder and prevent the handle from turning back.
Step 7: Turn the Key to Lock the Cylinder
With the handle in the closed position, turn the key. Usually, this is a 90-degree or 180-degree turn clockwise. This action drives a locking pin or cam into place, preventing the handle itself from rotating. You should feel a crisp “click” or a definitive stop when the lock engages.
If the key feels spongy or refuses to turn fully, do not use pliers or excessive force. It likely means the handle isn’t fully in the closed position, or the slide bars are hitting an obstruction. Wiggle the handle slightly while maintaining pressure on the key to find the “sweet spot” where the lock slips into place.

Step 8: Verify the Slide Bar Engagement (Audio/Visual Check)
If you are outside, listen closely as you turn the handle and lock it. You should hear the metallic sound of the slide bars (the long metal rods on the inside of the door) shooting through the slots in the vertical track. If you have access to the inside of the garage (via a side door), go inside and visually inspect the lock.
The slide bars should be protruding fully through the track slots. If they are only partially through, the door could still be forced open. This visual confirmation is the only way to be 100% certain that the physical latch is secure.
Step 9: Remove the Key
Once the cylinder has turned fully and the mechanism is locked, rotate the key back to the neutral position required for removal (usually vertical). Pull the key out gently. Sometimes, old locks will try to pull the cylinder core out slightly with the key; use your thumb to hold the lock face in place while you pull the key.
Check the key for any metal shavings, which could indicate the lock is grinding and needs more lubrication for next time. Store the key immediately in a secure place—do not leave it in the lock “for just a second.”
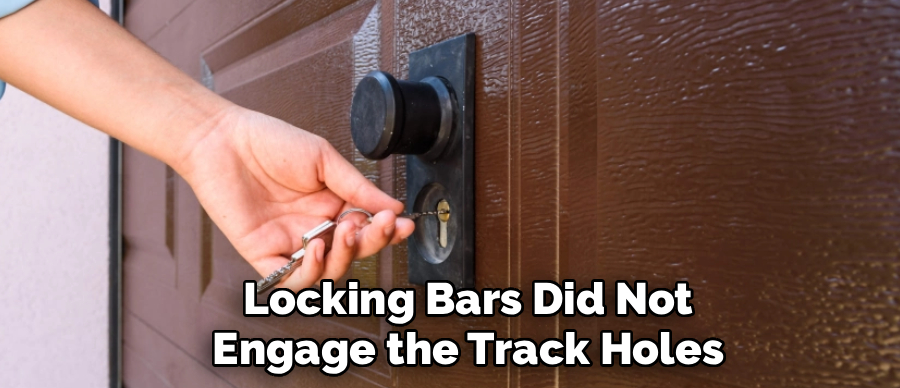
Step 10: Perform the ‘Lift Test’
The final and most important step is the physical confirmation. Stand in front of the garage door, grab the handle, and attempt to turn it. It should be rigid and refuse to rotate. Next, grab the lift handle (usually located near the bottom of the door) or gripping point and try to pull the door upward with moderate force.
The door should not budge more than a fraction of an inch. If the handle turns or the door slides up, the locking bars did not engage the track holes. If this happens, you must start over from Step 2. This “shake down” confirms that your property is truly secure.
5 Things You Should Avoid
To ensure the longevity of your garage door lock and your own safety, avoid these common mistakes:
- Forcing the Key: Never use pliers or excessive force to turn a stuck key. Garage door keys are often made of soft brass and can snap off inside the lock easily, resulting in an expensive locksmith bill.
- Using Oil-Based Lubricants: Avoid using standard oil or grease in the keyhole. These substances trap dirt and grit, which will eventually turn into a sticky paste that jams the tiny pins inside the lock cylinder.
- Ignoring Rust: If you see rust forming on the handle or the locking bars, don’t ignore it. Rust expands metal and increases friction, eventually causing the mechanism to seize permanently. Treat rust immediately with a rust remover.
- Leaving the Door Partially Open: Never attempt to lock the handle while the door is partially open for ventilation. The locking bars will extend and likely hit the track or get bent, damaging the alignment of the entire system.
- Forgetting to Unlock Before Opening: If you have an electric opener, ensure the manual lock is disengaged before running the motor. If you run the opener while the manual lock is engaged, you will strip the opener’s gears or tear the door panel apart.
Conclusion
Securing your garage door with a manual handle is a straightforward yet essential task for home maintenance.
By following these ten steps on how to lock garage door with handle, you ensure that your garage acts as a fortress rather than a vulnerability. Regular inspection, proper lubrication, and the patience to engage the mechanism correctly will extend the life of your lock and provide invaluable peace of mind.
Take a few minutes today to check your handle—your home security depends on it.
I am Rick. I grew up helping my dad with his handyman service. I learned a lot from him about how to fix things, and also about how to work hard and take care of business. These days, I’m still into fixing things- only now, I’m doing it for a living.
I’m always looking for new ways to help people grow and develop. That’s why I have created this blog to share all my experience and knowledge so
that I can help people who are interested in DIY repair.