
A garage door is often the largest moving object in a home, and its safety features are paramount. Among the most critical of these are the safety sensors. These small devices, located near the bottom of the garage door tracks, prevent the door from closing on a person, pet, or object.
If you’ve noticed your garage door reversing unexpectedly or refusing to close, misaligned sensors are a likely culprit. Proper alignment is essential not just for convenience but for the safety and security of your home.
This guide on how to align garage door safety sensors will walk you through everything you need to know to get them working perfectly again.
What are the Benefits?
Keeping your garage door sensors properly aligned offers several significant advantages. The most important benefit is enhanced safety. Correctly aligned sensors create an invisible beam that, when broken, immediately stops and reverses the closing door, preventing potentially serious accidents. This feature is vital for protecting children and pets who may not be aware of the danger.
Beyond safety, you’ll experience smoother and more reliable garage door operation. Misaligned sensors can cause the door to behave erratically, often refusing to close. By ensuring they are aligned, you eliminate a common source of frustration and restore the door’s dependability. This simple maintenance task also helps prevent unnecessary wear and tear on the garage door opener’s motor, which can be strained by repeated, failed attempts to close the door.
What Will You Need?
Before you begin, gathering a few basic tools and materials will make the process much smoother. You likely have most of these items around your home already.
- Screwdriver or nut driver (to loosen sensor brackets)
- Measuring tape
- A level (a small one works best)
- Cleaning cloth or rag
- Mild cleaning solution (like soapy water)
- String or twine (optional, for checking alignment)
- Step ladder (if needed to reach wiring)
10 Easy Steps on How to Align Garage Door Safety Sensors
Follow these detailed steps to diagnose and fix your sensor alignment issues. This process is straightforward and doesn’t require specialized skills, but it’s important to be thorough.
Step 1: Confirm the Problem
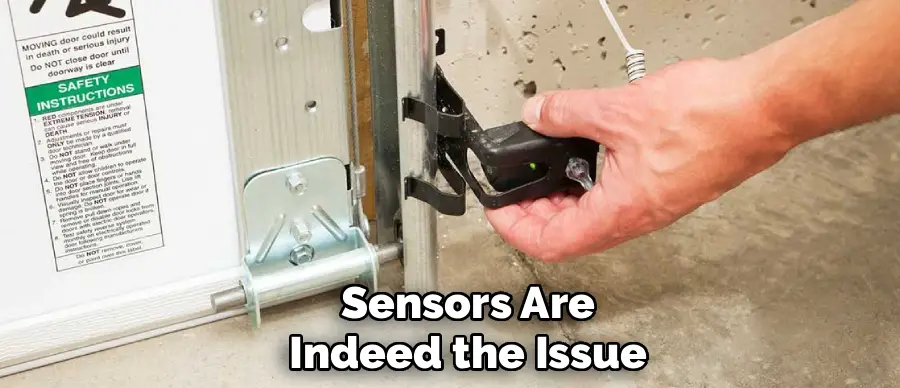
First, verify that the sensors are indeed the issue. A common sign is the garage door starting to close, then stopping and reversing while the opener lights blink. Check the small LED lights on the sensors themselves. The sending sensor usually has a solid amber or yellow light, indicating it has power. The receiving sensor should have a solid green light, which means it is receiving the beam from the sender. If the green light is off, blinking, or flickering, the sensors are likely misaligned or obstructed. This initial check confirms you are on the right track and prevents you from troubleshooting other parts unnecessarily.
Step 2: Cut Power to the Garage Door Opener
Safety should always be your top priority. Before you touch any part of the garage door system, you must disconnect it from its power source. Unplug the garage door opener from the electrical outlet in the ceiling. If the opener is hardwired, you will need to turn off the corresponding circuit breaker at your home’s main electrical panel. This step is non-negotiable, as it eliminates the risk of electric shock and prevents the door from moving unexpectedly while you are working on it. Wait a minute after unplugging to ensure any stored power has dissipated.
Step 3: Clean the Sensor Lenses
Over time, the lenses on your safety sensors can become covered with dust, dirt, cobwebs, or even condensation. This buildup is enough to obstruct the infrared beam and trick the system into thinking something is blocking the door’s path. Take a soft, clean cloth and gently wipe the lens of each sensor. For stubborn grime, you can lightly dampen the cloth with a mild cleaning solution. Be sure to dry the lenses completely afterward. This simple act of cleaning can sometimes resolve the problem entirely without needing any further adjustments.
Step 4: Inspect for Obstructions
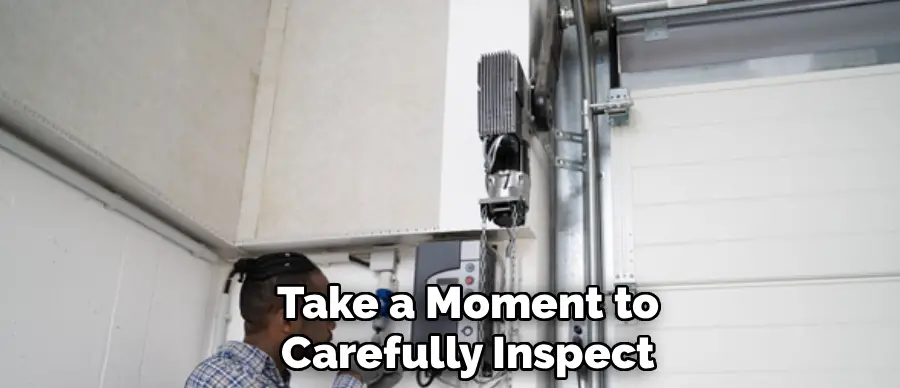
Take a moment to carefully inspect the area between the two sensors. Anything that breaks the invisible beam will prevent the door from closing. Common culprits include stray garden tools, storage boxes, children’s toys, or even overgrown plants near the garage opening. Remove any items that are blocking the direct line of sight between the sender and the receiver. It’s a good practice to keep the area along the garage door threshold clear at all times to ensure the sensors can function as intended.
Step 5: Check the Sensor Brackets
The sensors are mounted on metal brackets attached to the garage door tracks. These brackets can get bumped or knocked out of position. Visually inspect each bracket to see if it is loose, bent, or damaged. Gently try to wiggle each sensor; if it moves easily, the mounting hardware has likely become loose. A bent bracket will make it impossible to achieve proper alignment, so if you notice one is damaged, you will need to carefully bend it back into its correct shape or replace it.
Step 6: Loosen the Receiving Sensor
Using a screwdriver or nut driver, slightly loosen the mounting bolt or screw on the bracket of the receiving sensor (the one with the green light). You don’t need to remove the screw completely—just loosen it enough so that you can pivot the sensor up, down, and side-to-side by hand. This will allow you to make small, precise adjustments to its position. By focusing on the receiving sensor first, you can adjust it until it “finds” the beam from the stationary sending sensor.
Step 7: Adjust the Sensor’s Position
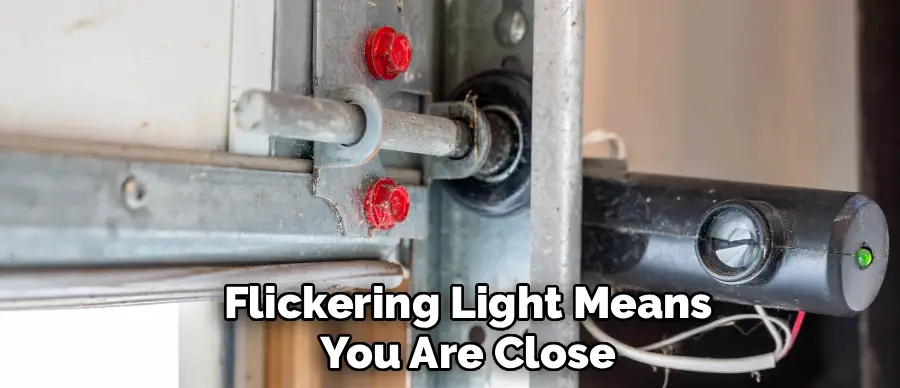
Now, begin adjusting the sensor. While watching the green LED light on the receiver, slowly move the sensor by hand. Pivot it up and down, then left and right. Your goal is to find the “sweet spot” where the green light turns on and stays solid. This indicates that the receiver is picking up a strong, uninterrupted signal from the sending sensor. This part of the process requires patience. Make small, deliberate movements until the light is steady. A flickering light means you are close but not perfectly aligned.
Step 8: Verify Height and Level
Once the green light is solid, it’s important to verify the sensors’ height. According to federal law, safety sensors should be installed no higher than six inches from the garage floor. Use your measuring tape to check the height of each sensor. Both should be at the same height. You can also use a level to ensure the sensors are not tilted up or down, as they need to point directly at each other. A string tied from one sensor to the other can also be a great visual aid to confirm they are aimed correctly.
Step 9: Tighten the Sensor and Test
After you have a solid green light and have confirmed the height and level, it’s time to secure your adjustment. Carefully hold the sensor in its perfect position with one hand and use your screwdriver to tighten the mounting bolt with the other. Be careful not to bump the sensor while tightening it, as this could undo your work. Once it’s secure, check that the green light is still solid.
Step 10: Restore Power and Test the Door
With the sensors aligned and secured, you can now restore power to the system. Plug the garage door opener back into the outlet or flip the circuit breaker back on. To test, press the button to close the garage door. It should now close smoothly without reversing. For a final safety check, test the sensors themselves. As the door is closing, wave an object (like a broom handle) in front of one of the sensors. The door should immediately stop and reverse.

5 Things You Should Avoid
- Forgetting to Disconnect Power: Never work on any component of your garage door opener without first unplugging it or turning off the breaker. This is a critical safety step.
- Over-tightening the Brackets: When you secure the sensors, tighten them just enough to be firm. Over-tightening can strip the screws or damage the plastic housing of the sensor.
- Ignoring Damaged Wiring: While inspecting the sensors, check the wires leading to them. If you see frayed, pinched, or disconnected wires, this is a separate issue that needs to be repaired.
- Bypassing the Sensors: Do not permanently bypass or disable the safety sensors. They are a crucial safety feature required by law to prevent serious injury or death.
- Assuming the Problem is Always Alignment: While misalignment is a common culprit, the issue could also be faulty sensors, wiring problems, or an issue with the opener’s logic board. If alignment doesn’t work, further diagnosis may be needed.
Frequently Asked Questions
- Why Are the Lights on My Garage Door Sensors Blinking?
A blinking light on a garage door sensor typically indicates a problem with alignment or an obstruction. The sending sensor’s light may blink if it has a wiring issue, while the receiving sensor blinks when it cannot detect the infrared beam. Start by clearing any obstructions and attempting to realign them to see if the blinking stops and the light becomes solid. - Can I Replace Just One Garage Door Sensor?
It is generally recommended to replace both sensors as a pair. Sensors are sold in kits containing a sender and a receiver designed to work together. Using a new sensor with an old one can sometimes lead to compatibility issues. Replacing both ensures they are perfectly matched and functioning correctly for maximum safety and reliability. - How Often Should I Check My Garage Door Sensors?
You should test your safety sensors at least once a month. The test is simple: start closing the garage door and then place an object (like a paper towel roll) under it. The door should reverse automatically. This quick check ensures your sensors are working correctly and helps keep your home and family safe from potential accidents.
Conclusion
Your garage door’s safety sensors are a small but mighty part of your home’s safety system. Keeping them properly aligned is a simple and effective way to ensure your garage door operates reliably and, more importantly, safely.
By following the steps outlined in this guide, you can confidently tackle this common issue yourself, saving time and money while gaining peace of mind. Regular checks and maintenance will ensure this essential feature continues to protect you and your family for years to come.
Hopefully, this guide on how to align garage door safety sensors has provided you with the knowledge and skills to keep your garage door sensors in top working condition.
I am Rick. I grew up helping my dad with his handyman service. I learned a lot from him about how to fix things, and also about how to work hard and take care of business. These days, I’m still into fixing things- only now, I’m doing it for a living.
I’m always looking for new ways to help people grow and develop. That’s why I have created this blog to share all my experience and knowledge so
that I can help people who are interested in DIY repair.