The integrated garage door opener system in a Mercedes-Benz is a hallmark of the brand’s commitment to luxury, convenience, and seamless technology. This built-in feature, typically located discreetly on the rearview mirror, offers effortless access to your home, eliminating the clutter and insecurity of loose remotes.
While this system is designed for years of flawless operation, there are common situations where performing a “reset” becomes necessary. You may be preparing to sell the vehicle, moving to a new home with a different garage, or simply troubleshooting a button that has stopped working correctly.
This guide is designed to walk you through the simple, straightforward process of managing this feature. It may sound technical, but the procedure is user-friendly and requires no special tools. Learning how to reset mercedes garage door opener systems is a quick task that any owner can perform to ensure their home’s security is protected and to restore the system’s functionality, allowing them to fully enjoy the convenience and elegance of their vehicle’s integrated technology.

Understanding Your Mercedes-Benz Garage Door Opener System
Before diving into the steps, it is helpful to have a basic understanding of the technology you are working with. This knowledge will clarify the purpose of each step in the process and make troubleshooting easier should you encounter any issues. The system consists of the transmitter in your car and the receiver on your garage door motor.
The Integrated Buttons
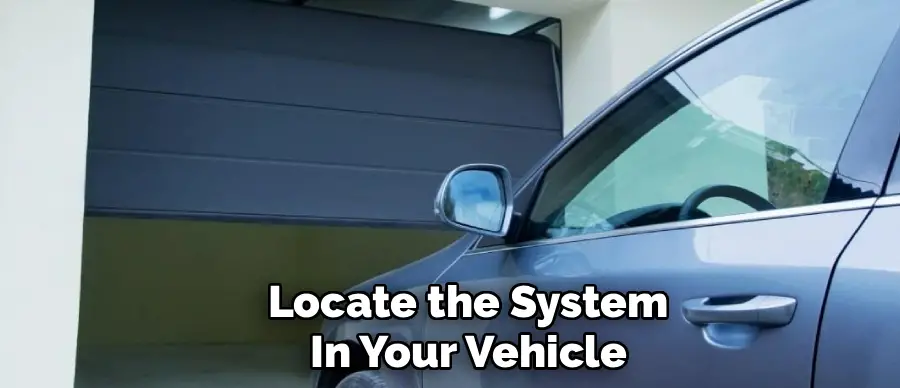
First, locate the system in your vehicle. In nearly all modern Mercedes-Benz models, the garage door opener consists of three small, programmable buttons located on the underside of the interior rearview mirror. These buttons are part of a powerful, built-in radio-frequency (RF) transmitter. It is a “learning” device, meaning its primary function is to listen to, capture, and then perfectly replicate the signal from your existing handheld remote control for your garage door, security gate, or other compatible device. An indicator light next to the buttons provides crucial feedback during the reset and programming process.
Rolling Code vs. Fixed Code Technology
This is the most critical concept to grasp, as it explains why an extra step is often required. Older garage door openers (typically pre-1995) used “fixed code” technology, where the remote sent the same exact signal every time. This was simple but not secure.
To combat this vulnerability, all modern garage door openers use “rolling code” technology. This advanced security feature uses an encrypted algorithm that changes the access code every single time you press the button. The opener’s motor is programmed to only accept the next code in that unique, synchronized sequence. This makes it virtually impossible for anyone to intercept and reuse your signal. This distinction is vital because while the initial programming step is the same for both types, rolling-code systems require a final synchronization step using the “Learn” button on the motor unit itself to finalize the secure connection.
Why and When to Perform a Reset
A full system reset is not something you will need to do often, but it is an essential procedure for a few key scenarios. Understanding why it’s necessary will reinforce the importance of the process.
For Security Reasons
The most critical reason to perform a reset is for security when you are no longer in possession of the vehicle. Before selling or trading in your Mercedes-Benz, clearing the system’s memory is a vital step. If you fail to do this, the new owner will have a fully functional remote control for your garage door, community gate, and any other devices you programmed. Taking 30 seconds to perform the reset protects your home and provides invaluable peace of mind.
For Troubleshooting or Reprogramming
A full reset is the best starting point when you are experiencing issues or setting up a new device. If you have installed a new garage door opener at your home, or if one of the integrated buttons is not functioning correctly, a reset provides a “clean slate.” It removes any old, corrupted, or conflicting codes from the system’s memory, ensuring a fresh and successful reprogramming experience.

Preparation: What You Need Before You Start
A smooth and efficient process begins with having all the necessary items ready before you begin. A few moments of preparation will save you time and prevent any mid-process scrambling.
Your Original Remote and a Ladder
To program the system after a reset, you will need your original, working handheld remote control for the garage door opener. The vehicle’s system learns by copying the signal from this remote, so it must have a fresh battery and be fully functional. If you have a modern rolling-code opener (which is almost certain), you will also need a sturdy and secure ladder or step stool. This is to provide safe access to the “Learn” button located on the opener’s motor unit, which is typically hanging from the ceiling in your garage.
Positioning Your Vehicle
For the best results during the reprogramming phase, park your Mercedes-Benz outside of the garage, with the front of the vehicle facing the garage door. This ensures a strong, clear signal path between the transmitter in your rearview mirror and the receiver on the garage door motor. It also prevents the risk of the door accidentally closing on your vehicle during the process.

How to Reset Mercedes Garage Door Opener: The Clearing Process
This is the primary instructional part of the guide, focusing on how to wipe the system’s memory clean. This is the “reset” itself. The procedure is simple and consistent across nearly all Mercedes-Benz models.
Step 1: Turn the Ignition On
Get into your vehicle and turn the ignition to the “On” position. This is typically position 2 of the ignition, where the dashboard lights and electronics become active. The engine does not need to be running for this process, but the vehicle’s electrical system must be powered on to supply energy to the integrated remote module in the mirror.
Step 2: Press and Hold the Two Outer Buttons
Now, direct your attention to the three buttons on the underside of your rearview mirror. To perform the master reset, you will need to simultaneously press and hold the far-left button (button 1) and the far-right button (button 3). Ignore the middle button for this procedure.
Step 3: Watch the Indicator Light
You must continue to press and hold both outer buttons down firmly. This is a timed process that takes approximately 20 to 30 seconds. As you hold the buttons, observe the small LED indicator light on the mirror. The light will turn on (often yellow or amber) and stay solid for several seconds. You must continue holding the buttons until the light’s behavior changes.
Step 4: Confirm the Memory is Cleared
The confirmation that the reset has been successful is a change in the indicator light. After holding the buttons for 20-30 seconds, the solid light will change to a rapidly flashing light (often green). This rapid flashing is the signal that all previously stored signals and pairings have been successfully erased from the system’s memory. Once you see this rapid flashing, you can release both buttons. The system has now been reset to its factory default state and is ready to be reprogrammed.

Reprogramming a Button After the Reset
With the system’s memory cleared, your mirror buttons are now blank. You must teach the system the new signal you want it to use. This section details that straightforward learning process.
Choose a Button and Enter Learning Mode
First, decide which of the three buttons you want to program for your garage door. To begin, press and hold this chosen button. As you hold it, the indicator light on the mirror will begin to flash slowly (typically amber). This slow flash indicates that the button is in “learning mode” and is actively listening for a new RF signal to copy. Do not release the button yet.
Transmit the Remote’s Signal
While you are still holding down the button on the mirror, take your original handheld remote control for the garage door. Hold it approximately 1 to 3 inches away from the rearview mirror. Now, press and hold the button on your handheld remote. This will transmit its signal directly to the learning receiver in your car’s mirror.
Confirm the Signal is Learned
You must continue holding both buttons down—the one on the mirror and the one on your handheld remote. After a few seconds, you will see the indicator light on the mirror change its behavior. It will change from a slow flash to either a rapid flash or a solid green light. This change is the confirmation that your vehicle has successfully learned and stored the signal from your handheld remote. You can now release both buttons.
The Final Sync for Rolling-Code Systems
Now, test the button. Press and release the mirror button you just programmed. If your garage door begins to move, you have an older fixed-code opener, and you are done. However, if the door does not move, it simply means you have a modern rolling-code system that requires the final synchronization step. To complete this, use your ladder to safely access the garage door motor unit. Locate the “Learn” or “Smart” button on the unit.
Press and release this button once. An LED on the motor will usually light up, indicating it is in pairing mode for about 30 seconds. Quickly and safely return to your car and press the newly programmed mirror button two or three times. The garage door should now activate, confirming the secure rolling-code link is complete.
Troubleshooting Common Programming Issues
While the process is highly reliable, a few common snags can occur. If you run into a problem, one of these simple fixes will likely solve it.
The Mirror Light Won’t Change to a Rapid Flash
If you are holding both the remote and the mirror button, but the indicator light on the mirror never changes from a slow flash to a rapid/solid one, the system is not learning the code. The most common cause is a weak signal from your handheld remote. The first and easiest troubleshooting step is to install a fresh battery in your handheld remote. A weak battery is the number one cause of training failure. If a new battery doesn’t work, try experimenting with the distance, holding the remote anywhere from one inch to a foot away from the mirror.
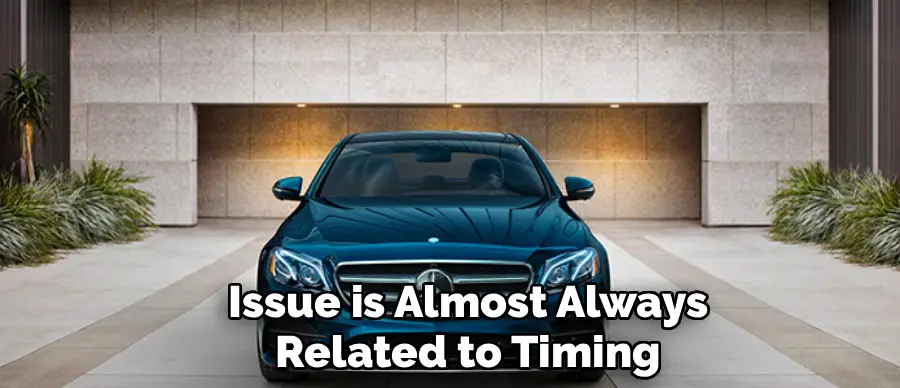
The “Learn” Button Step Isn’t Working
If you have successfully trained the mirror button, but it will not sync with the motor unit in the final step, the issue is almost always related to timing or brand-specific protocols. First, remember the strict 30-second time limit after pressing the “Learn” button. If it still fails, it is worth consulting your garage door opener’s user manual. Some brands may have a slightly different procedure for this final sync step, such as requiring you to hold the button in the car instead of pressing it multiple times.
Tips for European Garage Door Openers
For owners in Europe, it is worth noting a potential compatibility issue that can arise, as the technology standards can differ from those in North America.
Frequency Differences
European garage door systems sometimes operate on a different frequency band than those in North America. The integrated remote in your Mercedes-Benz is designed to be compatible with the vast majority of modern systems, but in rare cases, a specific European opener may not be compatible. If you have repeatedly failed to program the system despite following all the steps correctly, it may be worth contacting your garage door opener manufacturer to confirm that its signal is compatible with your vehicle’s integrated remote system.
Conclusion
The integrated garage door opener in your Mercedes-Benz is a feature designed for ultimate convenience and a clean, uncluttered interior. Knowing how to manage this system is a simple yet valuable skill for any owner. The reset process is a straightforward matter of clearing the system’s memory by holding the two outer buttons, providing a secure, clean slate whenever needed. Reprogramming is just as easy, allowing you to quickly sync your vehicle with a new home or a new garage door opener.
By following the steps outlined in this guide, you can confidently handle any situation that requires you how to reset mercedes garage door opener systems. This empowers you to maintain your home’s security, troubleshoot common issues, and ensure your vehicle’s advanced features are always working perfectly to suit your needs, adding to the pleasure and convenience of the Mercedes-Benz ownership experience.
I am Rick. I grew up helping my dad with his handyman service. I learned a lot from him about how to fix things, and also about how to work hard and take care of business. These days, I’m still into fixing things- only now, I’m doing it for a living.
I’m always looking for new ways to help people grow and develop. That’s why I have created this blog to share all my experience and knowledge so
that I can help people who are interested in DIY repair.