Is your garage floor slowly disappearing under a mountain of muddy boots, stray sneakers, and gardening clogs? You are not alone. The garage often becomes the default dumping ground for footwear that doesn’t quite make it inside the house, leading to clutter and tripping hazards. Organizing this chaos doesn’t require an expensive custom closet system or a professional carpenter. In fact, learning how to build shoe rack in garage spaces is one of the most rewarding and accessible DIY projects for beginners.
This project is designed to be simple, sturdy, and functional. By using basic lumber and standard tools, you can create a custom storage solution that fits your specific space and needs. Whether you have a small corner or a large wall to work with, a homemade rack keeps your footwear organized, aired out, and off the damp concrete floor. In this guide, we will walk you through the entire process, from gathering materials to the final assembly, ensuring you have the confidence to tackle this build and reclaim your garage floor.

Why Build a Garage Shoe Rack?
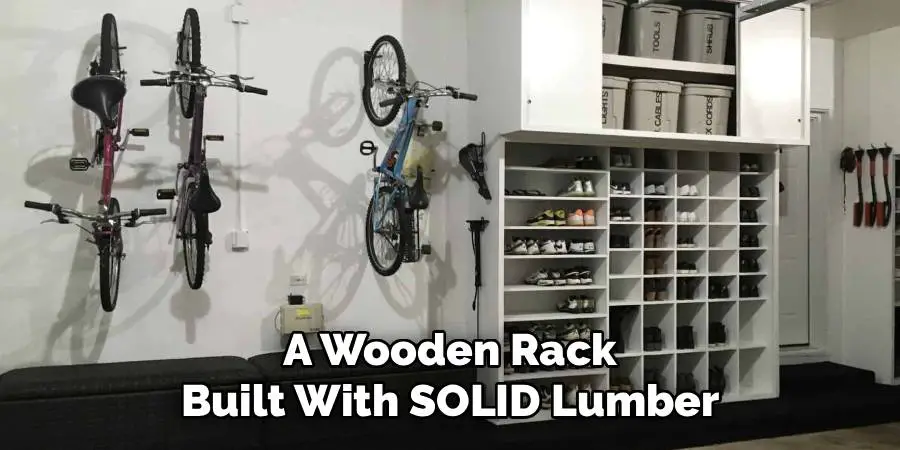
Building your own storage solution offers significant advantages over buying a flimsy, pre-made plastic unit. First and foremost, durability is key in a garage environment. Garages experience temperature fluctuations, humidity, and plenty of dust. A wooden rack built with solid lumber can withstand these harsh conditions far better than particleboard or weak metal wire. You can choose pressure-treated wood or seal your creation to protect it from moisture and mud, ensuring it lasts for years.
Furthermore, a DIY approach allows for complete customization. Commercial racks often come in standard sizes that might not fit your specific boots or high-top sneakers. When you build it yourself, you control the dimensions. You can adjust the shelf height to accommodate tall rain boots, make it wide enough for the whole family’s collection, or design it to fit perfectly into that awkward recess by the door. This level of personalization maximizes your vertical storage space and keeps your garage looking tidy and intentional.
Step-by-Step Guide on How to Build Shoe Rack in Garage
Building your own rack is a straightforward process that requires patience and precise measuring. Follow these steps to construct a durable and practical unit that will serve your family for years.
Step 1: Measure Your Available Space
Before you buy a single piece of wood, you must determine exactly where your new storage unit will live. Grab a tape measure and assess the area where you plan to install the rack. Measure the width, depth, and height of the space, taking note of any obstructions like outlets, pipes, or baseboards that might affect the design. It is crucial to leave enough clearance for you to walk past the rack easily, especially if your car is parked nearby. Drafting a quick sketch with these dimensions will act as your roadmap, preventing costly mistakes and ensuring that your final project fits perfectly into its designated spot.
Step 2: Gather Materials and Tools
Once you have your dimensions, head to the hardware store to pick up your supplies. For a standard, sturdy rack, you will typically need 2×4 lumber for the frame and legs, and either plywood or 1×12 boards for the shelves. You will also need box of 2 ½-inch wood screws to hold everything together securely. In terms of tools, a circular saw or miter saw is ideal for cutting the wood, but a handsaw works if you are willing to put in some elbow grease. Don’t forget a power drill, a measuring tape, a speed square for marking straight lines, and some sandpaper to smooth out rough edges.

Step 3: Cut the Lumber to Size
With your materials on site, it is time to start cutting the wood according to your design sketch. Start by cutting the four vertical legs from your 2×4 stock to your desired height. Next, cut the horizontal supports and the shelving planks to match the width of your space. Consistency is vital here, so measure twice before making any cuts to ensure all matching pieces are exactly the same length. If you are using plywood for shelves, you might need to rip it down to the correct depth. Sand the cut ends immediately to remove splinters, making the assembly process safer and giving your finished rack a more professional appearance.
Step 4: Assemble the Side Frames
The structural integrity of your rack relies on strong side frames. Lay two of your vertical legs flat on the ground, parallel to each other. Place the shorter horizontal supports across them at the heights where you want your shelves to sit. Use your speed square to ensure everything is perfectly aligned at ninety-degree angles. Drill pilot holes through the supports into the legs to prevent the wood from splitting, then drive in your screws. Repeat this entire process for the second side frame, ensuring that the shelf supports are at the exact same height as the first one so your shelves will be level.
Step 5: Connect the Sides with Shelves
Now you will begin to see the structure take shape. Stand your two side frames upright—you might need a helper to hold them steady for this part. Place your bottom shelf plank across the lowest rung of supports. Check that it is square with the frame and flush with the edges. Drill pilot holes and screw the shelf down into the supports. Once the bottom shelf is secure, the unit should stand on its own, making it easier to attach the remaining shelves. Work your way up, attaching each plank securely. This is the core of how to build shoe rack in garage storage that is stable and reliable.

Step 6: Add Support and Stability
Depending on the width of your rack, the shelves might sag in the middle over time, especially when loaded with heavy work boots. To prevent this, measure the distance between the bottom and top shelves in the center of the rack. Cut a piece of 2×4 to this length to serve as a central support pillar. Slide it into place at the back of the rack, centered between the side frames, and screw it into each shelf from the back or underside.
Frequently Asked Question
What Is The Best Wood To Use For A Garage Shoe Rack?
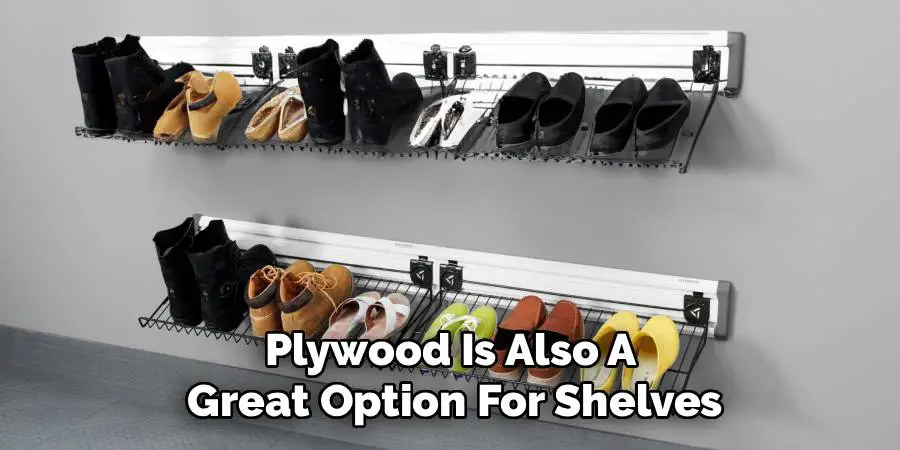
For a garage shoe rack, softwood lumber like pine or fir is an excellent, cost-effective choice. Standard construction-grade 2x4s and pine boards are sturdy enough to hold heavy boots and are easy to work with. If your garage is particularly damp or you live in a humid climate, consider using pressure-treated lumber or cedar, as these woods have natural resistance to rot and moisture. Plywood is also a great option for shelves because it is flat and strong, though you will want to seal the edges to prevent peeling.
How Deep Should A Shoe Rack Be?
The ideal depth for a shoe rack is typically between 12 and 14 inches. This depth is sufficient to accommodate most standard shoe sizes without them hanging over the edge significantly. If you have particularly large feet or plan to store oversized work boots, you might want to increase the depth to 16 inches. However, try to avoid making it deeper than necessary, as a rack that sticks out too far can encroach on your parking space or walkway, making the garage feel cramped.
How Much Space Should I Leave Between Shelves?
The spacing between shelves depends on the type of footwear you plan to store. For standard sneakers, flats, and loafers, a vertical gap of 6 to 7 inches is usually sufficient. For hiking boots or high-top sneakers, you will likely need 8 to 10 inches of clearance. If you have tall rain boots or snow boots, plan for at least one shelf with 12 to 14 inches of height, usually at the bottom. Adjustable shelving or varying the heights of fixed shelves gives you the most flexibility.
Do I Need To Use Slatted Shelves For Boots?
While solid shelves work fine, slatted shelves are often better for garage storage, especially for muddy or wet boots. Leaving small gaps between the boards allows for better air circulation, which helps wet soles dry faster and prevents mold or mildew growth. Additionally, slats allow dried mud and dirt to fall through to the floor, where it can be easily swept away, rather than accumulating on the shelf itself. This design keeps your rack cleaner and your shoes fresher.
Can I Build A Shoe Rack Without Power Tools?
Yes, it is entirely possible to build a simple shoe rack without power tools, though it will take more physical effort. You can use a handsaw to cut your lumber to size and a manual screwdriver to assemble the pieces. However, using a power drill to make pilot holes is highly recommended to prevent the wood from splitting, which is difficult to do by hand. If you don’t own a saw, many large hardware stores will cut lumber to your specified dimensions for free or a small fee, leaving you with just the assembly work.
Conclusion
Organizing your garage doesn’t have to be an overwhelming chore or an expensive renovation. By taking the time to construct your own shoe storage, you create a solution that is tailored specifically to your family’s needs and your available space. You have learned how to build shoe rack in garage environments using simple materials and basic techniques, transforming a pile of clutter into a neat, accessible display.
This project not only protects your footwear and clears your floor but also gives you a sense of accomplishment every time you park the car. With your new rack in place, muddy boots have a home, tripping hazards are gone, and your garage is one step closer to being the organized, functional space you want it to be. So grab your tape measure, head to the lumber yard, and get ready to build something useful that will last for years to come.
I am Rick. I grew up helping my dad with his handyman service. I learned a lot from him about how to fix things, and also about how to work hard and take care of business. These days, I’m still into fixing things- only now, I’m doing it for a living.
I’m always looking for new ways to help people grow and develop. That’s why I have created this blog to share all my experience and knowledge so
that I can help people who are interested in DIY repair.