
How to change a garage door opener battery is an essential article for anyone with a garage door opener. Replacing the battery is a simple process that can be done in less than 10 minutes. In this article, we will walk you through the steps of changing the battery in your garage door opener. We will also provide some tips for making the process easier. Changing the battery in your garage door opener is a quick and easy way to ensure that your opener is working correctly. Let’s get started!
A garage door is a large and essential piece of equipment for your home. Therefore, it is important to ensure that your garage door opener is in good working order. One way to do this is to change the battery in your garage door opener. A new battery can help keep your opener running smoothly and ensure that it is ready to open your garage door when you need it.
Signs That Your Garage Door Opener Batteries Are Dead
Garage door openers use batteries to power the remote control. If you notice that your garage door opener is not responding when you push the button, or if it takes longer than normal for the door to open, your battery may be dead.
Here are a few signs that your garage door opener battery might be dead:
-Your garage door opener does not respond when you push the button.
-It takes longer than usual for the garage door to open.
-The red light on the garage door opener flashes continuously.
-The garage door opens and closes slowly.
What You’ll Need:
A Screwdriver:
The first thing you will need is a screwdriver. Depending on your garage door opener model, you may need either a flathead or Phillips head screwdriver. Make sure to check the manual or look closely at the screws on your opener to determine which type of screwdriver you will need.
A Replacement Battery:
Next, you will need a replacement battery for your garage door opener. Most garage door openers use a 3-volt lithium battery, but it’s always best to check the manual or consult with a professional to ensure you have the correct battery for your specific model.
A Ladder:
You will also need a ladder to reach the garage door opener. Make sure that your ladder is stable and secure before climbing up to access the opener.
Optional: A Helper:
While changing the battery can typically be done on your own, having someone to hold the ladder or hand you tools can make the process smoother and safer. If possible, enlist the help of a friend or family member.
A Step-by-Step Guide on How to Change a Garage Door Opener Battery
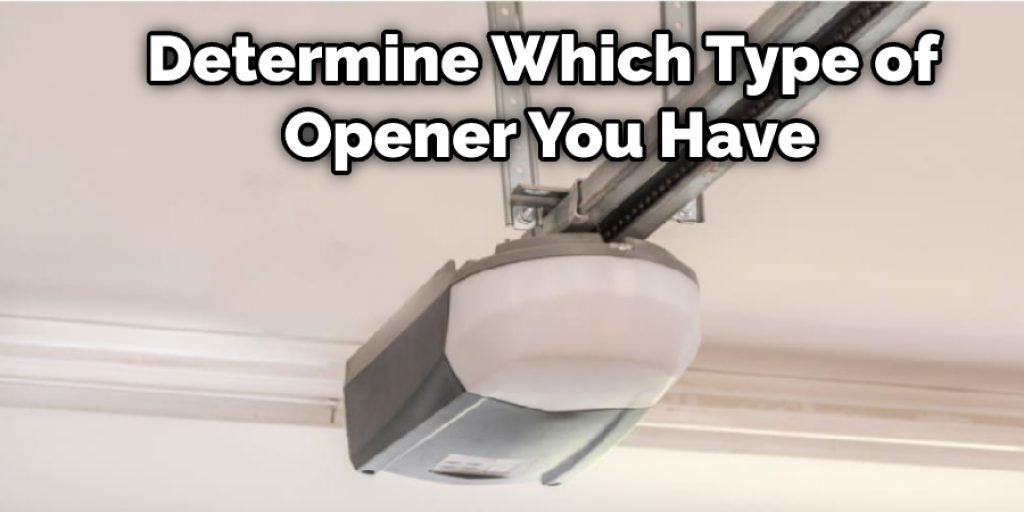
Step 1: Determine What Type of Garage Door Opener You Have
There are a few different types of garage door openers, and each one has its specific battery. Before you can charge the battery, you need to determine which type of opener you have. There are several ways to do this:
– Look for a sticker on the motor unit that will identify the brand and model of your garage door opener
– If there is no sticker, try to find the name or logo of the company that made your opener online
– If all else fails, remove the cover of your motor unit and take a picture or write down the make and model number
Step 2: Determine Battery Type
To determine the battery type, you will need to look at it. There are generally two types of batteries – lead-acid and nickel-cadmium. Lead-acid batteries are usually found in cars, while nickel-cadmium batteries are used in various applications, including garage door openers.
Once you have determined the battery type, you can purchase a replacement battery from a local store or online. Be sure to get the correct type of battery for your opener!
In some cases, the battery may be rechargeable. If this is the case, you can plug it into an outlet and allow it to charge overnight. Then, unplug it and continue with the next step once it is fully charged.
Step 3: Remove the Cover
Garage door openers usually have a cover that can be removed to access the battery. The cover will be held in place by screws or bolts. Use a screwdriver or wrench to remove the screws or bolts and set them aside.
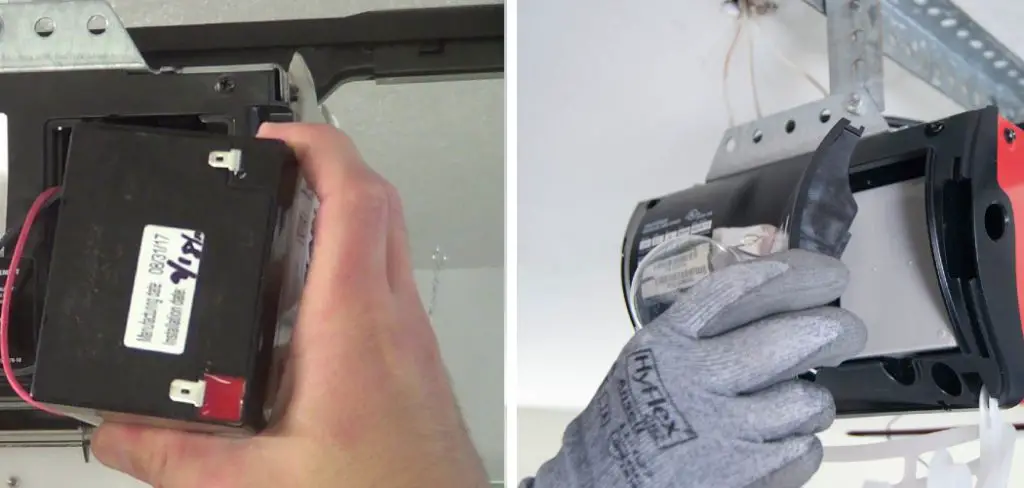
Once the cover is removed, you will be able to see the battery. Carefully remove it using pliers or your hands. If it is too tight, use a Torx wrench to loosen it. Be sure to wear safety glasses during this step if any acid from the battery leaks out.
Step 4: Disconnect Battery Cables
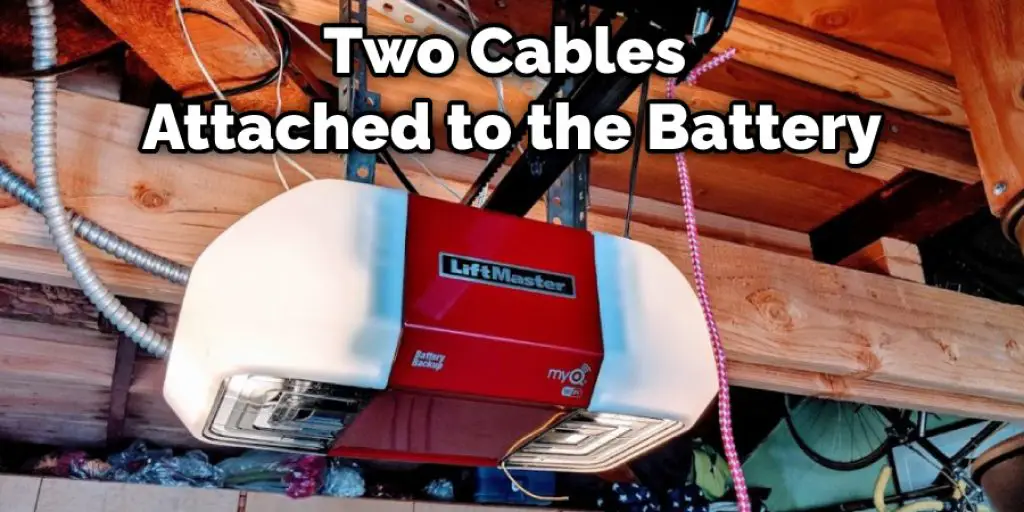
There will be two cables attached to the battery – a positive cable and a negative cable. Disconnect the negative cable first by loosening the clamp with pliers. DO NOT remove the clamp entirely – loosen it enough to remove the cable.
Once the negative cable is disconnected, disconnect the positive cable simultaneously. Be very careful not to touch the battery terminals with metal objects, as this could cause a spark and create a dangerous situation.
Step 5: Remove the Old Battery
Now, it’s time to remove the old battery. This can be a little tricky, so follow the specific instructions for your garage door opener.
– For lead-acid batteries, use pliers to disconnect the negative terminal (black) and then the positive terminal (red)
– For nickel-cadmium batteries, use a Torx wrench to remove the four screws that hold the battery cover in place
Once you have removed the old battery, set it aside and prepare to install the new one.
Step 6: Install the New Battery
It’s now time to install the new battery. Again, follow the specific instructions for your garage door opener.
– For lead-acid batteries, connect the positive terminal (red) first and then the negative terminal (black)
– For nickel-cadmium batteries, install the four screws that hold the battery cover in place and then connect the positive and negative terminals
Once the battery is installed, reconnect the clamp on the negative cable and the positive cable. Be sure to tighten them securely.
Step 7: Test Your Garage Door Opener
After replacing the battery, it is essential to test your garage door opener. To do this, open and close the garage door a few times. If it is working correctly, you will hear a clicking noise. If you do not hear a clicking noise, the battery is not installed correctly, or there is another problem with your garage door opener. In this case, you will need to troubleshoot the issue. These steps will help you change a garage door opener battery.
Step 8: Reattach the Cover
If everything is working correctly, reattach the cover of your garage door opener. Use a screwdriver or wrench to tighten any screws or bolts that hold the cover in place. Be sure to double-check that the opener is functioning correctly before using your garage door regularly. You can also refer to the manual for any additional instructions or recommendations. It is always best to keep the manual handy in case you need to refer to it for any future maintenance or repairs. Congratulations, you have successfully changed your garage door opener battery!
Following these steps will help you to successfully change the battery in your garage door opener. Remember, safety should always be a top priority when working with electricity, so be sure to take all necessary precautions and consult a professional if needed. With a new battery, your garage door opener will continue to work efficiently for years to come. Happy DIY-ing!
Tips and Warnings:
Tips:
-If your garage door opener battery is not easily accessible, you may need to remove the entire unit from the ceiling to change it. But, again, be sure to have a helper on hand, as this can be a heavy and cumbersome process.
-Before changing the battery, make sure that you unplug the opener from the wall. This will avoid any potential shocks.
-There are many different types of garage door openers, so be sure to use the correct type of battery when replacing it. You can usually find this information in the owner’s manual.
-Garage door opener batteries typically last for about two years. Therefore, if your opener is not working correctly, or if it has been more than two years since you replaced the battery, it may be time to consider a new opener.
If you are not comfortable changing the battery yourself or don’t have the proper tools, please call a professional to do the job for you. Changing a garage door opener battery is a relatively simple process, but it can be dangerous if done incorrectly.
Warnings:
-Never attempt to change the battery if the opener is plugged in. This could result in serious injury.
-Make sure that the new battery is the correct type for your opener. If it is not, this could also cause injury.
-Be careful when removing the old battery. It may be dirty or corroded, and it may contain acid. Wear gloves and safety goggles when handling the old battery.

Replacing a garage door opener battery is a relatively simple process, but it can be dangerous if done incorrectly. Be sure to read the owner’s manual carefully and follow all safety instructions.
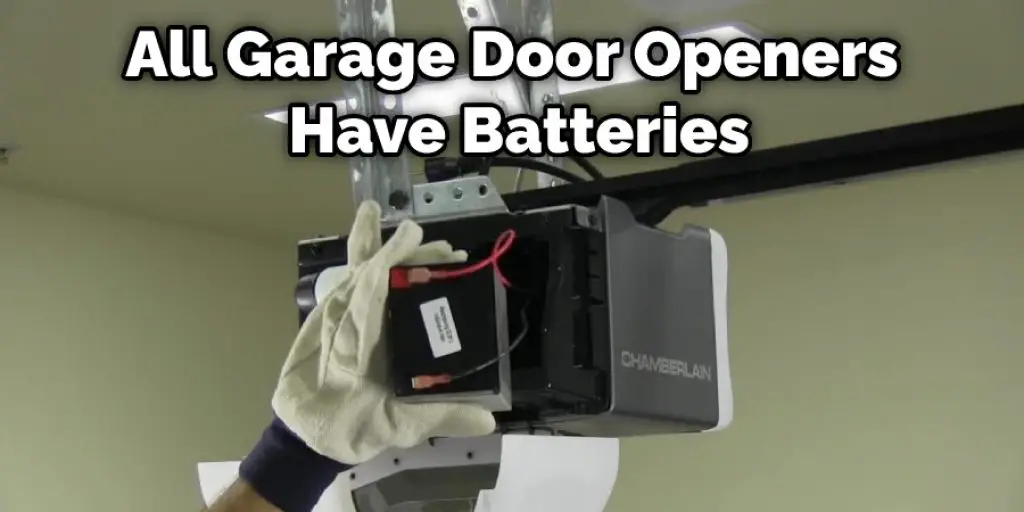
Do All Garage Door Openers Have Batteries?
Yes, all garage door openers have batteries. However, the type of battery and its lifespan will vary depending on the make and model of your garage door opener. For example, some openers use 12-volt alkaline batteries, while others use 24-volt nickel-cadmium or lead-acid batteries. Typically, these batteries will last anywhere from one to five years, depending on how often your garage door is used.
To determine what type of battery your garage door opener uses, you’ll need to consult your owner’s manual. If you’ve lost your manual or can’t find it online, you can typically find the information printed on the back or bottom of your garage door opener. Once you have this information, you can purchase the appropriate battery at a local hardware store or online.
Where Is the Battery on My Garage Door Opener?
Most garage door openers have the battery located in the motorhead. It is a small, rectangular battery about 2 inches wide and 3 inches long. Some garage door openers may have a battery in the wall control unit.
Consult your owner’s manual if you are not sure where your garage door opener’s battery is located. It will provide detailed instructions on how to access and replace the battery. In some cases, you may need to remove screws or panels to reach the battery.
It’s always a good idea to have someone with you when replacing the battery, especially if you need to remove the entire unit from the ceiling. They can help hold it in place and prevent any accidents or injuries. Safety should always be your top priority when working on garage door openers.
Do You Need to Use Professionals?
While replacing a garage door opener battery is a simple process, it may require the use of tools and some technical knowledge. If you do not feel comfortable or confident in completing this task yourself, it is always best to hire a professional. They will have the experience and expertise needed to safely replace the battery and ensure that your garage door opener is functioning correctly.
Additionally, if you are experiencing any issues with your garage door opener, such as it not responding to commands or making strange noises, a professional can diagnose and fix the problem for you. They may also be able to recommend preventative maintenance steps to prolong the life of your garage door opener.
Frequently Asked Questions:
Q: How Do I Know if My Garage Door Opener Battery Needs to Be Replaced?
A: If your garage door opener is not functioning correctly or not working at all, it may be a sign that the battery needs to be replaced. You can also check the battery’s voltage with a multimeter to see if it falls below the recommended level for your specific garage door opener. If it does, it is time to replace the battery. The owner’s manual will also provide information on when the battery should be replaced based on usage.
Q: Can I Use a Regular Battery Instead of a Garage Door Opener Battery?
A: No, it is essential to use the correct type of battery for your garage door opener. Using a regular battery could cause damage to your opener and potentially be dangerous. Always refer to your owner’s manual for the correct type of battery to use. You can also consult a professional for guidance on purchasing the right battery for your opener.
Q: How Often Should I Replace My Garage Door Opener Battery?
A: It is recommended to replace your garage door opener battery every 1-5 years, depending on the type and model of your opener. Consult your owner’s manual for specific recommendations, as well as any warning signs that may indicate it is time for a replacement. It is also a good idea to test the battery periodically and replace it if necessary. You can also schedule regular maintenance with a professional to ensure your opener is functioning correctly and the battery is in good condition.
Q: Is It Dangerous to Change a Garage Door Opener Battery?
A: It can be dangerous if proper precautions are not taken. Always make sure to unplug the opener from the wall and wear protective gear, such as gloves and safety goggles, when handling the battery. If you are unsure or uncomfortable with changing the battery yourself, it is best to call a professional for assistance.
Overall, changing a garage door opener battery is a simple process that can be completed with the right tools and safety measures in place. By following these tips and precautions, you can ensure that your garage door opener continues to function properly and safely.
Remember to consult your owner’s manual for specific instructions and always use caution when working with heavy equipment. With proper maintenance, your garage door opener battery should last for years to come. So, be safe and take care of your garage door opener! Happy DIY-ing!
Conclusion:
Like most people, you probably don’t think about your garage door opener all that often. But when it stops working, suddenly you realize just how important it is! Changing the battery in a garage door opener is a quick and easy fix that can save you from having to call a technician. So if your garage door opener starts acting up, don’t wait – change the battery and get back to enjoying the convenience of this home appliance. We hope you find this article on how to change a garage door opener battery helpful.
You Can Check It Out to Disable a Garage Door Opener Remote
You Can Check It Out to Install Battery Backup for Garage Door Opener
You May Also Read: How to Get Rid of Mice from Garage
I am Rick. I grew up helping my dad with his handyman service. I learned a lot from him about how to fix things, and also about how to work hard and take care of business. These days, I’m still into fixing things- only now, I’m doing it for a living.
I’m always looking for new ways to help people grow and develop. That’s why I have created this blog to share all my experience and knowledge so
that I can help people who are interested in DIY repair.