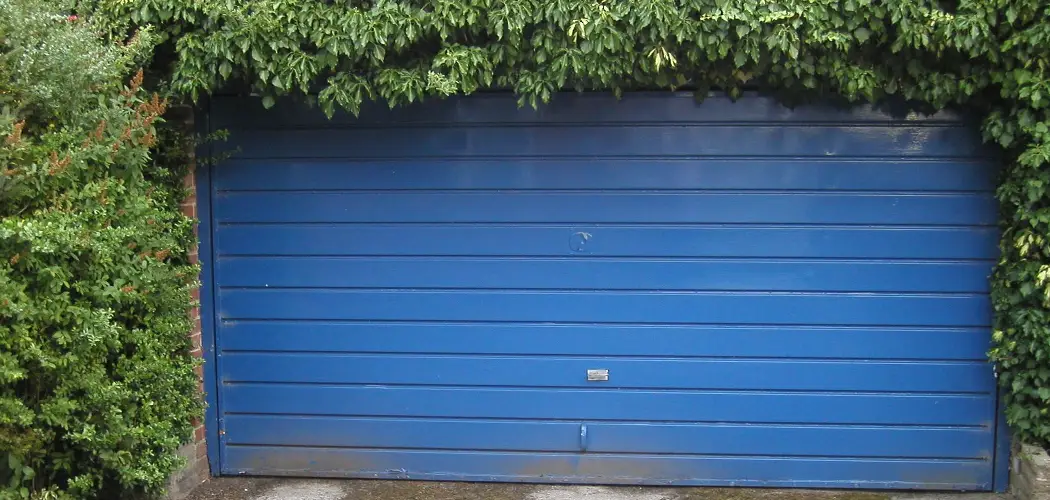
Do you have a garage door that needs a new bottom panel? Replacing the bottom panel of your garage door is a relatively easy task that can be completed in just a few hours.

This blog post will walk you through the steps on how to replace bottom panel of garage door. Be sure to read through the entire post before beginning, so that you have a clear understanding of what is involved. You may also want to refer to the related video tutorial for additional assistance. Thanks for reading!
Summary: Replacing the bottom panel of a garage door can be a tricky but rewarding task. It requires measuring the old panel, cutting and fitting new panel pieces, and attaching them to the rails. Depending on the age of your door, you may also need to replace or adjust other parts such as cables, weatherstripping, or trim moldings. In addition to the hardware, you may need to hide wires and cables that are necessary for your garage door opener.
Can Dented Garage Door Panels Be Repaired?
Yes, many dented garage door panels can be repaired. Depending on the type of material and damage, professional repair services may be able to fix the panel without having to replace it. This could include using specialized tools and techniques such as dent pulling or panel replacement.
If the dent is too severe, then a full panel replacement may be the best option. Additionally, garage doors with multiple dents may require a full panel replacement as well. It is important to contact a professional repair service when attempting to fix a dented door so that any safety risks are avoided.
Regardless of whether you’re repairing or replacing your dented garage door panels, it’s always important to follow manufacturer instructions for proper installation and use of these pieces for optimal performance and safety.
If you’re unsure whether repairing or replacing your broken garage door panel is the right choice, then it’s best to consult a professional repair service to help you make an informed decision.
16 Methods How to Replace Bottom Panel of Garage Door
Step 1: Gather Necessary Tools and Materials
Before beginning the process of replacing the bottom panel of your garage door, gather all the necessary tools and materials. These may include a replacement garage door panel, cordless drill, adjustable wrench, socket wrench, pry bar, locking pliers, safety goggles, gloves, and a helper to assist you during the process.
Step 2: Disconnect the Garage Door Opener
For safety reasons, disconnect the garage door opener from the garage door by pulling the emergency release cord. This will disengage the door from the opener and allow you to manually operate the door. Additionally, unplug the garage door opener from the electrical outlet to prevent accidental activation.
Step 3: Secure the Garage Door in Place
With the help of your assistant, raise the garage door until the bottom panel is at a comfortable working height. Use locking pliers or C-clamps to secure the garage door in place by clamping them onto the garage door tracks, just below the bottom rollers. This will prevent the door from accidentally falling during the panel replacement process.
Step 4: Remove the Tension from the Extension Springs
If your garage door is equipped with extension springs, you will need to remove the tension from the springs before proceeding. To do this, open the garage door fully and use C-clamps or locking pliers to secure it in place. Then, use an adjustable wrench to remove the bolts or nuts that secure the springs to the brackets on either side of the door.
Step 5: Detach the Bottom Panel’s Hardware
Using a cordless drill or socket wrench, remove the bolts or screws that secure the hinges, brackets, and struts to the bottom panel of the garage door. Keep all hardware organized, as you will need to reattach it to the new panel later.
Step 6: Remove the Bottom Panel
With the help of your assistant, carefully lift the bottom panel out of the garage door tracks, making sure to avoid damaging the other panels or rollers. If the panel is damaged or warped, it may require some extra force to remove it from the tracks. Use a pry bar if necessary to help lift the panel out of the tracks.
Step 7: Prepare the New Bottom Panel
Unpack the new bottom panel and inspect it for any damage or defects. If the panel is in good condition, proceed with the installation. If the panel is damaged, contact the supplier for a replacement.
Step 8: Attach the Hardware to the New Bottom Panel
Transfer the hinges, brackets, and struts from the old bottom panel to the new panel, using the same hardware and positioning as before. Ensure that all hardware is securely fastened and properly aligned to ensure a smooth installation.
Step 9: Install the New Bottom Panel
With the help of your assistant, carefully position the new bottom panel into the garage door tracks, ensuring that the panel is aligned correctly and the rollers are properly seated in the tracks. Slide the panel down until it rests on the floor and is flush with the other panels.
Step 10: Reattach the Hardware
Using a cordless drill or socket wrench, reattach the hinges, brackets, and struts to the adjoining garage door panel. Ensure that all hardware is securely fastened and properly aligned.
Step 11: Restore the Tension to the Extension Springs
If your garage door is equipped with extension springs, you will need to restore the tension to the springs. To do this, carefully lower the garage door until it is fully closed, and then use an adjustable wrench to reattach the springs to the brackets on either side of the door. Make sure the springs are properly seated and secure.
Step 12: Remove the Locking Pliers or C-Clamps
Once the new bottom panel is installed and
all hardware is securely fastened, carefully remove the locking pliers or C-clamps from the garage door tracks. This will release the door and allow it to move freely within the tracks.
Step 13: Reconnect the Garage Door Opener
Reconnect the garage door opener to the garage door by pulling the emergency release cord towards the door. This will engage the door with the opener, allowing for automatic operation. Plug the garage door opener back into the electrical outlet.
Step 14: Test the Garage Door
To ensure proper operation of the garage door with the new bottom panel installed, test the door by manually opening and closing it. Check for smooth movement, proper alignment, and secure hardware connections. If the door operates smoothly, test the garage door opener to confirm automatic operation.
Step 15: Inspect the Garage Door Seal
Inspect the garage door seal along the bottom of the new panel to ensure that it is properly seated and creating a tight seal against the garage floor. If the seal is damaged or improperly seated, adjust or replace it as needed to prevent drafts, moisture, and pests from entering the garage.
Step 16: Clean Up and Dispose of the Old Panel
After the new bottom panel is installed and the garage door is functioning properly, clean up any debris or tools used during the installation process. Dispose of the old bottom panel according to your local waste disposal regulations.
By following these steps, you can successfully replace the bottom panel of your garage door. It is essential to take safety precautions, such as disconnecting the garage door opener, securing the door in place, and enlisting the help of an assistant to ensure a smooth and secure installation process. Once the new panel is installed and the door is functioning properly, maintain regular inspections and maintenance to prolong the life of your garage door and its components.
You Can Check It Out to Seal a Garage Door for Winter
Thongs to Consider When Replacing Bottom Panel of Garage Door
1. Size and Measurements:
Before ordering a replacement bottom panel for your garage door, it is important to check the measurements of the existing panel. Take accurate measurements of its width, height, and depth so you can find a new panel that will fit correctly in place of the old one.
2. Materials:
There are several types of materials available for garage door panels, including steel, aluminum, vinyl, fiberglass, and wood composite. Consider the climate where you live as well as its effect on the material you choose—steel may be more durable but also heavier while lighter materials such as vinyl may be less durable but cheaper in cost.

3. Insulation:
If your home is susceptible to temperature extremes, choose a garage door panel with insulation properties. Insulated panels will help keep your garage temperature regulated and can reduce energy costs as well.
4. Price:
Garage door bottom panel replacement can be costly, so it is important to research the cost of different materials before making a decision. Consider how much you are willing to spend while still ensuring quality construction that will last for years to come.
5. Installation:
Before ordering a replacement bottom panel, consider whether or not you are prepared to install it yourself or if hiring a professional installer would be best for your situation. Professional installation may add to the cost of the panel itself but could save time and frustration down the line if something goes wrong during setup.
6. Warranty:
Many companies offer a warranty on their products. Make sure to read the fine print before purchasing a replacement panel and take advantage of any warranties offered. This can give you peace of mind in knowing that your new purchase is covered if something were to go wrong down the line.
Conclusion
Replacing the bottom panel of your garage door is a relatively easy task that you can do yourself in about an hour. You will need to purchase a replacement bottom panel, which you can find at your local home improvement store. With a few basic tools, you should be able to complete this repair quickly and easily.
Thanks for reading our blog post on how to replace bottom panel of garage door! We hope you found it helpful and informative.
You Can Check It Out to Pop Dents Out of Aluminum Garage Door