If you are like many homeowners, you may find that having a natural gas line in your garage can come in handy. There are several reasons why this may be the case. For example, perhaps you like to work on cars and need a space to do, which is heated in the winter. Or maybe you use your garage as a workshop and would like to have easy access to power tools that run on natural gas. Whatever your reason, learning how to run natural gas line from house to garage is a project that you can complete yourself with a little bit of know-how.
In this blog post, we will walk you through the process of running a natural gas line from your house to your garage. We will provide tips on where to start, measuring the distance, what type of materials you will need, and how to install the piping. You should have all the information you need to start this project by the end of this post.
What is Natural Gas?
Natural gas is a fossil fuel that is primarily made up of methane. It is found deep in the earth’s crust and extracted through drilling. Once it reaches your home, it goes through several stages before it can be used for heating or cooking. The first stage involves removing any impurities such as water vapor, carbon dioxide, and sulfur compounds. Then, the gas is compressed and sent through pipelines to be distributed to homes and businesses.
It is important to note that natural gas is a non-renewable resource, which means it cannot be replenished at the same rate at which it is being consumed. Therefore, it is crucial to use this resource wisely and efficiently.
Why Should You Run a Natural Gas Line from The House to The Garage?
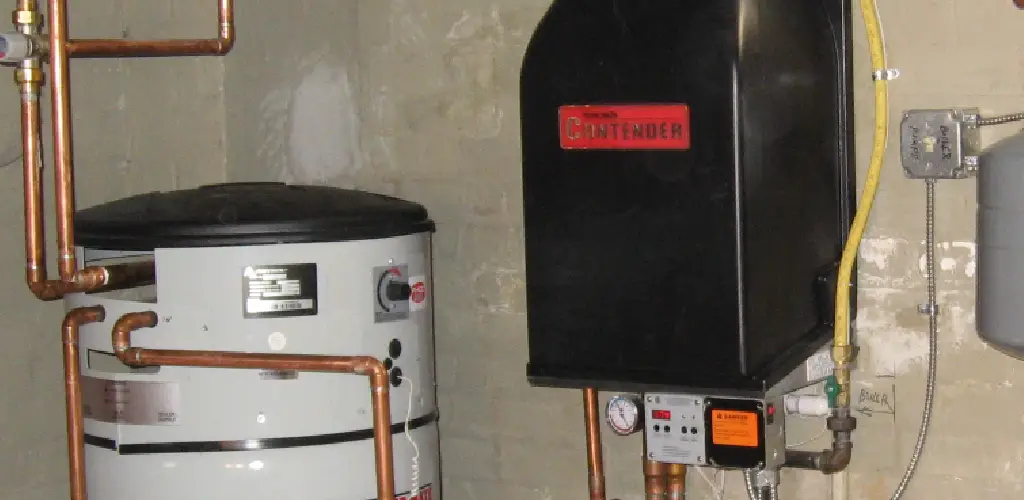
There are many reasons to run a natural gas line from the house to the garage. Natural gas is a clean and efficient fuel, and it can be used for a variety of purposes. For example, natural gas can power furnaces, water heaters, and other appliances in the garage. It can also power vehicles, making them more environmentally friendly.
Additionally, natural gas is usually less expensive than other fuels, making it a cost-effective choice for homeowners. Running a natural gas line from the house to the garage is an investment that will pay off in both the short and long run.
Required Materials
Natural Gas Line:
The first thing you will need to run a natural gas line from the house to the garage is, of course, the gas line itself. Natural gas lines are typically made of polyethylene or steel, both of which are durable and can withstand underground conditions.
Gas Meter:
You will also need a gas meter to measure how much natural gas is being used in your garage. This will help you keep track of your energy consumption and detect any potential leaks.
Trenching Tools:
To install the gas line, you will need to dig a trench from the house to the garage. You can rent or purchase trenching tools such as shovels, picks, or a backhoe to make this process easier.
Fittings and Connectors:
You will need fittings and connectors to attach the gas line to your existing gas system in the house and any appliances in the garage. These should be specifically designed for natural gas use.
Gas Leak Detector:
It is essential to have a gas leak detector on hand during this project. This tool can detect even small amounts of natural gas, helping you ensure that there are no leaks in your system.
How to Run Natural Gas Line from House to Garage Step-by-Step Guide
Step 1: Purchase the Equipment
First, you will need to purchase the required equipment for this project. This includes a natural gas line, a flexible connector, and basic hand tools. You can find these items at your local hardware store. It is also a good idea to invest in safety gear, such as gloves and eye protection, before starting the project.
You may also need to obtain permits from your local authorities before beginning the installation process. Check with your city or county’s building department to ensure that you comply with any regulations. It is essential to follow all safety regulations and building codes when working with natural gas.
Step 2: Lay Out Your Route
Next, you will need to plan your natural gas line route. You will want to avoid any obstacles such as trees or large rocks. The best way to do this is to use a string or rope to mark out the path you plan to take. You can also use spray paint to mark the route on the ground. Make sure to measure the distance from your house to the garage so you know how much gas line you will need. It is recommended to add a few extra feet to account for any turns or curves in the line.
It is crucial to avoid any other utility lines, such as water or electricity, while planning your route. Contact your local utilities company to mark these lines before digging. It is also a good idea to check with your homeowners’ insurance to ensure that you are covered in case of any accidental damage.
Step 3: Dig the Trench
Once you have your route marked out, you will need to dig a trench for the natural gas line. The depth of the trench should be at least 18 inches. This will ensure that the line is buried deep enough to avoid damage. If you plan to install the gas line below the frost line, it may need to be deeper. You can check with your local building department for specific guidelines.
The trench should be wide enough to accommodate the gas line and any fittings or connectors. You may need to use a backhoe or other digging equipment if you encounter any tough soil. It is essential to be cautious when digging and avoid damaging any existing utility lines.
Step 4: Turn Off the Gas
Before you begin any work on the gas line, turning off the gas supply is important. This can be done by shutting off the valve at the meter. Once the gas is shut off, you will need to bleed any remaining gas from the line. This can be done by opening all of the valves and appliances in your home. You should also turn off any pilot lights to avoid igniting gas during the installation process.
You can double-check that the gas is turned off by using a gas leak detector near the meter and any other appliances connected to your gas system. It should not detect any gas. Your safety and that of your home are the top priorities during this project.
Step 5: Cut the Pipe
Next, you will need to cut the pipe to connect the house to the garage. The best way to do this is with a hacksaw. Once the pipe is cut, you will need to clean up the edges with a file. It is essential to deburr the edges to ensure a proper connection. You may also need to remove any dirt or debris from the inside of the pipe. A pipe brush is recommended for this. The pipe should be clean and smooth before continuing.
The flexible connector will be used to connect the gas line from the house to the garage. It can be cut to fit properly using a pipe cutter or hacksaw. You will want to make sure that the cut is straight and clean for a secure connection.
Step 6: Install the Connector
Now, you will need to install the connector onto the gas line. First, you will need to apply a layer of pipe dope to the threads. Next, screw the connector onto the gas line and tighten it down with a wrench. Make sure to only tighten it enough to create a seal – over-tightening can cause the threads to strip or break.
You will then need to attach the other end of the connector to the gas line in your garage. Again, apply a layer of pipe dope and tighten it down with a wrench. It is essential to make sure the connector is securely attached to both gas lines before continuing.
Step 7: Turn on the Gas
Once all of the connections have been made, you can turn on the gas supply. Start by opening the valve at the meter. Once the gas is turned on, you will need to check all connections for leaks. You can do this by applying soapy water to each joint and watching for bubbles. If you find any leaks, you will need to tighten the connection until it stops. If you are unable to stop the leak, it is important to contact a professional for assistance.
It is also a good idea to use the gas leak detector again to ensure there are no leaks in your system. Once you have confirmed that all connections are secure and there are no leaks, you can turn on any appliances connected to the gas line.
Step 8: Test the Appliances
Finally, you will need to test the appliances in your home to make sure they are working properly. Once you have confirmed that everything is working, you can safely use your natural gas line.
If you have any problems or questions, be sure to consult a professional before attempting to run a natural gas line on your own. This is a complex process that should only be attempted by those with the proper knowledge and experience.
Now that you know how to run natural gas line from house to garage, you can start thinking about how you can use this fuel to power your home appliances and vehicles. Natural gas is a clean and efficient fuel, and it can be used for a variety of purposes.
For example, natural gas can power tools, heaters, and even vehicles in the garage. With a little bit of planning, you can use this fuel to save money and reduce your carbon footprint.
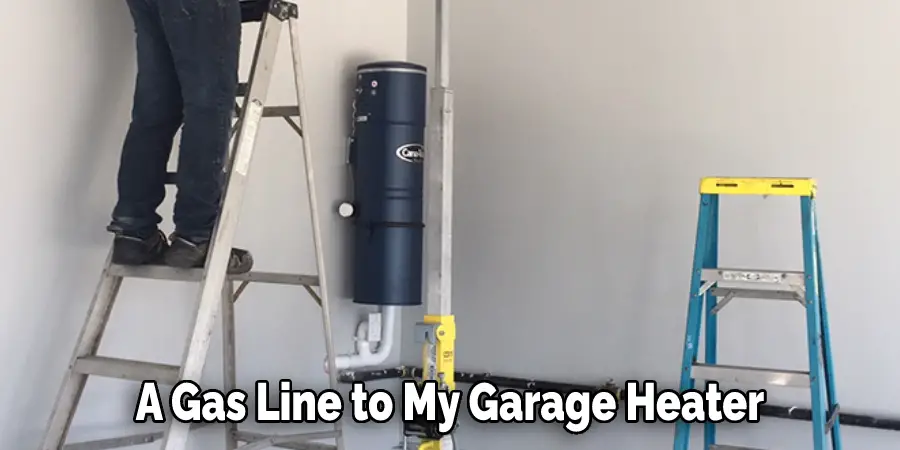
How Do I Run a Gas Line to My Garage Heater?
If you’re looking to add a garage heater to your home, you’ll need to run a gas line to the unit. This can seem like a daunting task, but it’s not too difficult with a little bit of planning and effort. Here’s a step-by-step guide to running a gas line to your garage heater:
1. The first step is to determine where the gas line will run from. You’ll need to have access to a natural gas source, typically located near the home’s main Gas Meter. Once you’ve determined the location of the gas line, you’ll need to measure the distance from the meter to the garage heater.
2. Next, you’ll need to purchase the necessary materials for running the gas line. This includes a length of black pipe, fittings, and a flexible connector hose. Make sure that you get all of the right sizes and lengths of materials so that everything will fit together properly.
3. Once you have all of your materials, it’s time to start running the gas line. Begin by attaching the black pipe to the Gas Meter using the provided fittings. Then, run the pipe along its desired route towards the garage heater. Be sure to leave enough slack in the line to be easily connected to the heater.
4. When you reach the garage, cut the black pipe to the appropriate length using a hacksaw. Then, use the fittings to attach the flexible connector hose to the end of the pipe.
5. Finally, connect the other end of the flexible connector hose to the inlet of the garage heater. Once everything is properly connected, please turn on the gas and test the unit to ensure it’s working correctly.
With a little bit of planning and effort, you can easily run a gas line to your garage heater. Keep reading for more information about how to run natural gas line from house to garage.
What Size Pipe Do I Need for Natural Gas?

The size of pipe you need for a natural gas line will depend on the gas you plan to use. To calculate the pipe size you need, you’ll need to know the flow rate of the appliance and the pressure of the gas coming into your home. You can find this information in your appliance’s manual or on the manufacturer’s website.
The most common types of gas appliances are stoves, dryers, and water heaters. For these appliances, you’ll need a 1/2-inch or 3/4-inch pipe. If you have a high-demand appliance like a furnace, you’ll need a 1-inch pipe.
Frequently Asked Question
What Is the Best Pipe for Gas Line?
If you are running a natural gas line from your house to your garage, you will need to use a black iron pipe. This type of pipe is durable and can withstand the pressure of a gas line.
Can I Run the Natural Gas Line Myself?
Yes, you can run a natural gas line yourself, but it is not a job for the faint of heart. It requires drilling through concrete and metal and working with hazardous materials. If you are uncomfortable with any of these tasks, it is best to hire a professional.
Can Plastic Gas Line Be Exposed?
The answer to this question depends. Most gas lines are either black or red and are made of plastic. If your gas line is not the typical black or red plastic, it may be made of combustible material and, therefore, should not be exposed.
If you are unsure whether or not your gas line is made of combustible material, it is always best to consult with a professional before proceeding.
Can a Gas Pipe Be Run Externally?
Yes, it is possible to run a gas pipe externally. This can be done by excavating a trench in your yard and running the pipe underground. You will also need to have a gas meter installed at your home.
Can I Use Pex for the Gas Line?
Yes, you can use Pex for a gas line, but be sure to check with your local building codes to ensure that it is permissible in your area. You will also need to use a gas-rated Pex tubing, as standard Pex tubing is not designed for carrying gas.
Conclusion
If you are thinking of converting your garage into a workshop, home office, or just more living space, running a natural gas line may be best. By following these simple steps, you can have a new natural gas line up and running in no time! Thanks for reading our post about how to run natural gas line from house to garage.
You can check it out to Fix Uneven Garage Floor
I am Rick. I grew up helping my dad with his handyman service. I learned a lot from him about how to fix things, and also about how to work hard and take care of business. These days, I’m still into fixing things- only now, I’m doing it for a living.
I’m always looking for new ways to help people grow and develop. That’s why I have created this blog to share all my experience and knowledge so
that I can help people who are interested in DIY repair.