Your garage floor is not level. You don’t know what to do about it. You’ve tried concrete leveling compound, and that didn’t work. You don’t know how to fix uneven garage floor. Don’t worry; you’re not alone! In this blog post, we will show you the best way to fix an uneven garage floor without spending a lot of money. Read on to learn more!
What is an Uneven Garage Floor?
An uneven garage floor is a surface that is not level, meaning it has low and high spots. This can be caused by various factors, such as age, settling of the ground underneath, or poor construction. It can be frustrating to have an uneven garage floor as it can cause problems with moving vehicles and storing items. Moreover, it can also be a safety hazard, especially if you have children or elderly people in your household.
You may also notice that water tends to pool in certain areas of your garage, making it prone to flooding. An uneven floor can also affect the overall aesthetics of your garage, making it look unappealing and unkempt.
Why It’s Important to Fix Uneven Garage Floor?
There are many benefits to fixing an uneven garage floor. First and foremost, an uneven surface can be a major safety hazard, as it can lead to the formation of trip hazards or even more serious accidents. Additionally, an uneven surface can make it difficult to store large items in the garage, such as cars or heavy exercise equipment.
Finally, an uneven garage floor can also cause damage to vehicles over time as a result of lower ground clearance due to bumps and valleys. Thus, homeowners can improve their safety and convenience by taking steps to fix an uneven garage floor and help protect their valuable investments like their vehicles.
And ultimately, when it comes down to it, who wouldn’t want a safer, more functional garage?
Required Materials
Cement:
First and foremost, you will need cement to fix your uneven garage floor. You can purchase this at any home improvement store. Make sure you get enough for the size of your garage.
Concrete Mixer:
A concrete mixer is necessary to mix the cement properly. If you don’t have one, you can rent it from a local hardware store.
Leveling Compound:
A leveling compound is a cement-like product that can be poured over an existing floor to level out any uneven areas. You can find this at your local home improvement store.
Trowel:
A trowel is used to spread the leveling compound evenly on the garage floor.
Concrete Grinder or Sander:
A concrete grinder or sander is needed to remove any bumps or high spots on your garage floor.
Protective Gear:
It is important to protect yourself when working with cement. Make sure you have gloves, goggles, and a mask to avoid any contact with the material.
Measuring Tape and Chalk:
A measuring tape and chalk will help you mark out any areas that need to be leveled or repaired.
Cleaning Supplies:
Before you start the repair process, make sure to clean your garage floor thoroughly. You will need a broom, mop, and degreaser to remove any dirt, debris, or oil stains.
How to Fix Uneven Garage Floor 9 Step-by-Step Guide
Step 1: Determine the Cause of the Uneven Floor
Most often, an uneven garage floor is the result of differential settling. This occurs when one side of your foundation settles more than the other, causing one side of the garage floor to become higher. Before you can fix your uneven garage floor, it’s important to determine what caused the settling in the first place and how much the problem has progressed.
Step 2: Investigate Underneath
Once you’ve determined the cause of your uneven garage floor, it’s time to investigate underneath. If possible, you’ll want to use a construction laser to determine how far off the surface of your garage is from the level. You can also use a garden hose to determine how much water pools on the surface when you run the water across it.
Step 3: Address Any Cracks or Holes
Once you’ve removed any large debris or objects from your garage floor, it’s time to fill in any cracks or holes. Doing so will help level out your floor and make it more smooth. You can use a concrete patching compound for this purpose. First, apply the compound to the cracks or holes, then use a trowel to spread it out evenly.
Let the patching compound dry according to the manufacturer’s instructions, then move on to the next step.
Step 4: Apply a Garage Floor Leveler
If your garage floor is still uneven after filling in the cracks and holes, you may need to apply a garage floor leveler. Floor levelers are available in both latex and epoxy forms. You can also choose from various colors to match your garage floor.
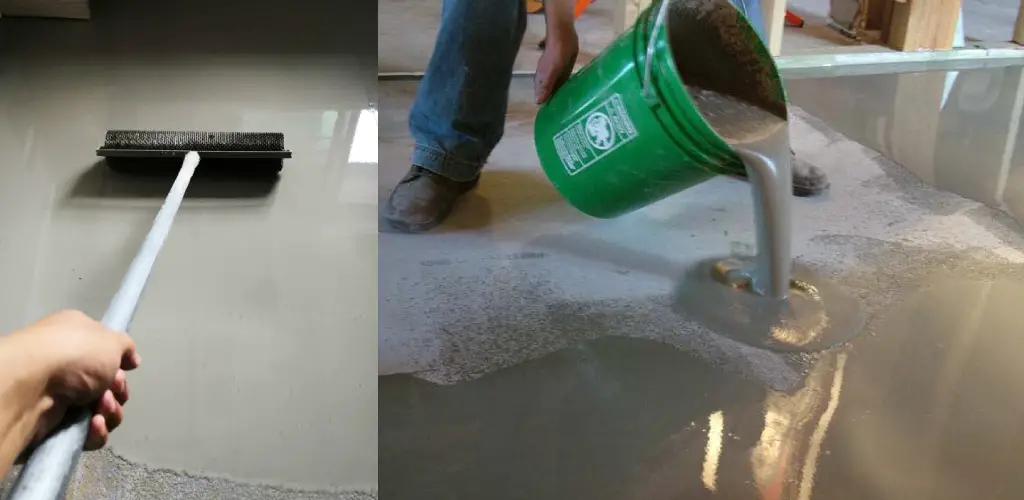
To apply the garage floor leveler, start by putting on a pair of rubber gloves and a dust mask. Next, mix the leveler according to the manufacturer’s instructions. Once evenly mixed, pour a small amount onto the garage floor and begin spreading it around with a trowel.
Continue to spread the leveler in small sections until your entire garage floor is coated. Then, allow the leveler to dry completely.
Step 5: Pour Self-Leveling Underlayment on the Uneven Area of the Floor
Pour self-leveling underlayment onto the uneven area of your garage floor. Start by mixing the underlayment according to the manufacturer’s instructions. Once evenly mixed, pour a small amount onto the garage floor and begin spreading it around with a trowel.
As you spread the underlayment, take care to fill in any low spots on the garage floor. You may need to apply several coats of underlayment, allowing each layer to dry completely before moving on to the next step.
Step 6: Use a Concrete Grinder or Sander to Smooth Out High Spots
After the self-leveling underlayment has dried, use a concrete grinder or sander to smooth out any remaining high spots on your garage floor. These tools can be rented from your local home improvement store.
Make sure to wear protective gear and follow all safety precautions when using the grinder or sander. The goal is to create a smooth, level surface for your garage floor.
Step 7: Clean Your Garage Floor Again
After you have smoothed out any high spots, it’s important to clean your garage floor again. Use a broom and mop to remove any dust or debris from the grinding process, and use a degreaser to remove any oil stains. This will ensure a clean surface for the next step.
You may also want to consider applying a concrete sealer at this point to protect your garage floor from future damage. It can also help make your garage floor more resistant to stains and spills.
Step 8: Apply a Concrete Sealer
To protect your newly leveled garage floor, it’s important to apply a concrete sealer. This will help prevent any future damage from oil stains or other spills. You can find concrete sealers at your local home improvement store.
Follow the manufacturer’s instructions for applying the sealer and allow it to dry completely before using your garage again. You may need to apply multiple coats for maximum protection. The sealer should also be reapplied every few years.
Step 9: Consider Professional Help
Fixing an uneven garage floor can be a challenging and time-consuming task. If you are not confident in your ability to complete this project on your own, consider hiring a professional contractor who has experience with concrete repair. They will have the necessary tools and expertise to ensure a level and smooth garage floor. It may cost more upfront, but it could save you time and hassle in the long run.
The key to fixing an uneven garage floor is proper preparation and taking the time to properly level out the surface. With these steps, you can get your garage floor back to its original state and ensure a safe and stable foundation for your vehicles and other belongings. Remember to always wear protective gear and follow safety precautions when working with cement.
Regardless of how to fix uneven garage floor, following these steps will help ensure that the job is done correctly and safely. So, if you are ready to fix your uneven garage floor, be sure to follow these tips!
When Do You Need To Fix The Uneven Garage Floor
1. Garage Floor Tilting Towards The House
If your garage floor is tilting towards the house, there could be a structural issue with your foundation or the ground underneath. To address this, you may need to enlist the help of a professional contractor to assess and repair any issues with the foundation.
2. Gaping Garage Door
A gaping garage door is a more obvious issue than an uneven garage floor, but it can be easy to fix. Whether your garage door has been damaged due to harsh weather or your spring system is not working correctly, there are several steps you can take to address the problem and restore your garage door to its proper functionality.
3. When Critical Services Are Affected
If your business relies on the garage for storage or parking, you need to make sure that the floor is level. Uneven surfaces can cause accidents and damage vehicles. If you have a home workshop in your garage, an uneven floor can also make it difficult to use power tools and work on projects.
What Causes Garage Floors To Crack?
1. Shrinkage
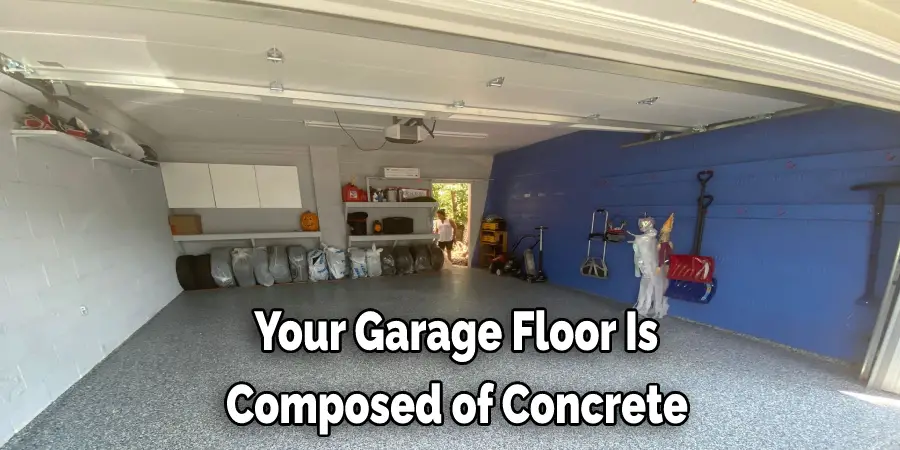
If your garage floor is composed of concrete, it may start to crack and buckle over time due to shrinkage. This occurs when the concrete begins to lose moisture as it cures, causing the top layer of the pavement to contract and pull away from the underlying layers.
2. Poor Installation
One of the most common causes of cracked garage floors is poor installation. In particular, if your concrete contractor fails to compact the soil beneath the slab properly, this can lead to uneven settling over time and cracks.
3. Foundation Problems
Another potential cause of cracked garage floors is underlying issues with the foundation or structure of your home. If your foundation is uneven or has cracks in it, this could cause your garage floor to become uneven. To fix this issue, you may need to contact a professional foundation repair company that can assess the situation and make any necessary repairs.
4. Tree Roots
If there are trees near your garage, their roots can grow under the floor and cause it to crack. To prevent this, you should be sure to properly maintain your trees and keep the area around them clear of overgrown weeds and other vegetation.
5. Poor Drainage
Over time, your garage floor can develop cracks due to poor drainage. Overhead water that is not properly drained can penetrate the subfloor and concrete slab, causing unevenness in the garage surface.
6. Settlement of Slab
If your garage is built on top of a slab foundation, it is important to know that slabs are prone to settling over time. As the ground beneath them shifts or settles, this can cause cracks in the surface of your garage floor.
How Do I Know if My Garage Floor Is Level?
When it comes to your garage floor, ensuring that it is level is essential for your safety and the safety of your vehicles. A level floor will help prevent dangerous and unsightly puddles of water from forming, reducing the risk of slipping and breakage due to periodic flooding.
Additionally, a level surface makes it easier to park and easily move your car around in the garage. So how do you know if your garage floor is level? Several methods can be used, such as using a bubble level or employing specialized tools designed specifically.
No matter which technique you choose, taking the time to ensure that your garage floor is level is always worth the effort in the long run. Keep reading for more information about how to fix uneven garage floor.
How Much Could It Cost?
The cost of fixing an uneven garage floor will vary depending on the extent of the issue and whether you choose to hire a professional or do it yourself. On average, hiring a professional contractor for this task can run anywhere from $500 to $5,000.
If you opt to fix your own garage floor, costs may include materials such as concrete mix, sealer, and tools, which can range from $100 to $500 or more, depending on the size of your garage. However, keep in mind that fixing an uneven garage floor is a labor-intensive task that requires proper knowledge and experience to ensure it is done correctly and safely.
Frequently Asked Question
Which Type of Adhesive Should I Use to Fix My Uneven Garage Floor?
Many types of adhesives can be used to fix an uneven garage floor. A latex-based adhesive such as PL Premium may work if the floor is only slightly uneven. If the floor is more severely uneven, a mortar-based adhesive such as Mapei Kerabond may be required. You may need to consult with a professional contractor for recommendations on the best adhesive for your specific situation.
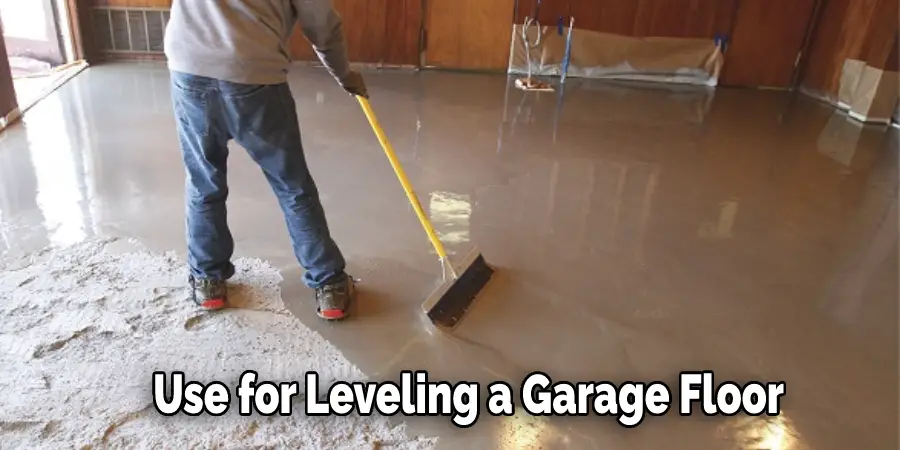
What Tools Should I Use for Leveling a Garage Floor?
A few tools can be used for leveling a garage floor. A shovel, rake, or hoe can move gravel, dirt, or sand to fill in low spots. A trowel can be used to smooth out the surface. Additionally, a level, chalk line, and tape measure can help ensure that the floor is level once the surface has been filled in.
How Long Does It Take to Fix an Uneven Garage Floor?
The time it takes to fix an uneven garage floor will depend on the severity of the issue and the method being used. Using adhesive or concrete leveling may only take a few hours, while more extensive repairs to the foundation may take several days. It is best to consult with a professional contractor for an accurate estimate of time and cost for fixing an uneven garage floor.
How Can I Protect My Car from Scratches on The Uneven Garage Floor?
One way to protect your car from scratches on the uneven garage floor is to place a carpet or rug down on the ground. This will create a softer surface for your car to rest on and help avoid any damage that the unevenness of the floor may cause. You could also consider using a carport or an alternative parking spot until the floor is leveled and repaired. Regularly inspecting your garage floor for cracks and addressing them promptly can also help prevent scratches on your car.
Conclusion
Garage floor repair is a fairly simple process that anyone can do with the right tools and some basic know-how. By following the steps in this guide, you should be able to fix your uneven garage floor in no time. Have any questions about the process? Leave us a comment below, and we’ll help you out. Thanks for reading our post about how to fix uneven garage floor.
You Can Check It Out To Acid Stain Concrete Garage Floor
You can check it out to Run Natural Gas Line from House to Garage
I am Rick. I grew up helping my dad with his handyman service. I learned a lot from him about how to fix things, and also about how to work hard and take care of business. These days, I’m still into fixing things- only now, I’m doing it for a living.
I’m always looking for new ways to help people grow and develop. That’s why I have created this blog to share all my experience and knowledge so
that I can help people who are interested in DIY repair.
Ответственная игра в онлайн-казино — это набор правил, ориентированных на сохранение психики пользователей.
Эта концепция включает добровольное ограничение времени и денег на игру.
Участнику рекомендуется предварительно выставлять бюджет и не превышать его даже при выигрышных ситуациях.
Сайты честного i-gaming должны давать функции для тестов на зависимость и тайм-аутов.
К признакам игромании служат потребность вернуть проигранное и пренебрежение повседневными делами.
Ответственная игра помогает относиться к площадке как к досугу, а не инструменту заработка.
За счёт соблюдения этих норм интерес остаётся в безопасных рамках, не нанося человека.
https://franch-expo.ru/article/689-bespilotnyy-arsenal-v-ogne-rossii-udalos-podavit-ukrainskiy-khrebet-bayesovtsev