
Converting a garage into a studio can be a great way to create extra living space without sacrificing too much yardage. If you’re creative and handy, it’s a project you can complete relatively easily. Here are some steps for how to convert garage into studio.
Summary: Converting a garage into a studio is an excellent way to create a functional workspace that is separate from the rest of your home. Start by decluttering the space and clearing it out completely. Next, evaluate the space and create a plan for the layout of the studio. Add insulation, drywall, and flooring to create a comfortable environment.
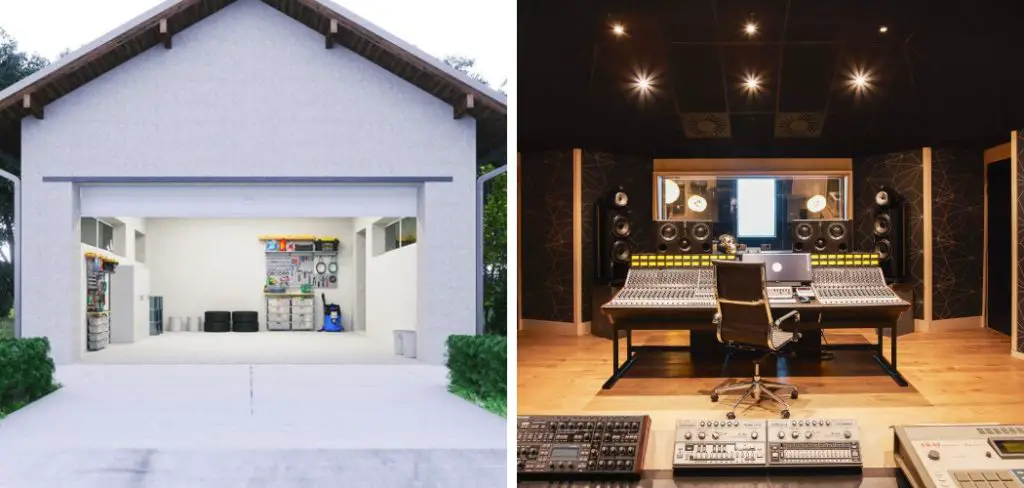
What Is a Garage Studio?
A garage studio is a type of music studio that is typically built in a garage. The term can also refer to a home recording studio that is set up in a garage. Garage studios are usually smaller and more affordable than commercial studios, offering a more intimate and relaxed setting. Many famous bands and artists have recorded in garage studios, including Nirvana, the White Stripes, and the Foo Fighters.
Garage studios often have a DIY aesthetic and are equipped with basic recording gear. However, some garage studios are more sophisticated, with professional-grade equipment and acoustically treated rooms. Garage studios can be an excellent option for musicians on a budget, and they can provide a creative environment for making music.
Why Should You Convert Garage Into Studio?
As any artist knows, having a dedicated space to work in can be essential to creativity and productivity. A garage can be the perfect spot to set up a studio, as it is often isolated from the rest of the house and can be easily customized to fit your needs. Additionally, a garage conversion can add value to your home if you ever decide to sell. Here are some other reasons why you should consider converting your garage into a studio:
- You’ll have more space to spread out and store materials.
- You’ll be able to control your studio’s temperature and lighting conditions and optimize them for working conditions.
- You’ll be able to work without distractions or interruptions.
- Finally, converting your garage into a studio can actually make you more disciplined about working, as it creates a physical boundary between your workspace and the rest of your home.
So if you’re looking for ways to boost your creativity and productivity, converting your garage into a studio is definitely worth considering.

7 Steps to Follow on How to Convert Garage Into Studio
Converting your garage into a studio can be a great way to get extra space without going through the hassle and expense of building an addition to your home.
If you’re planning on using the studio for music or other audio production, it’s important to consider soundproofing from the start. You’ll also want to ensure the space is well-insulated to ensure temperature control.
Here are seven steps to follow when converting your garage into a studio:
1. Determine What You Need
The first step is to figure out how you will use the studio. This will help you determine what kind of finishes and fixtures you’ll need to install. For example, if you’re planning on using the space for music production, you’ll need to soundproof the garage to ensure that your recordings don’t pick up any unwanted noise from outside. You may also want to consider installing acoustic panels to help control the sound within the room.
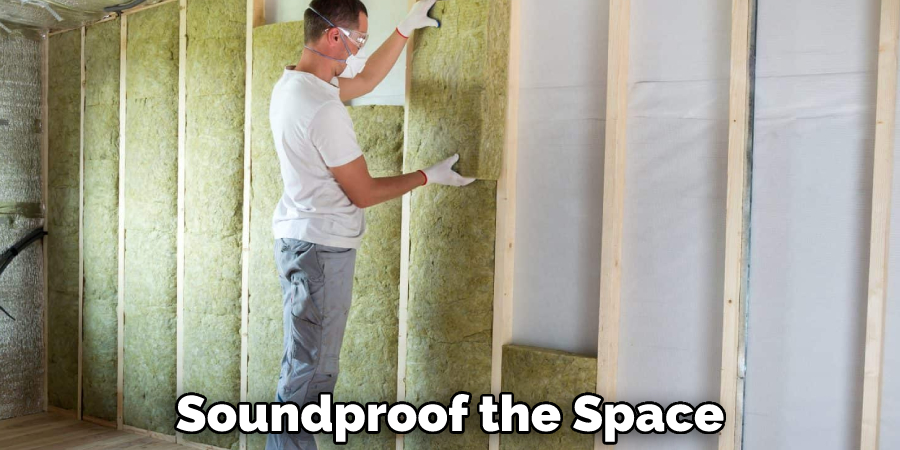
2. Insulate the Garage
Insulating the garage is important for two reasons: to help control the room’s temperature and reduce the amount of noise that can pass through the walls. There are a variety of insulation materials available, so you’ll need to choose one that’s appropriate for your climate and budget. For example, fiberglass batts are popular for garages in colder climates, while blown-in cellulose or foam insulation is better suited for warm weather.
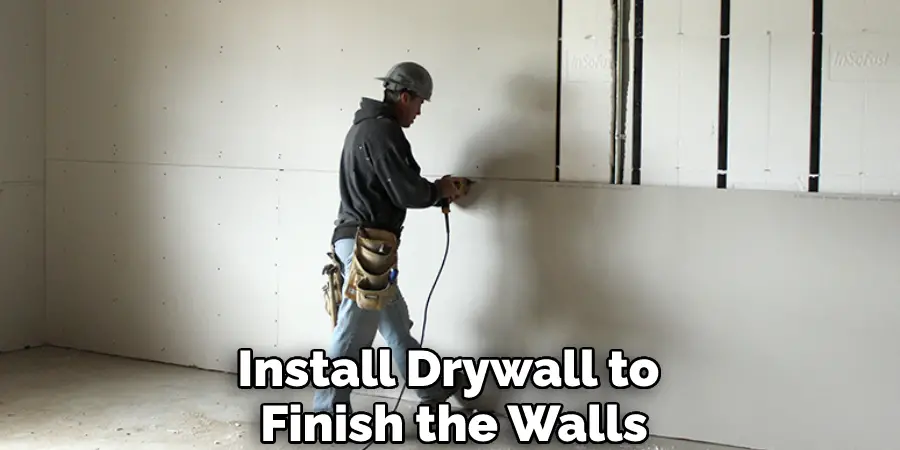
3. Install Drywall
Once the insulation is in place, you’ll need to install drywall to finish the walls and ceiling. It’s important to use a type of drywall that’s designed for soundproofing, such as 5/8-inch thick drywall with a green board backing.
4. Paint the Walls and Ceiling
After the drywall is up, you’ll need to paint the walls and ceiling. Again, it’s important to use a type of paint that’s designed for soundproofing, such as latex-based paint with a sound-damping additive.
5. Add Flooring
The type of flooring you choose will depend on how you plan to use the studio. For example, if you’re planning on using the space for music production, you’ll want to install a floating floor system to reduce noise transfer.
6. Install Electric Wiring and Outlets
If you’re planning on using the studio for anything that requires electricity, you’ll need to have an electrician install wiring and outlets. It’s important to have these installed before you finish the walls and ceiling so that they’re hidden from view.
7. Add Windows and Doors for Ventilation and Light
The final step is to add windows and doors for ventilation and light. You’ll want to make sure that the windows are large enough to let in plenty of natural light but small enough to prevent noise from outside from entering the room.
That’s it! You’ve now learned how to convert garage into studio. Follow these seven steps, and you’ll have the perfect space for music production, art, or other creative pursuits.
What You Need to Know Before Converting Your Garage into a Studio
Before you decide to convert your garage into a studio, there are a few things you need to take into consideration. First, you must ensure that the space is properly insulated to keep the temperature comfortable year-round. Second, you will need to soundproof the space to minimize noise pollution from outside sources.
Third, you will need to ensure that the space has adequate lighting and ventilation. Finally, you will need to take steps to protect your belongings from dust and dirt. By taking the time to plan ahead, you can create a studio that is both functional and inviting.
The Best Way to Insulate a Garage for Conversion into a Studio
When you’re ready to turn your garage into a studio, there are a few things you’ll need to do to make sure it’s insulated properly. The first step is to check for any cracks or holes in the walls and seal them up with caulking or weather stripping. Next, you’ll want to add insulation to the walls and ceiling. This can be done by installing fiberglass insulation batts or blown-in cellulose insulation.
If you live in a cold climate, you may also want to install a heating system to keep the studio warm. Finally, make sure the windows are insulated with window film or plastic sheeting. By taking these steps, you can be sure that your garage will be comfortable and energy-efficient, making it the perfect place to work on your next project. Keep reading for more information about how to convert garage into studio.
How to Choose the Right Flooring for Your Garage Conversion Studio
When you’re planning to convert your garage into a studio, choosing the right flooring is important. Not only should it be durable and easy to clean, but it should also provide a comfortable surface for working on. There are many different types of flooring available, and the best option for you will depend on your budget and the amount of traffic your studio is likely to see.
Vinyl flooring may be the best choice if you’re looking for a low-cost option that can withstand heavy foot traffic. A carpet is a good option for a more comfortable surface that will still stand up to wear and tear. If you’re willing to spend a bit more, engineered hardwood or laminate can give your studio a high-end look. Whichever type of flooring you choose, get professional help with the installation to ensure that it’s done correctly.
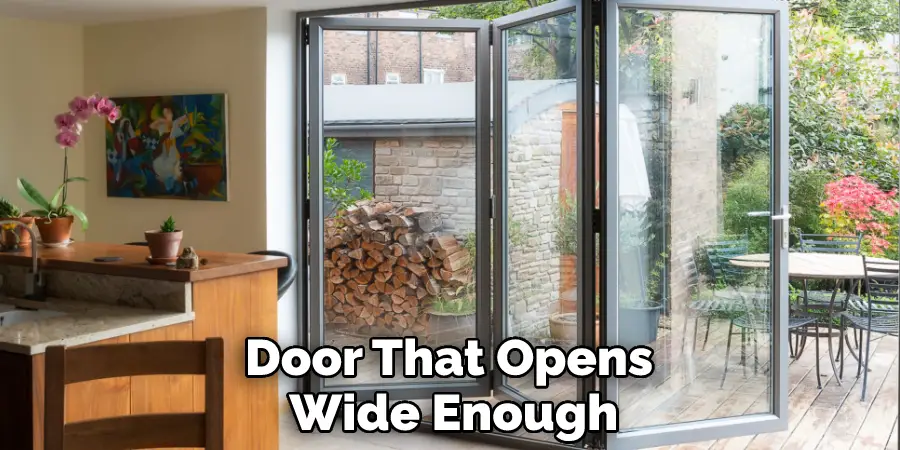
How to Choose the Right Garage Door for Your Studio
As any artist knows, a studio is more than just a place to paint or sculpt. It’s a refuge, a place to explore your creativity and push the boundaries of your art. As such, it’s important to choose a garage door that reflects your creative style. If you’re not sure where to start, consider these factors:
First, consider the materials you want your door to be made from. Metal doors are durable and low-maintenance but can also be quite plain. Wood doors offer a warm, natural look but require more care and upkeep. Glass doors provide a sleek, modern look, but they’re also the most fragile option.
Next, think about the design of the door. Do you want a simple, functional door or something with more personality? Many different garage doors are available, from classic wood doors to modern glass doors. Consider what would best suit the overall look of your studio.
Finally, think about how easy the door is to use. If you often have large pieces of art or supplies that need to be moved in and out of your studio, you’ll need a door that opens wide enough to accommodate them. You should also ensure that the door opener is compatible with any security system you have.
By considering these factors, you can choose a garage door that will perfectly complement your studio – and help you create even better art.
Conclusion
Converting a garage into a studio can be a great way to add extra living space and can be done relatively cheaply. By following the tips in this article, you should be able to create the perfect studio for your needs. Thanks for reading our post about how to convert garage into studio.
I am Rick. I grew up helping my dad with his handyman service. I learned a lot from him about how to fix things, and also about how to work hard and take care of business. These days, I’m still into fixing things- only now, I’m doing it for a living.
I’m always looking for new ways to help people grow and develop. That’s why I have created this blog to share all my experience and knowledge so
that I can help people who are interested in DIY repair.