
Ready to record your next album? Or maybe do some voice-overs or music production? Check out this guide on how to build a recording studio in your garage. With a little know-how and some basic supplies, you’ll be up and running in no time! So get ready to take your music career to the next level!
Summary: To build a recording studio in your garage, you need to start by clearing out the space and deciding on what kind of studio setup you want. Invest in quality recording equipment, including microphones and audio interfaces, and consider hiring a professional electrician to update your electrical system to handle the heavy power load.
What Is a Recording Studio?
A recording studio is a facility where musicians, singers, and other artists can record their music. The studio typically consists of two main rooms: the control room and the live room. The control room is where the engineer works to mix and edit the recorded audio, while the live room is where the artist performs.
Recording studios are usually equipped with various microphones and other recording equipment, as well as soundproofing to reduce outside noise interference. Many studios also have a waiting area for artists and producers, as well as a kitchen and bathroom.
Recording studios vary in size and amenities, but all provide a space for artists to create music.
Why Should You Build a Recording Studio in Your Garage?
Home recording studios are becoming increasingly popular, and it’s easy to see why. They offer a cost-effective way to get started in the music industry and provide a creative space where you can experiment with sound. If you’re thinking about building a home studio, there are a few things you should keep in mind.
First, consider the acoustics of your space. Garage studios often have good acoustics because of their concrete walls and ceilings. Second, make sure you have enough power for all your equipment. Third, invest in some soundproofing material to keep your neighbors from early morning jam sessions.
Finally, have fun and be creative! A garage studio is perfect for experimenting with sound and creating the music you’ve always wanted to make.
How to Build a Recording Studio in Your Garage
Building a recording studio in your garage is a great way to start music production. It’s also a great way to save money, as you can use materials you may already have on hand. Here are the steps you’ll need to take to build your recording studio:
Step 1: Assess Your Space and Needs
Before beginning the construction of your recording studio, assess the available space in your garage and determine your specific needs. Consider the size of your garage, your desired layout, the types of instruments and equipment you plan to use, and the number of people who will be using the studio simultaneously.
Step 2: Plan Your Layout
Develop a detailed floor plan for your recording studio, including the placement of walls, doors, windows, electrical outlets, and lighting fixtures. Consider the location and size of the control room, live room, and isolation booths, as well as any additional spaces you may require, such as a lounge or storage area. Remember to leave ample space for equipment and instruments, as well as comfortable movement within the studio.
Step 3: Acquire Necessary Permits
Check with your local building department to determine if any permits are required for the construction of a recording studio in your garage. Obtain the necessary permits before beginning any construction work to ensure that your project complies with local building codes and regulations.
Step 4: Prepare the Garage
Empty your garage of any items that will not be part of the recording studio. This may include vehicles, tools, and storage items. Clean the garage thoroughly, paying particular attention to the floor, walls, and ceiling. Remove any debris, dirt, or dust that could interfere with the construction process or negatively impact the acoustics of your studio.
Step 5: Construct Walls and Ceilings
Build the walls and ceilings for your recording studio, following your floor plan and local building codes. Use materials that provide both soundproofing and insulation, such as double layers of drywall, resilient channel, or mass loaded vinyl. Install acoustic insulation, like mineral wool or fiberglass, within the wall cavities to further reduce sound transmission.
Step 6: Install Doors and Windows
Install doors and windows in your recording studio, taking care to select models designed for soundproofing. Use solid core doors, which provide greater sound isolation than hollow core models. For windows, choose double or triple pane glass with a high Sound Transmission Class (STC) rating. Ensure that all doors and windows are properly sealed with weatherstripping to prevent sound leakage.
Step 7: Set Up Electrical and Lighting Systems
Install electrical outlets, switches, and lighting fixtures in your recording studio, following your floor plan and local building codes. Use isolated ground circuits to minimize electrical noise and interference. Consider the placement of equipment when installing outlets to ensure that they are easily accessible. Choose energy-efficient LED lighting with a warm color temperature to create a comfortable working environment.
Step 8: Install HVAC and Ventilation Systems
Install heating, ventilation, and air conditioning (HVAC) systems in your recording studio to maintain a comfortable temperature and humidity level. Ensure that the HVAC system is quiet and does not introduce noise into the studio. Consider using duct silencers, soundproof vents, or an isolated mechanical room to minimize noise transmission.
Step 9: Soundproof and Acoustically Treat the Studio
Apply soundproofing and acoustic treatment materials to the walls, ceiling, and floor of your recording studio. Use materials such as acoustic foam, bass traps, and diffusers to control sound reflections and improve the overall acoustics of the space. Consider the placement of these materials based on the specific needs of your studio, including the types of instruments and equipment used and the desired sound quality.
Step 10: Install Flooring
Install flooring in your recording studio, selecting a material that provides both sound isolation and comfort. Popular options include carpet, rubber, or vinyl flooring, which can be installed over an acoustic underlayment for improved soundproofing. Remember to account for the weight and movement of equipment when choosing your flooring material.
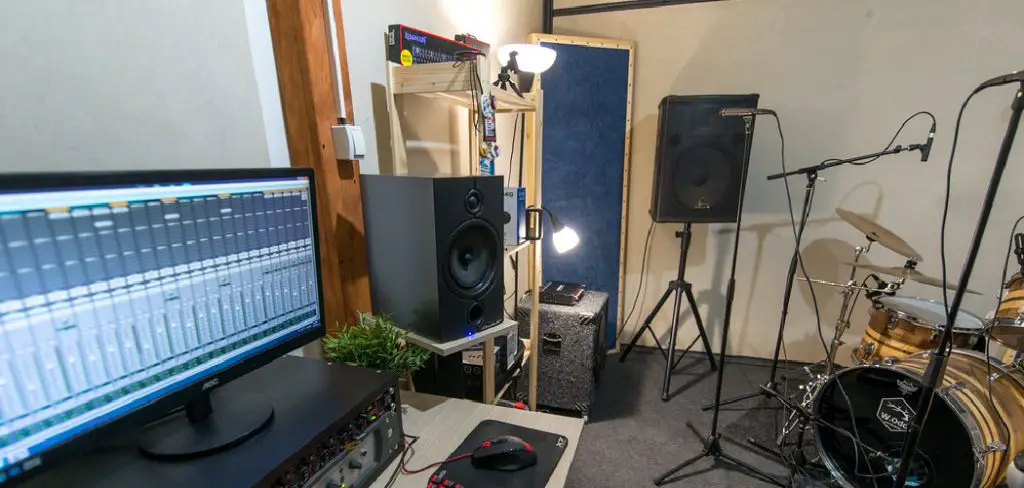
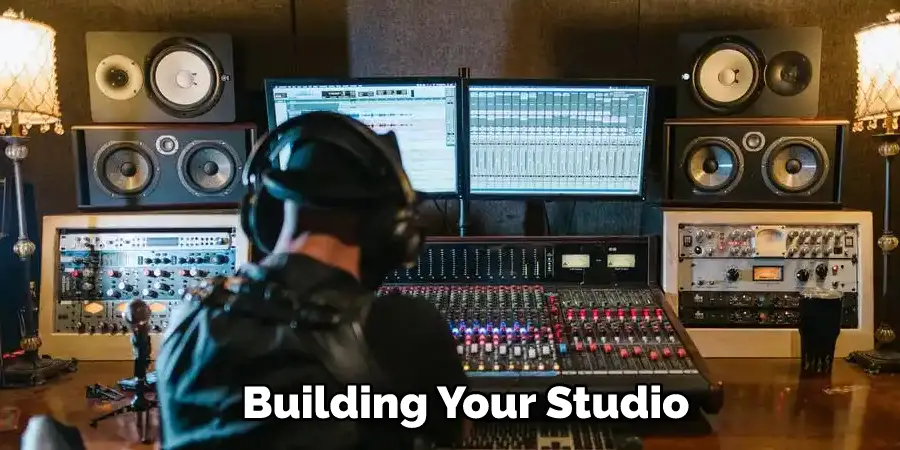
Step 11: Set Up the Control Room and Live Room
Designate separate areas within your recording studio for the control room and live room. The control room is where the audio engineer will operate the mixing console, monitors, and other recording equipment, while the live room is where the musicians will perform and record.
Equip the control room with essential audio equipment such as a mixing console, audio interface, monitors, headphones, and a computer with recording software. Set up the live room with necessary instruments, amplifiers, microphones, and stands. Ensure that both rooms are ergonomically designed, with comfortable seating and ample space for movement.
Step 12: Install Audio Wiring and Cabling
Run audio wiring and cabling throughout your recording studio, connecting the control room to the live room and any isolation booths. Use high-quality audio cables to minimize signal loss and interference. Label and organize cables using cable management solutions, such as cable ties or cable organizers, to keep your studio neat and efficient.
Step 13: Test Your Studio’s Acoustics
Before using your recording studio, test its acoustics to ensure optimal sound quality. Play a variety of audio sources through your monitors and listen for any problematic frequencies or reflections. Make any necessary adjustments to the placement of acoustic treatment materials, equipment, or furniture to fine-tune the studio’s acoustics.
Step 14: Set Up Communication and Recording Systems
Install communication systems in your recording studio, such as talkback microphones and headphone distribution systems, to facilitate communication between the control room and live room during recording sessions. Set up your recording system, including your computer, digital audio workstation (DAW), and any necessary plugins or hardware, to capture and process audio.
Step 15: Optimize Your Studio’s Workflow
Organize and optimize your recording studio’s workflow by establishing designated areas for specific tasks, such as editing, mixing, and mastering. Consider the placement of equipment, furniture, and storage solutions to create an efficient and comfortable work environment.
Step 16: Decorate and Personalize Your Studio
Add personal touches to your recording studio, such as artwork, rugs, and plants, to create an inviting and inspiring atmosphere. Choose decor and color schemes that reflect your personal style and preferences while maintaining a professional appearance.
Step 17: Maintain and Update Your Studio
Regularly maintain and update your recording studio to ensure its continued functionality and performance. This includes cleaning and inspecting equipment, updating software, and replacing worn or damaged materials. Stay informed about advancements in recording technology and consider upgrading your studio as needed to stay competitive in the industry.
By following these steps, you can successfully build a recording studio in your garage that meets your specific needs and provides a professional, comfortable environment for creating and capturing high-quality audio. Remember to consult local building codes and regulations, and seek the help of professionals when necessary, to ensure the success and safety of your project.
What You Need to Know Before You Start Building Your Studio
Building your studio can be an incredibly rewarding experience. Not only will you have a space that is entirely your own, but you will also have the satisfaction of knowing that you created it yourself. However, before you start construction, there are a few things you need to keep in mind.
First and foremost, you need to make sure that you have the proper permits in place. Depending on your location, there may be strict regulations regarding the construction of buildings. Secondly, you need to consider the cost of materials and labor. Finally, if you’re working with a limited budget, it’s important to be realistic about what you can afford.
Lastly, you need to have a clear plan for your studio. What kind of space do you need? What sort of equipment will you need? By answering these questions, you can ensure that your studio build goes smoothly and that the result is exactly what you wanted.
How to Make the Most of Your Limited Space when Building a Studio
Building a studio can be a daunting task, especially if you have limited space to work with. However, there are a few ways that you can make the most of your limited space and create a studio that is both functional and stylish.
First, consider using multipurpose furniture. A desk that doubles as a dressing table or a bed that converts into a sofa will help you save space and create a more flexible layout.
Second, take advantage of vertical storage solutions. Wall-mounted shelves and cabinets can help free up floor space and keep your studio feeling organized.
Finally, try to use light-colored fixtures and furnishings. Light colors will help to reflect light and make your studio feel airy and spacious. By following these tips, you can turn even the smallest studio into a stylish and functional space. Keep reading for more information about how to build a recording studio in your garage.
What Is the Cheapest Way to Build a Recording Studio?
When it comes to building a recording studio, there are many factors to consider. The most important factor is acoustics. It is essential to have a room that doesn’t have too much echo or reverberation. This can be achieved by using sound-absorbing materials on the walls and ceiling.
The next consideration is equipment. A good recording studio needs high-quality microphones, mixing consoles, and speakers. Finally, you need to consider the cost of construction and soundproofing. With all of these factors in mind, the cheapest way to build a recording studio is to convert an existing room in your home into a studio.
This can be done by adding sound-absorbing materials to the walls and ceiling and investing in high-quality recording equipment. Then, with a little effort, you can create a professional-sounding recording studio on a budget.
Who Should I Hire to Help Me Build a Recording Studio?
Hiring the right team to help you build your recording studio is essential. You need experts who understand the acoustics of a room and how to design a space that sounds good. You also need people who are experienced in construction and electrical work to ensure that your studio is safe and up to code.
And, of course, you’ll need to find someone who fits within your budget. With so many factors, it can be difficult to know where to start. However, by doing your research and taking the time to find the right team, you can build the perfect recording studio for your needs.
You Can Check It Out To Convert Garage Into Studio
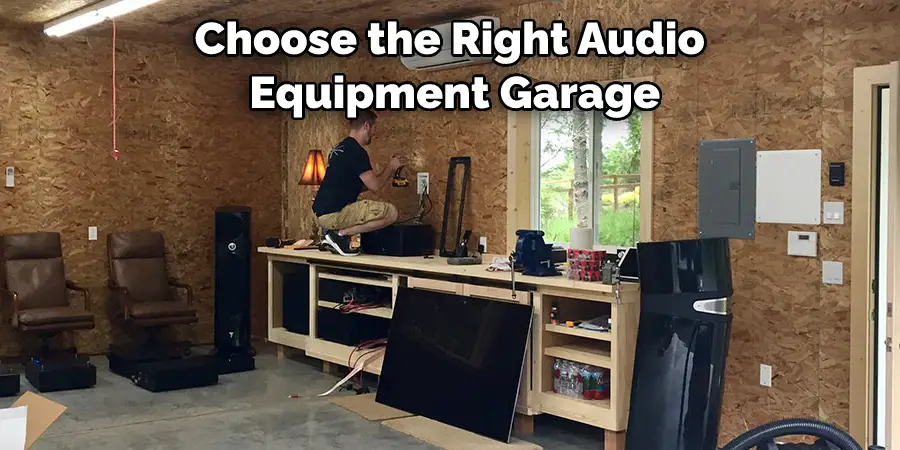
How to Choose the Right Audio Equipment for Your Studio
As any musician knows, having the right audio equipment is essential for recording high-quality tracks. But with so many different types of microphones, mixers, and monitors on the market, it can be difficult to know where to start. So here are a few tips on choosing the right audio equipment for your studio.
First, consider the size of your studio and the type of music you typically record. If you have a large space, you’ll need powerful speakers that can fill the room. For smaller studios or recordings that don’t require a lot of volumes, portable speakers may be a better option.
Next, consider the different types of microphones available and decide which one will work best for your needs. If you’re recording vocals, for example, you’ll want a microphone that captures all the subtleties of the voice. For instruments, on the other hand, you might prefer a microphone with a more focused sound.
Finally, don’t forget to factor in your budget when choosing audio equipment. While getting quality gear is important, remember that you don’t need to spend a fortune to get good results. With a little research, you can find affordable options that will help you get great sound.
Conclusion
If you’re looking to build your recording studio, there are a few things you need to keep in mind. By following the tips we’ve outlined in this article, you’ll be on your way to creating a professional-sounding studio right in your garage. Thanks for reading our post about how to build a recording studio in your garage. Good luck and happy recording!
I am Rick. I grew up helping my dad with his handyman service. I learned a lot from him about how to fix things, and also about how to work hard and take care of business. These days, I’m still into fixing things- only now, I’m doing it for a living.
I’m always looking for new ways to help people grow and develop. That’s why I have created this blog to share all my experience and knowledge so
that I can help people who are interested in DIY repair.