When it comes time to install a new garage door, many homeowners struggle with deciding which type of door to choose. Clopay has various options available, each with its own benefits and drawbacks.
In this blog post, we’ll take a look at the different types of Clopay garage doors and how to install a clopay garage door. We’ll also provide some tips for making the installation process go as smoothly as possible. So if you’re in the market for a new garage door, read on!

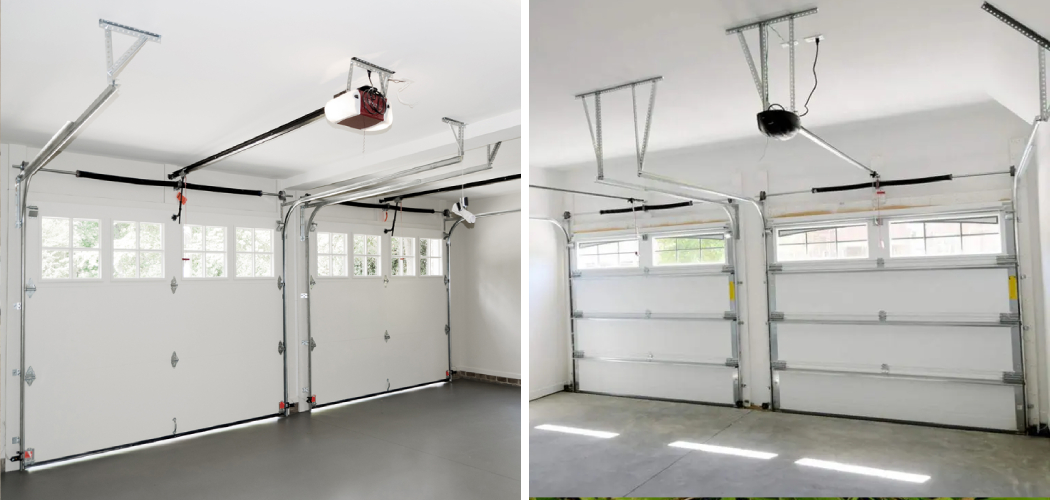
Summary: Installing a Clopay garage door is simple and straightforward. Begin by gathering the necessary tools and materials, such as a drill, screwdriver, and mounting hardware. Install the hinge brackets on each garage door side using lag bolts. Attach the spring anchor bracket to the header support. Assemble the operator and attach it securely, connecting all cables and wires in accordance with the manufacturer’s instructions.
What Causes Clopay Garage Doors to be a Popular Choice?
Clopay garage doors are considered some of the best in the market. They’re known for their durability, energy efficiency, and appealing designs. If you’re looking for a garage door that will last for years and provide excellent value, Clopay is a great choice.
There are several reasons why Clopay garage doors are so popular. First, they’re made with high-quality materials.
Clopay uses a steel reinforcement bar in all of its doors, making them much more resistant to impact than other garage doors. Additionally, Clopay doors are available in a variety of styles and colors. As a result, you can choose a door that perfectly matches the look of your home.
Clopay also offers a variety of energy-efficient garage doors. If you’re looking to save money on your energy bills, Clopay’s insulated doors can help. These doors are made with a foam core that helps to reduce heat loss in your garage. As a result, your garage will be warmer in the winter and cooler in the summer, which can lead to lower energy bills.

Another benefit of Clopay doors is that they’re easy to install. Unlike some other brands, Clopay doors have all the necessary hardware and instructions. The other thing that makes Clopay doors great is their customer service.
If you have any questions or problems during the installation process, you can contact Clopay’s customer service team for help. Finally, Clopay offers a warranty on all of its doors, so you can be confident that your investment is protected.
Types of Clopay Garage Doors
As we mentioned, Clopay has a variety of garage doors to choose from. In this section, we’ll briefly discuss the different types of Clopay doors so you can decide which one is right for your home.
The first type of Clopay door is the steel garage door. This is the most popular type of Clopay door and is known for its durability. Steel doors are also low-maintenance and easy to clean.
The second type of Clopay door is the wood garage door. Wood doors add a touch of elegance to your home and can be stained or painted to match your home’s exterior. However, wood doors require more maintenance than steel doors and are not as durable.
The third type of Clopay door is the fiberglass garage door. Fiberglass doors are known for their energy efficiency and resistance to impact. They’re also low-maintenance and easy to clean. However, fiberglass doors are more expensive than steel or wood doors.

The fourth and final type of Clopay door is the aluminum garage door. Aluminum doors are lightweight and low maintenance. However, they’re not as durable as the other types of Clopay doors and can be easily dented.
Tools and Materials Needed
Before beginning the installation process, gathering all the tools and materials, you’ll need is important. For most installations, you’ll need the following:
- Ladder
- Power drill
- Screwdriver
- Measuring tape
- Level
- Hammer
- Saw
- Drill bit
- Garage door opener (if desired)
Step by Step How to Install a Clopay Garage Door
1. Measure Garage Door Opening
The first step is to measure the garage door opening. This will ensure that you buy a door that fits properly. To do this, use a measuring tape to measure the width and height of the opening. First, measure the width at the opening’s top, middle, and bottom.

Then, measure the height at the opening’s left, middle, and right sides. Write down all of these measurements, so you don’t forget them. If the measurements are different, use the largest measurement for both the width and height.
2. Determine Door Type
Once you’ve measured the garage door opening, it’s time to decide which type of Clopay door you want. As we mentioned earlier, Clopay offers four different types of doors: steel, wood, fiberglass, and aluminum. Consider the look you want for your home and the amount of maintenance you’re willing to do.
Steel doors are the most popular type of Clopay door and are known for their durability. Try not to get too caught up in looks, as all of Clopay’s doors are designed to be stylish.
3. Cut Header Board to Length
After you’ve decided which type of Clopay door you want, it’s time to cut the header board to length. The header board is a horizontal piece of wood that will be mounted above the door. To cut the header board, measure the width of the door opening and add two inches.
Then, use a saw to cut the header board to this length. First, make a mark at the desired length. Then, line up the saw’s blade with the mark and cut along the board. If you don’t have a saw, you can ask someone at the hardware store to make the cut for you.
4. Mount Header Board
Now that the header board is cut to length, it’s time to mount it. To do this, first, find the center of the door opening and mark it. Then, find the center of the header board and mark it.
The marks should line up with each other. Once the centers are marked, hold the header board in place and use a drill to screw it into the center of the door opening. Be sure to use screws that are long enough to go through the header board and into the door frame.
5. Install Top Bracket
The next step is to install the top bracket. The top bracket is a metal bracket that will be mounted on the header board. To install the top bracket, first, hold it in place on the header board. Then, use a drill to screw it into the header board. Be sure to use screws that are long enough to go through the header board and into the bracket.
You Can Also Check It Out to Heat an Uninsulated Garage
6. Install Bottom Bracket
After the top bracket is installed, it’s time to install the bottom bracket. The bottom bracket is similar to the top bracket but will be mounted on the floor. To install the bottom bracket, hold it on the floor first. Then, use a drill to screw it into the floor. Be sure to use screws that are long enough to go through the bracket and into the floor.
You Can Also Check It Out to Add a Garage to a House
7. Hang Door on Brackets
Now that the brackets are installed, it’s time to hang the door on them. First, lift the door and place it on the top bracket to do this. Then, use a drill to screw the door into the top bracket.
Be sure to use screws that are long enough to go through the door and into the bracket. Next, lift the bottom of the door and place it on the bottom bracket. Again, use a drill to screw the door into the bottom bracket.
8. Install Tracks
The next step is to install the tracks. The tracks are the metal pieces that the door will roll along when it’s opened and closed. To install the tracks, hold them in place on either side of the door opening. Then, use a drill to screw them into place. Be sure to use screws that are long enough to go through the tracks and into the door frame.

9. Install Rollers
After the tracks are installed, it’s time to install the rollers. The rollers are what allow the door to roll along the tracks when it’s opened and closed. First, hold the rollers in place on the tracks to install them. Then, use a drill to screw them into the tracks. Be sure to use screws that are long enough to go through the rollers and into the tracks.
10. Install L-Brackets
The final step is to install the L-brackets. The L-brackets are used to secure the bottom of the door to the floor. To install the L-brackets, hold them in place on the bottom of the door. Then, use a drill to screw them into the floor. Be sure to use screws that are long enough to go through the L-brackets and into the floor.
You Can Check It Out to Install Garage Door Weatherstripping
How Much Does It Cost To Install A Clopay Garage Door?
The cost of installing a Clopay garage door varies depending on the size and style of the door, as well as the location of the installation. However, on average, you can expect to pay between $200 and $500 for installing a Clopay garage door.
Conclusion
So there you have it! Now you know how to install a Clopay garage door. Follow all the steps carefully to ensure the door is installed correctly. And, if you have any questions, ask a professional for help. Thanks for reading!
You Can Check It Out To How to Remove Rust Oleum Garage Floor Epoxy
I am Rick. I grew up helping my dad with his handyman service. I learned a lot from him about how to fix things, and also about how to work hard and take care of business. These days, I’m still into fixing things- only now, I’m doing it for a living.
I’m always looking for new ways to help people grow and develop. That’s why I have created this blog to share all my experience and knowledge so
that I can help people who are interested in DIY repair.