
If your garage door opener is suddenly having trouble moving the door up and down, or if you notice that the chain is loose or damaged, it’s time to fix your garage door. Although it may seem like a daunting task, you can easily fix your garage door yourself with a little patience and some basic tools. Read on for our step-by-step guide on how to fix cable on garage door.
Why It’s Important to Fix the Cable on The Garage Door?
It’s important to fix the cable on the garage door because a broken or loose chain can cause the opener to work harder than necessary, which can shorten its lifespan. If the cable breaks, it can also cause the door to come crashing down, which can be dangerous. So if you notice that your garage door opener is having trouble moving the door up and down, or if you see that the chain is loose or damaged, it’s time to fix your garage door.
What You’ll Need:
Phillips Head Screwdriver:
You’ll need this to loosen and tighten the screws on the garage door opener. Make sure to choose the right size for your specific opener.
Pliers:
Pliers will come in handy when working with cables and springs. They can also be used to adjust tension.
Wrench Set:
A wrench set will be needed to tighten any loose bolts or nuts on the garage door opener or tracks.
Replacement Cable:
If your cable is damaged or broken, you’ll need to purchase a new one before starting the repair process.
How to Fix Cable on Garage Door Step-by-Step Guide
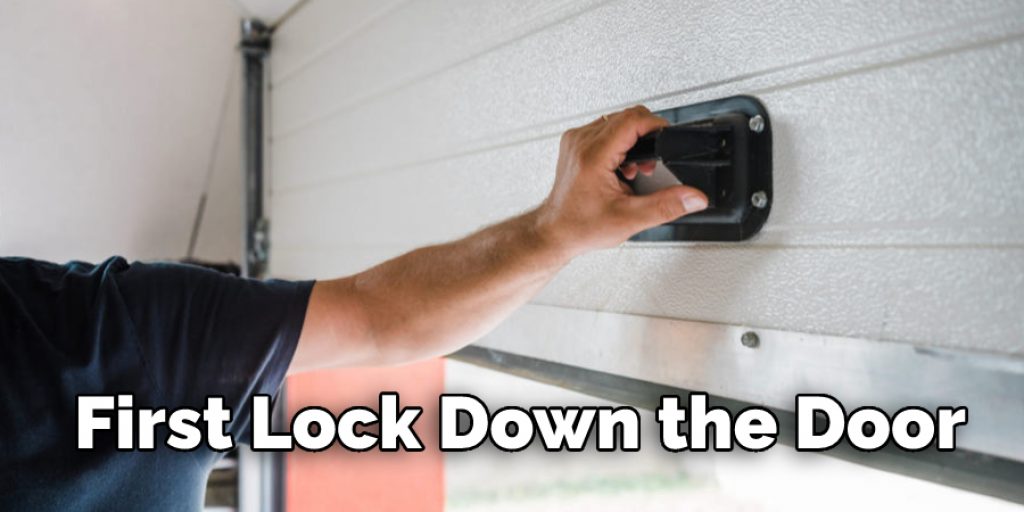
Step 1: Lock Down the Door:
The first step is to lock down the door. This is done by closing the garage door and then pulling the red cord above the door. This will release the lock and keep the door closed. You may need a ladder to reach the cord. It’s important to make sure the door is securely locked down before starting any repairs.
Step 2: Loosen the Unbroken Spring:
If the broken cable is on the left side of the garage door, you will need to loosen the unbroken spring. This can be done by turning the adjustment bolt clockwise at the end of the spring with a wrench. Be careful not to over-tighten the bolt, as this could cause damage to the spring.
If the broken cable is on the right side of the garage door, you will need to loosen the unbroken spring by turning the adjustment bolt located on the end of the spring counterclockwise with a wrench. But, again, be careful not to over-tighten the bolt.
Step 3: Unwind the Unbroken Spring:
Assuming that the cable is still attached to the garage door and that it has not broken, you will need to unwind the unbroken spring. Then, use your hands to slowly turn the winding cone on the end of the spring in a clockwise direction. You must take your time with this step, as you do not want to damage the spring.
Step 4: Disconnect the Springs from The Center Bracket:
There are two springs located on the center bracket. You’ll need to remove the nuts that hold them in place to disconnect them. You can use a socket wrench for this step. Once the nuts are off, you can pull the springs off the bracket and set them aside. Be careful not to let them snap back and hit you.
Step 5: Secure the Torsion Tube:
Now, it is time to secure the torsion tube. This can be done with either the clips with your door or cable ties. If you are using cable ties, make sure that you do not overtighten them, as this can cause damage to the door. Once the tube is secured, reattach the opener arm. The tension from the springs will help hold everything in place.
Step 6: Remove the Old Spring:
There are two springs on the garage door, one on each side. The spring is located between the cable and the roller. To remove the old spring, you will need to loosen the set screws that hold it in place. Once the screws are loosened, you can pull the spring out of the bracket. Be careful not to let the spring snap back.
Step 7: Buying Replacement Parts:
If you have determined that the cable is the issue, you will need a replacement. You can find these at most hardware stores or online. The type of cable you need will depend on the make and model of your garage door. Be sure to get the right size and type to avoid further issues. But, if you are unsure, it is always best to consult a professional.
Step 8: Install the Left Spring:
Install the left spring onto the shaft. The coil should be facing down. The end of the spring with the hook should be on top of the garage door. Slide the spring up the shaft until it is seated against the bearing plate. You will need to wind the spring a certain number of times, depending on the size and weight of your garage door. Be sure to follow manufacturer instructions or consult a professional if you are unsure.
Step 9: Install a New Center Bearing:
Garage door cables can often break or fray at the bearing plate. If this is the case, installing a new center bearing is important. You’ll need to remove the bottom bracket from the door to do this. Once this is done, you can install the new bearing and replace the bracket. Ensure the bracket is securely fastened before moving on to the next step.
Step 10: Replace the Bottom Brackets, Rollers, and Lift Cables:
Again, use the adjustable wrench to unscrew the bolts that secure the bottom brackets to the garage door. Next, remove the brackets and rollers, then replace them with the new ones. Be sure to insert the screws in the correct holes, as they may be a different color than the old ones. Finally, reattach the lift cables to the bottom brackets and rollers.
Step 11: Thread the Cables:
If your cables are frayed, it’s time to replace them. You’ll first need to remove the drum from the shaft to do this. Once the drum is off, you can start threading the new cables through the holes in the bracket and around the pulleys. Ensure that the cables are evenly spaced on each side of the door. Once the cables are in place, reattach the drum to the shaft and test the door.
Step 12: Tighten the Drums:
Now that the cable is in place, it’s time to tighten the drums. To do this, you’ll need a crescent wrench. Place the wrench on the bolt and turn it clockwise until it’s tight. Do not over-tighten the bolts, or you could damage them. You may need to use a second wrench to hold the shaft in place while tightening.
Step 13: Wind the Garage Door Tension Springs:
Wind the garage door tension springs by turning them clockwise. Be careful as they are under a lot of tension. It would help if you had someone help you with this step to ensure your safety. Once the springs are wound, stop and check to ensure the cable is in place and tightened. If it is not, repeat steps 10-12 until it is.
Step 14: Stretch the Springs:
With the door in the open position, use a broomstick or other long object to push down on the garage door opener lever. This will stretch the springs and help take some of the tension off of them. Be careful not to let go of the opener lever while stretching the springs! It could cause damage or injury.
Step 15: Lubricate the Spring:
This will help keep the door working correctly. There are special lubricants made specifically for garage doors, but you can also use a silicone spray.
If your garage door is old, it may be time to replace the cables. This is a job that should be done by a professional, as it can be dangerous if done incorrectly. If you decide to replace the cables yourself, make sure you have the correct size and type of cable.
It is also a good idea to keep your garage door properly lubricated and in good condition to avoid any problems in the future.
When installing the new cable, follow the manufacturer’s instructions carefully. If you are not comfortable doing this yourself, call a professional to help. Replacing a cable can be a dangerous job, so please call a professional if you are not comfortable with it. Keep reading for more information about how to fix cable on garage door.
Some Other Ways to Replace a Garage Door Cable?
If your garage door cable has snapped, it will need to be replaced as soon as possible. This is a job that can be done by most people, provided they have some basic tools and know-how. The following steps will show you how to replace a garage door cable:
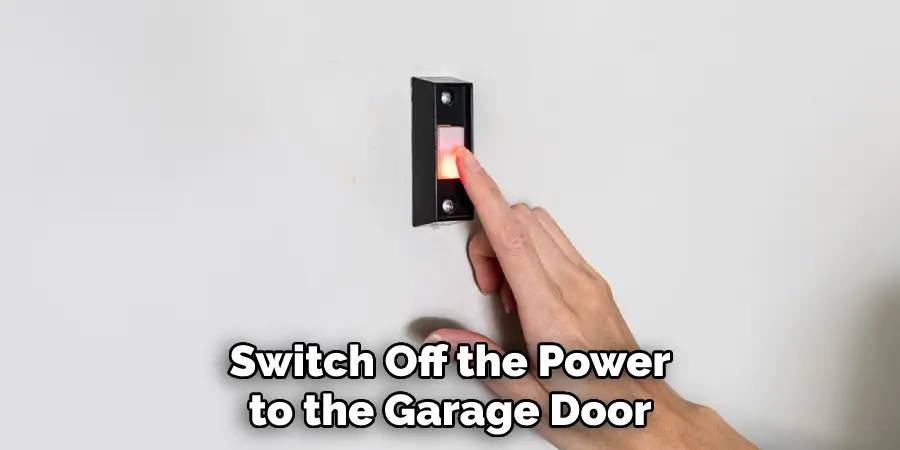
1. Switch Off the Power:
Before you do anything, you will need to switch off the power to the garage door. This can usually be done by flipping a switch in the garage or pulling out a fuse in the box.
2. Remove the Manual Lock:
Some garage doors have a manual lock that you will need to release before the door can be opened. So first, find the manual lock and release it. This is usually done by pulling on a lever or turning a knob.
3. Hold the Door:
Now, it’s time to hold the door. This is where you use your body weight to keep the door closed. Again, you will need someone to help you with this step. One person should be on each side of the door and put their hands on the door near the bottom. The person on the inside then pushes up on the door while the person outside pulls down. This will keep the door in place while you work on the cables.
4. Remove the Springs:
The springs are another common source of problems with garage doors. They can become worn out or damaged, which will make the door difficult to open and close. If you suspect that your springs are causing issues with your door, you can remove them and inspect them for damage. If they are damaged, you can replace them yourself or call a professional to do it for you.
If you will remove the springs, be sure to take precautions. The springs can be hazardous if they are not appropriately handled. Be sure to wear safety goggles and gloves, and use caution when handling them. Once you have removed the springs, you can take them to a hardware store or garage door specialist to have them replaced.
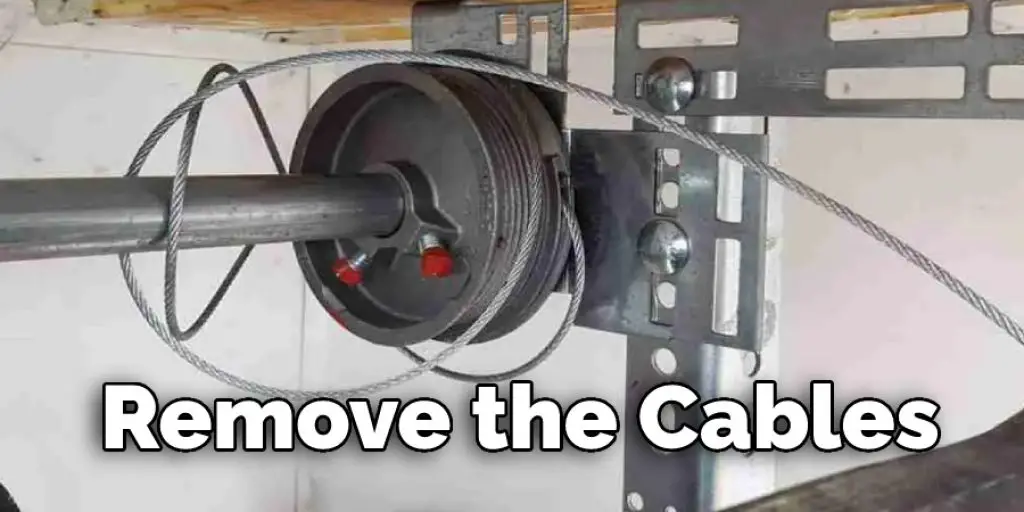
5. Remove the Cables:
Once the opener is exposed, it is time to remove the cables. This can be a little bit tricky, as the tension on the cable will be high. You will need to use a socket wrench or crescent wrench to loosen the bolts that hold the cable in place. Be very careful when doing this, as one wrong move could result in the cable snapping.
6. Replace the Cable:
If the cable is broken, then it will need to be replaced. You will need to remove the door from the tracks to do this. This can be done by loosening the bolts that hold it in place. Once the door is off the tracks, you can remove the old cable and replace it with a new one. Be sure to follow the same steps when putting the door back on the tracks.
7. Test the Door:
Now, it is time to test the door. Open and close it a few times to make sure the cable is working properly. If everything seems to be in order, then you are done! If you want to know more about how to fix cable on garage door, keep reading.
What Should You Do If You Have a Broken Garage Door Cable?
A broken garage door cable can be a real pain, but fortunately, it’s a fixable problem. Here are the steps you need to take to get your garage door up and running again:
1. Open the garage door. This will give you easier access to the cable.
2. Locate the cable. It’s usually located on the bottom of the garage door.
3. Remove the cable from its brackets. Be careful not to damage the cable while you’re doing this.
4. Bend the end of the cable that’s still attached to the door. This will make it easier to attach a new cable later on.
5. Cut the old cable off of the door.
6. Strip the insulation off of the new cable.
7. Attach the new cable to the door. Make sure it’s in the same place as the old cable.
8. Bend the end of the new cable that’s still attached to the door.
9. Replace the brackets and screw them in place.
10. Close the garage door and test it out.
If you have any questions, don’t hesitate to call us. We’re happy to help!
Safety Precautions for Fixing Broken Garage Door Cables
- Make sure the power to the garage is turned off before beginning any repairs.
- If possible, have a second person help you stabilize the door while you work.
- Be very careful when working with the springs, as they can cause serious injury if they snap.
- If you have any questions about your ability to fix the cable safely, please consult a professional. Your safety is the top priority.
- Wear protective gear, such as goggles and gloves, when handling components of the garage door.
- Follow all manufacturer’s instructions carefully to ensure proper installation of new cables and other parts.
Frequently Asked Question
How Much It Costs to Replace The Garage Door Cables?
Replacing the cables on a garage door typically costs between $100 and $300, depending on the size of the door. Most homeowners can do the job themselves, but it does require some strength and dexterity. If you’re not comfortable replacing the cables yourself, a professional can typically do the job in less than an hour.
How to Tell if You Need Garage Door Cable Repair?
If you are not sure whether your garage door cable needs repair, there are a few signs you can look for. One sign is that the door is difficult to open and closes at a slower speed than normal. Another sign is that the door starts making loud noises, such as grinding or clicking. If you notice any of these signs, it is important to repair the cable as soon as possible to avoid further damage.
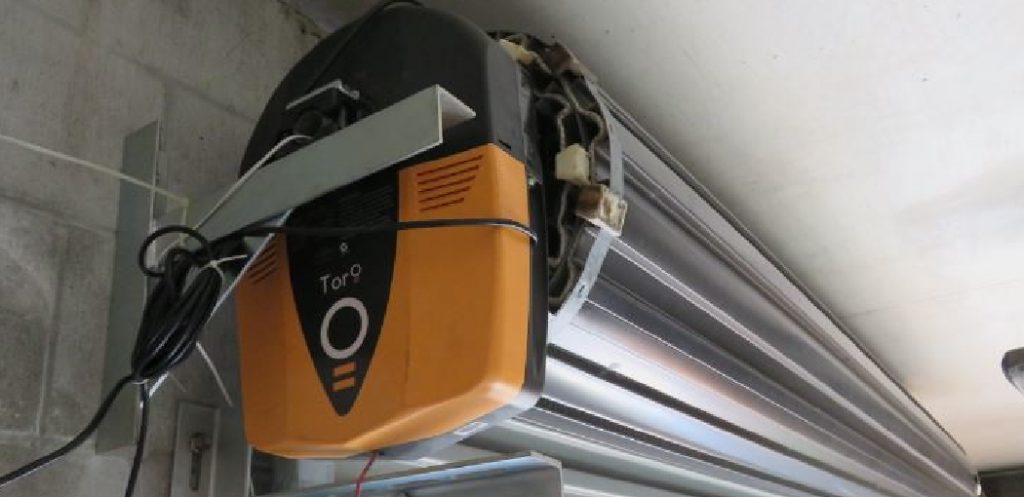
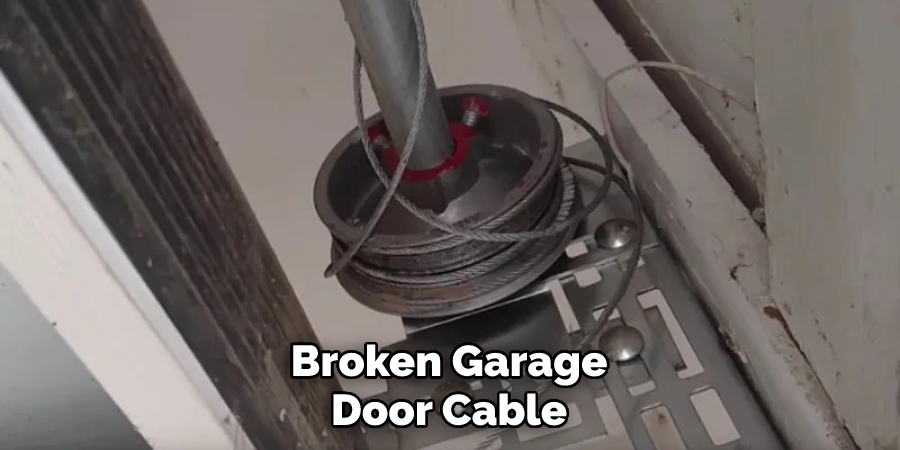
What is a Garage Door Cable?
A garage door cable is a metal cable that helps lift and open the garage door. The cable is often attached to a drum on the garage door opener, and as the opener pulls the cable, the door opens. However, if the cable breaks or becomes loose, it can prevent the garage door from opening or closing.
What’s Wrong With My Garage Door Cables?
There are a few things that can go wrong with garage door cables. One of the most common problems is when the cable snaps or comes loose from the drum. This can happen if the cable is old and worn if it’s been over-tightened, or if it’s been exposed to harsh weather conditions.
Can I Prevent My Garage Door Cables From Breaking?
Yes, you can prevent your garage door cables from breaking by performing some regular maintenance. First, inspect the cables for any signs of wear and tear. If there is any damage, you will need to replace the cables as soon as possible. Additionally, make sure that the garage door is properly balanced. If it is not, the cables may break. Finally, lubricate the cables and the pulleys once a month to keep them in good condition.
Can I Fix My Broken Garage Door Cable Myself?
Many people question whether they can fix their broken garage door cable themselves. The answer to this question is, unfortunately, no. There are a few reasons for this. First of all, fixing a garage door cable is a relatively difficult task that requires special tools and expertise. Secondly, even if you can fix the cable, it is not likely to stay fixed. Garage door cables are under a lot of tension and can easily break again.
Conclusion
Garage door cables are an important part of the garage door system. However, if they break, it can be difficult to fix them without the help of a professional. This blog post shows you how to identify and fix a broken cable on your garage door. We hope that you found this information helpful and that it will help you keep your garage door functioning properly. Thanks for reading our post about how to fix cable on garage door.
You Can Check It Out to Get in Garage When Power Is Out
You may read also How to Close the Garage Door Manually
I am Rick. I grew up helping my dad with his handyman service. I learned a lot from him about how to fix things, and also about how to work hard and take care of business. These days, I’m still into fixing things- only now, I’m doing it for a living.
I’m always looking for new ways to help people grow and develop. That’s why I have created this blog to share all my experience and knowledge so
that I can help people who are interested in DIY repair.