
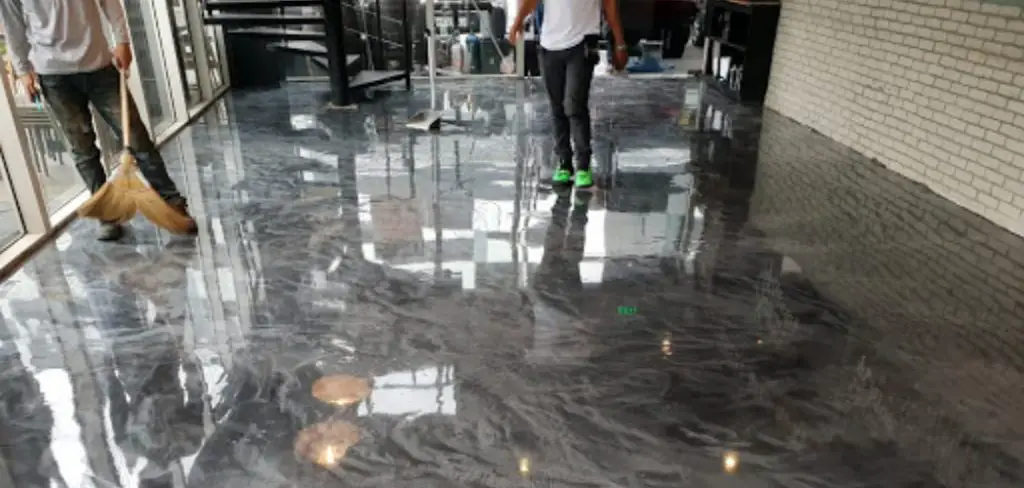
If you have a garage floor that is coated with epoxy, then you know how important it is to keep it clean. Garage floor epoxy can be durable and easy to clean, but only if it is well maintained. This post will show you how to clean garage floor epoxy to look great and last for years.
We will also give you some tips on how to prevent stains and debris from building up on your floor in the first place. Let’s get started!
Summary: Use a mop or sponge to apply the solution to the floor, working in sections. Be sure to rinse the mop or sponge frequently to prevent dirt from spreading around. After you’ve cleaned the entire floor, rinse it thoroughly with clean water and allow it to air dry. Avoid using harsh or abrasive cleaners, and never use a metal scraper or brush on your garage floor epoxy, as this could scratch or damage the surface.
What Causes Stains on Garage Floor Epoxy?
There are a few different things that can cause stains on your garage floor epoxy. The most common culprit is oil and grease. If you have a car that leaks oil or if you store any oil-based products in your garage, then you are likely to see stains on your floor.
Another common cause of stains is road salt. In the winter, road salt can be tracked into your garage on your car’s tires. This salt can cause the epoxy to deteriorate over time and can also leave behind ugly stains.
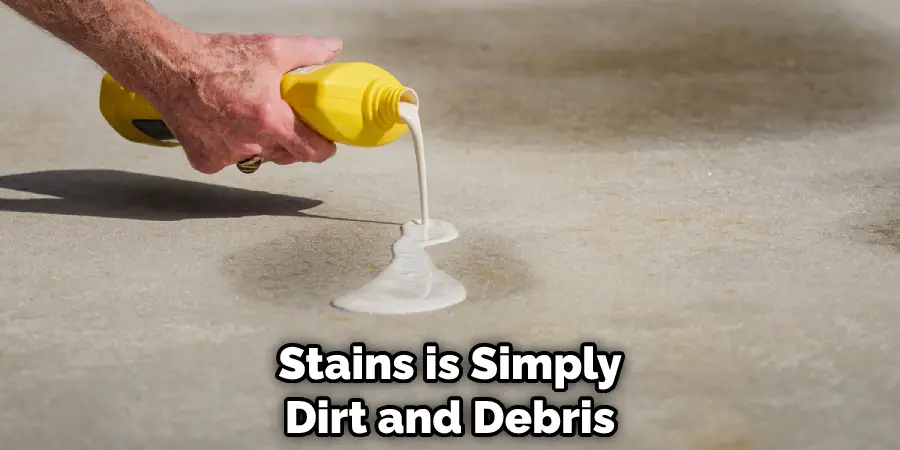
Additionally, if you have a pet urinating in your garage, you may also see stains on your floor. The other main cause of stains is simply dirt and debris. Even if you are diligent about sweeping and mopping your garage, dirt and dust can still find their way onto your floor and cause stains.
Lastly, if you have ever had a car leak antifreeze, then you know that this can also cause some serious staining.
Why It’s Important to Keep Your Garage Floor Epoxy Clean
Now that we know what can cause stains let’s talk about why keeping your garage floor epoxy clean is so important. First of all, a clean floor looks better. If you have a nice car or use your garage for entertaining, you want it to look its best. Additionally, a clean floor is easier to maintain than a dirty one.
Another reason to keep your floor clean is that it can actually extend the life of your epoxy coating. Dirt, debris, and salt can all contribute to the deterioration of your floor coating. By keeping your floor clean, you can help to prevent this damage and extend the life of your epoxy coating.
Finally, if you ever need to repair or replace your garage floor epoxy, it will be much easier if the floor is clean.
Some Easy Ways How to Clean Garage Floor Epoxy
Step 1: Gather Necessary Cleaning Supplies
Before starting the cleaning process, gather all the necessary supplies. These may include a broom or vacuum, a mop, a bucket, mild detergent or cleaning solution, and a scrub brush or deck brush. Having all your cleaning tools ready beforehand will make the process more efficient and convenient.
Step 2: Remove Debris and Dust
Begin by removing any debris, such as leaves, dirt, or small objects, from the garage floor. Use a broom or vacuum to sweep the entire surface, ensuring that all dust and dirt particles are removed. This step is crucial, as it will prevent the debris from scratching or damaging the epoxy surface during the cleaning process.
Step 3: Prepare Cleaning Solution
In a bucket, mix a mild detergent or cleaning solution with warm water. It is essential to use a non-abrasive cleaner to avoid damaging the epoxy floor. Read the manufacturer’s instructions for the recommended cleaner-to-water ratio and adhere to their guidelines for optimal results.
Step 4: Apply Cleaning Solution
Using a mop or deck brush, apply the cleaning solution to the garage floor. Start at the farthest corner of the garage and work your way towards the entrance. Ensure that the entire floor is covered with the cleaning solution, taking care to apply an even layer.
Step 5: Scrub the Floor
For heavily soiled areas or stubborn stains, use a scrub brush or deck brush to agitate the surface. Apply gentle pressure and move the brush in circular motions to loosen the dirt and grime. Be cautious not to apply excessive force, as this may scratch or damage the epoxy coating.
Step 6: Let the Solution Sit
Allow the cleaning solution to sit on the floor for a few minutes to break down dirt and stains. The length of time needed will depend on the level of soil and the specific cleaning solution used. Check the manufacturer’s instructions for their recommended dwell time.
Step 7: Rinse the Floor
After the cleaning solution has had time to work, thoroughly rinse the floor with clean water. Use a mop or hose to remove all traces of the cleaning solution, as leaving residue behind can cause the floor to become slippery or attract more dirt. Make sure to rinse the floor from the farthest corner towards the entrance, pushing dirty water out of the garage.
Step 8: Remove Excess Water
Once the floor is rinsed, use a squeegee or mop to remove excess water from the surface. This step will help prevent water from pooling and causing potential damage to the epoxy coating. Additionally, removing excess water will speed up the drying process.
Step 9: Dry the Floor
Allow the floor to air dry completely before moving vehicles or other items back into the garage. The drying process can be expedited by using fans or air movers. Ensure the floor is entirely dry to prevent slips and falls, as well as potential damage to the epoxy surface.
Step 10: Inspect for Damage
After the floor is clean and dry, inspect the epoxy coating for any signs of damage or wear. This includes checking for scratches, peeling, or discoloration. If you notice any issues, consult a professional or refer to the manufacturer’s instructions for guidance on repairs or maintenance.
Step 11: Maintain a Regular Cleaning Schedule
To keep your garage floor epoxy looking its best, establish a regular cleaning schedule. This may involve sweeping or vacuuming the floor weekly, and deep cleaning with a mild detergent or cleaning solution monthly or as needed. By maintaining a consistent cleaning routine, you can prolong the life of your epoxy floor and ensure it remains in excellent condition.
You Can Check It Out to Store Scooters in Garage
Tips and Warnings on How to Clean Garage Floor Epoxy
Tips:
- Scrape off any loose or flaking epoxy with a putty knife.
- Wet the floor and use a stiff brush to scrub away any dirt or grime.
- Mix a solution of 1 part bleach to 10 parts water and mop the floor with it.
- Rinse the floor with clean water and allow it to dry completely.
Warnings:
- Wear gloves and eye protection when handling or working with bleach.
- Do not allow the bleach solution to sit on the floor for more than 10 minutes.
- Rinse the floor well after cleaning with bleach to remove all residue.
- Do not use abrasive cleaners or scrubbers on the floor, as they can damage the epoxy.
- Avoid walking on the floor while it is still wet to prevent slipping.
- Do not use a power washer to clean the floor, as it can also damage the epoxy.
Conclusion
So there you have it, a few tips on how to clean garage floor epoxy. By following these tips, you can keep your floor looking great for many years to come.
If you have any stubborn stains that won’t come up with regular cleaning, try one of the deeper cleaning methods described above. We hope this guide was helpful and that you can now keep your floor looking like new. Thanks for reading!
You Can Check It Out To How to Dismantle Office Partitions
I am Rick. I grew up helping my dad with his handyman service. I learned a lot from him about how to fix things, and also about how to work hard and take care of business. These days, I’m still into fixing things- only now, I’m doing it for a living.
I’m always looking for new ways to help people grow and develop. That’s why I have created this blog to share all my experience and knowledge so
that I can help people who are interested in DIY repair.