
You may be wondering what to do when a hurricane is headed your way, and you have a garage door. One option is to sandbag the garage door. It’s an easy process that can help protect your home from damage. Here are the steps on how to sandbag garage door.
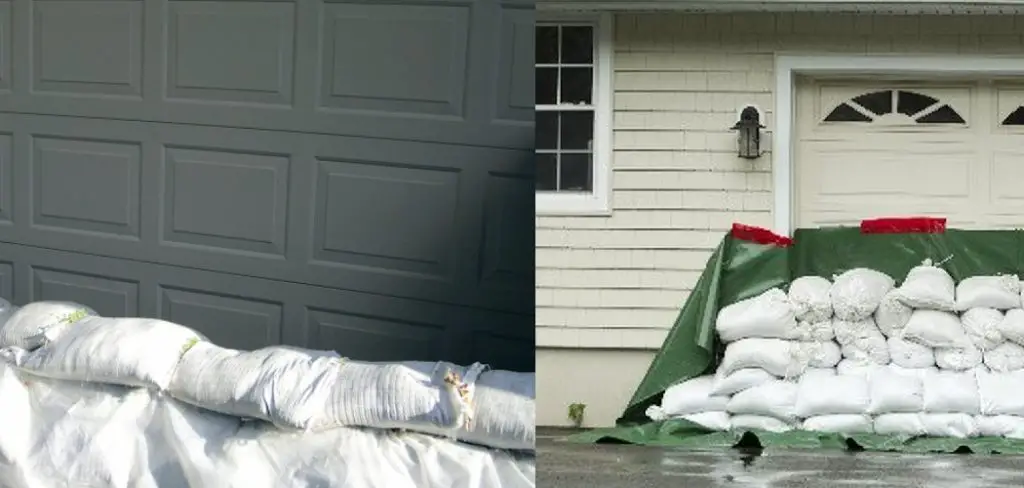
Summary: Sandbagging a garage door is a simple and effective way to protect it from flood damage. To sandbag, place sandbags at the corners of the door, working your way inward. Stack the sandbags in a pyramid shape, leaving a small gap at the top to allow for expansion. Secure the sandbags with duct tape or bungee cords to ensure they won’t shift or move during flooding.
What Is a Sandbag?
A sandbag is a bag filled with sand typically used for flood control or military fortification. When placed in or around homes, businesses, and other buildings, sandbags can help to prevent water damage from flooding. In addition, sandbags can create barriers or walls, protecting against enemy fire.
Much like concrete blocks or bricks, sandbags are an effective way to build a temporary wall or barrier. However, sandbags are significantly cheaper and easier to transport than bricks or blocks. As a result, they are often used in emergencies where time is of the essence.
Why Should You Use Sandbags on Your Garage Door?
If you live in an area prone to severe weather, it’s important to take steps to protect your property. One of the most vulnerable areas of your home is the garage door. High winds can easily damage a garage door, and flying debris can break through the glass. To help keep your garage door intact during a storm, it’s a good idea to use sandbags.
Sandbags can provide extra support for your garage door and help to keep it from being blown open by the wind. In addition, they can help to prevent flying debris from breaking through the glass. By taking the time to secure your garage door with sandbags, you can help to keep your home safe during a storm.
How to Sandbag Garage Door Step by Step Guide
Step 1: Assess the Flooding Risk
Before sandbagging your garage door, assess the risk of flooding in your area. Consider factors such as heavy rainfall, proximity to bodies of water, or known flood-prone zones. If you determine that your garage is at risk of flooding, sandbagging the door can be an effective preventative measure.
Step 2: Gather Necessary Materials and Tools
To sandbag your garage door, you will need sandbags, sand or soil, a shovel, gloves, and protective eyewear. Sandbags can be purchased at local hardware stores or online. It’s essential to have enough sandbags to create a barrier across the entire width of the garage door and to stack them several layers high.
Step 3: Calculate the Number of Sandbags Needed
Determine the number of sandbags required to cover the width of the garage door. To do this, measure the width of the door and divide that number by the width of a single sandbag. Multiply the result by the desired height of the sandbag barrier (typically 3 to 4 layers) to calculate the total number of sandbags needed.
Step 4: Fill the Sandbags
Fill the sandbags with sand or soil, filling them approximately two-thirds full. This will allow the sandbags to mold to the shape of the ground and create a more effective barrier. Be sure to wear gloves and protective eyewear when filling the sandbags to prevent injury.
Step 5: Create the First Layer of Sandbags
Start by laying the first layer of sandbags across the width of the garage door, placing them tightly against the door’s base. Ensure that the sandbags are packed firmly together, with no gaps between them. Overlap the sandbags like bricks, with the seams of adjacent bags staggered rather than aligned.
Step 6: Stack Additional Layers of Sandbags
Once the first layer is in place, continue stacking additional layers of sandbags on top of the previous layer. Each layer should be staggered, with the seams of the sandbags in the upper layer covering the seams of the lower layer. This pattern will create a more stable and effective barrier against floodwaters.
Step 7: Tamp Down the Sandbags
As you build the sandbag barrier, periodically tamp down the sandbags to ensure they are tightly packed and well-seated. This can be done using your hands, feet, or a flat tool, such as a shovel or a tamper. Tamping the sandbags will help create a more solid and effective flood barrier.
Step 8: Create a Plastic Sheet Barrier (Optional)
For added protection, you can place a large plastic sheet over the sandbag barrier before adding the final layer of sandbags. This plastic sheet should extend from the top of the barrier, down the front, and onto the ground in front of the garage door. The final layer of sandbags should be placed on top of the plastic sheet, securing it in place and providing additional protection against water infiltration.
Step 9: Monitor the Sandbag Barrier During Flooding Events
During flooding events, keep a close eye on the sandbag barrier to ensure it remains stable and effective. If you notice any leaks or breaches, take immediate action to reinforce the barrier or address the issue.
Step 10: Remove and Store the Sandbags
Once the flooding risk has passed, carefully remove the sandbags and store them for future use. If the sandbags were exposed to contaminated floodwaters, they should be disposed of according to local regulations. When storing sandbags, keep them in a dry and well-ventilated area to prevent mold and mildew growth.
By following these steps, you can effectively sandbag your garage door and protect your garage and its contents from potential flood damage. Regularly assess the flooding risk in your area and be prepared to act quickly if necessary. In addition to sandbagging the garage door, consider other flood prevention measures, such as installing flood vents, raising electrical outlets, or applying a waterproof sealant to your garage floor and walls.
Step 11: Consult with Local Authorities
Before sandbagging your garage door, consult with local authorities to determine if there are any specific regulations or recommendations regarding flood protection in your area. Local agencies may provide sandbags or other resources, as well as valuable information on flood-prone zones and best practices for flood prevention.
Step 12: Regularly Inspect and Maintain Sandbags
If you plan to store sandbags for future use, regularly inspect them for signs of wear, damage, or mold growth. Replace any damaged or compromised sandbags to ensure that they remain effective when needed.
Step 13: Consider Permanent Flood Barriers
If your garage is frequently at risk of flooding, you may want to consider investing in a more permanent flood barrier solution, such as a flood door, a flood panel, or an automatic flood barrier. These options can provide increased protection and convenience compared to sandbagging.
Step 14: Educate Yourself on Flood Safety
In addition to sandbagging your garage door, it’s essential to educate yourself on flood safety and preparedness. Know the difference between flood watches and flood warnings, create an emergency evacuation plan, and assemble a flood safety kit with essentials such as food, water, and first aid supplies.
Step 15: Share Your Knowledge with Neighbors
If your community is prone to flooding, share your knowledge and experience with your neighbors. Encourage them to take similar precautions to protect their homes and garages, and work together to improve flood safety in your neighborhood.
By following these steps and remaining vigilant, you can effectively sandbag your garage door and protect your property from the potential dangers of flooding. Regular assessment of flood risk, proper sandbag installation, and maintenance, as well as knowledge of local regulations and resources, will all contribute to a safer and more resilient home in the face of flooding.
How Do You Sandbag a Door?
When it comes to protecting your home from floods, sandbagging is one of the most effective methods. If you live in an area prone to flooding, it’s a good idea to know how to sandbag your doors. The process is fairly simple. First, you will need to prepare the sandbags. Fill each bag with sand, and then tie it off at the top.
Next, bring the sandbags to the door you want to protect, and stack them against the door on both sides. Once the bags are in place, use something heavy to weigh them down. This could be a brick or a piece of wood. Doing this will help keep the sandbags in place and prevent them from being blown away by high winds.
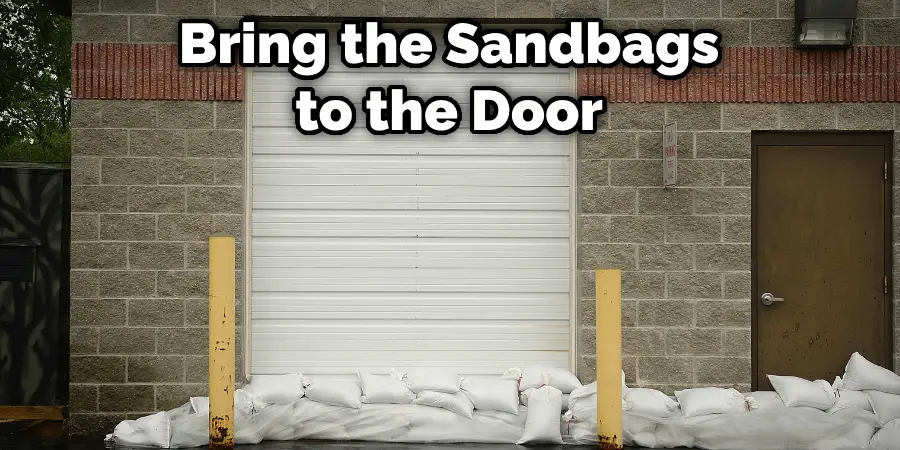
Finally, if you have time, it’s good to apply a waterproof sealant to the door. This will help to protect your home from floodwaters further.
Does Sandbagging Really Work?
Sandbagging is a common way to protect homes and businesses from flooding. The bags are filled with sand and placed around doorways and windows to keep water out. But does it really work?
Studies have shown that sandbagging can be effective in certain situations. For example, if the floodwaters are slow moving, sandbags can provide a barrier against the water.
However, sandbagging is not a perfect solution. If the floodwaters move too quickly, the bags can be swept away. And if the bags are not placed correctly, water can still enter through gaps and seams.
Frequently Asked Question
Do Sandbags Go on The Inside or Outside of The Garage Door?
If you are placing the sandbags on the inside of the garage door, make sure to place them so that they will not block the door’s path when it opens. If you are using them to help keep water out, make sure that the seams of the bags are facing down so that the water will not seep in.
What Can You Use Instead of Sand Bags?
One option is to use plastic garbage cans. Fill them with water and place them in front of the garage door. You can also use rocks or bricks to help weigh them down.
You Can Check It Out to Hang Drywall in Garage
Conclusion
So, there you have it – everything you need to know about sandbagging your garage door. Now that you know how to sandbag garage door, practice before the next big storm hits. And remember, if you still have any questions or concerns, feel free to reach out to us for help. We’re always here to answer your questions and help keep your home safe!
You can check it out to Use Blaster Garage Door Lubricant
I am Rick. I grew up helping my dad with his handyman service. I learned a lot from him about how to fix things, and also about how to work hard and take care of business. These days, I’m still into fixing things- only now, I’m doing it for a living.
I’m always looking for new ways to help people grow and develop. That’s why I have created this blog to share all my experience and knowledge so
that I can help people who are interested in DIY repair.