
Barn doors can be a great addition to your garage. They add character and style, and they can also provide additional storage space for items that don’t fit on shelves or cabinets. But building barn doors isn’t as easy as just buying a few boards at the store. Here are some tips on how to build barn doors for garage.

Summary: Barn doors are a great way to add rustic charm and an extra layer of security to your garage. With a few supplies, some tools, and careful measurements, you can easily construct your own custom barn door for your garage. Start by measuring the width of the opening and then cutting wood planks to fit the desired size. After the planks are cut and sanded, you’ll need to attach them together with hinges.
Can You Build Barn Doors for the Garage?
Building your own barn doors for your garage is a simple and rewarding DIY project. It can add tremendous rustic charm to any space, making it an excellent choice for those who are looking to add something eye-catching to their garage.
The design is straightforward; you will attach two wooden panels together with hinges before mounting them on the wall. By purchasing the necessary supplies from your local hardware store, you can easily customize the style of wood and stain that fits into your existing decor.
With some basic tools and some elbow grease, anyone can quickly transform their garage with a beautiful set of handcrafted barn doors!
Why Should You Build Barn Doors for Garage?
Building barn doors for the garage is an excellent way to increase curb appeal and storage space. Barn doors are full of character and offer a unique style that helps differentiate your home from the others in your neighborhood.
These strong and durable doors open up, sliding along a track to provide easy vehicle access, and can also be secured with locks for added peace of mind.
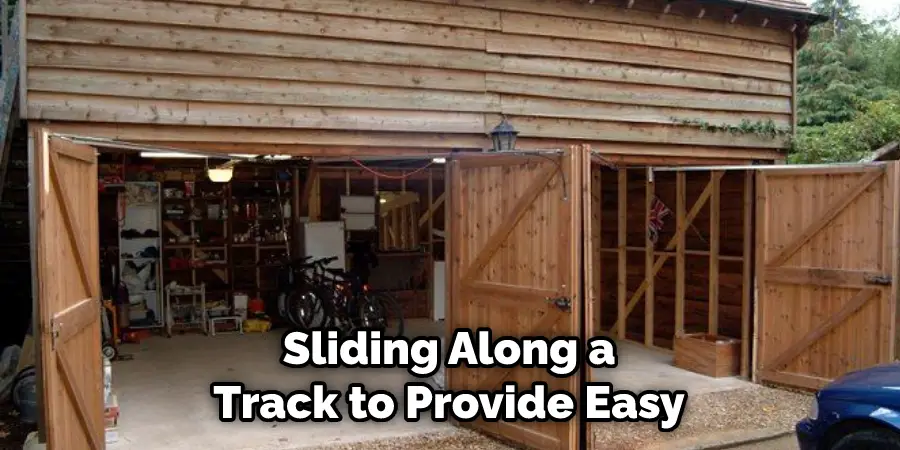
Furthermore, installing barn doors is typically easier than hanging a traditional door and opens up the walls on either side to free up floor space, creating more room for items like bikes and sporting equipment that get clogged up in conventional garages.
7 Steps to Follow on How to Build Barn Doors for Garage
Step 1: Start with Measurements
The first step in building barn doors is taking measurements of the door opening in your garage. It’s important to get an accurate measurement to ensure that your barn doors will fit properly when you install them.
You should also measure out the area where the track will be installed, which will determine the length of the track you need to buy.
Step 2: Choose Your Materials
Next, it’s time to choose the materials you will use to build your barn door. Wood is usually the most common choice, but there are other options, such as metal or plastic, if you prefer something more modern-looking or durable.
Be sure to pick materials that are strong enough to withstand wear and tear, especially if they’re going in an area of your garage with heavy foot traffic.
Step 3: Install Hardware and Tracks
Once you have all of your materials, it’s time to start installing the hardware and tracks for your barn door. The hardware includes hinges and latches, while the tracks allow your door to slide open and close smoothly without sticking or scraping against anything. Make sure that everything is installed securely so that it won’t come loose over time!
Step 4: Finish With Paint or Stain
Next, finish off your project with a coat of paint or stain for added protection from wear and tear and aesthetic appeal. This step is especially important if you plan on leaving your barn doors exposed rather than behind a wall inside your garage; it will help keep them looking good through rain, snow, sleet, etc., whatever Mother Nature throws at them!

Step 5: Attach the Doors
Once everything is painted or stained, it’s time to attach your doors. This step requires precision and patience, as you must ensure that each door is level and secure before moving on to the next one.
Once all the doors are attached, make sure they open and close smoothly with no sticking or scraping along the tracks.
Step 6: Hang the Barn Doors
Now that all of the pieces are in place, it’s time to hang your barn doors! Make sure you follow any instructions from your hardware or track manufacturer for proper installation.
If there aren’t any included, then a general rule is to line up the top of the door frame with the top of the track and secure it with hardware.
Step 7: Enjoy Your Barn Doors!
Once all of your hard work is complete, it’s time to admire your handiwork. You can now easily open and close your barn doors, adding style and character to your garage simultaneously! Keep an eye on them periodically to ensure everything is still in working order, and you can enjoy your barn doors for years to come.
That’s it! You’ve now learned how to build barn doors for garage in seven simple steps. With a bit of patience, creativity, and hard work, you can now make your own unique barn door for your home. Good luck!
Things You Need to Know Before Building Barn Doors for Garage
Building barn doors for your garage is a great way to give the space a more rustic look and feel. However, before you dive into this project, it’s important that you are aware of a few things. First, measure the space for where the door will go and select a door size that is appropriate for the opening.
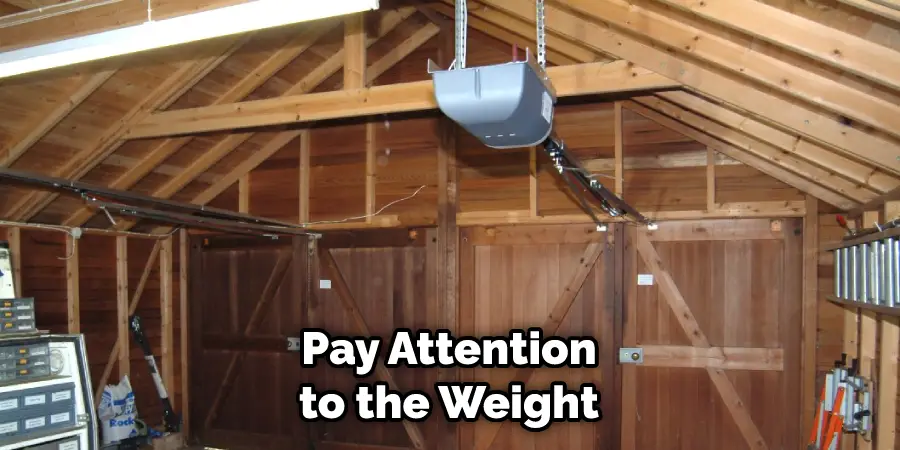
Second, pay attention to the weight and material of the door. Solid wood doors look amazing but can be heavy – having a track system in place to open and close them is crucial.
Third, find an adequate latch or lock solution that fits your style and your security needs. Taking these steps will ensure you have an attractive and safe DIY barn door in no time!
Benefits of Building Barn Doors for Garage
Building a barn door for your garage can be a great addition to the convenience and aesthetic of your home. Barn doors are sturdy and easy to install, making them ideal for homes with children running around.
The large panels take up little space, meaning you can still have the benefits of opening and closing the door without sacrificing valuable floor real estate.
Additionally, they block noise from entering the house while giving an eye-catching style to your living space that can bring a more rustic feel that compliments many interior designs. With little upkeep required these days, barn doors are functional buys and simple, stylish accents that add value to your home.
6 Common Mistakes People Make When Trying to Building Barn Doors for Garage
1. Not Planning for the Weight of the Door
One of the most common mistakes people make when building barn doors for their garage is not planning for the door’s weight. Barn doors can be very heavy, and if they are not properly supported, they can cause serious damage to your home.
Make sure to use heavy-duty hardware and brackets when installing your barn door, and be sure to test the door before hanging it to ensure that it is safe.
2. Not Measuring the Opening Correctly
Another common mistake people make when building barn doors is not measuring the opening correctly. It is important to measure both the width and height of the opening in order to ensure that the door will fit properly. Additionally, you will need to consider the clearance needed for the door to swing open and closed.
3. Not Leveling the Track
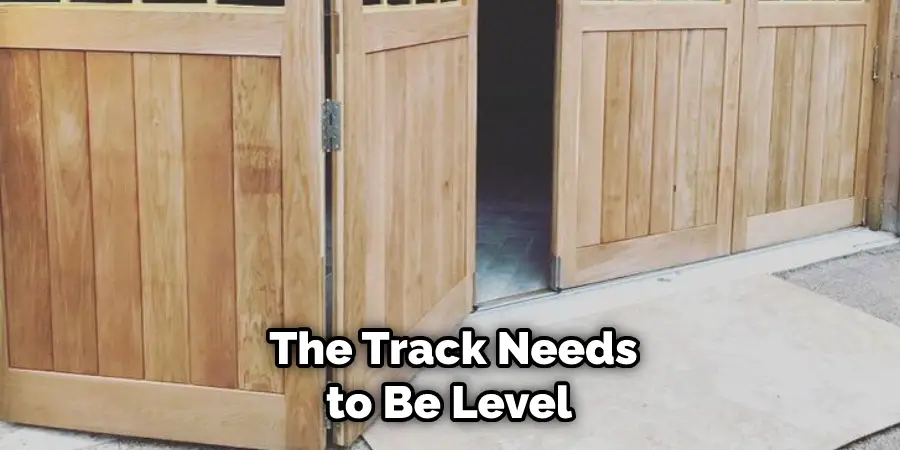
Another mistake people often make when installing barn doors is not leveling the track. The track needs to be level in order for the door to slide smoothly. Use a level to check the track before attaching it to the wall, and make any necessary adjustments.
4. Not Hanging the Door High Enough
Another common mistake people make is not hanging the door high enough. The door should be hung so that there are at least a few inches of clearance above the floor. This will help to prevent damage to your flooring and allow the door to swing open and closed without hitting anything.
5. Not Using Proper Hardware
When building barn doors, it is important to use proper hardware. Heavy-duty hardware is necessary to support the door’s weight and keep it from swinging open or closed on its own.
Make sure to use brackets that are rated for the weight of your door, and use screws that are long enough to go through both the wall and the track.
6. Not Testing the Door Before Use
Finally, one of the most important things you can do when building garage doors is to test them before using them. Open and close the door several times to ensure it slides smoothly and does not stick. Additionally, check that all of the screws are tight and that there is no movement in the track.
Conclusion
Building barn doors for a garage is a lot easier than it looks! With careful planning and an eye for detail, anyone can easily tackle this DIY project. Start by taking measurements of both the door opening and track area, so you know what size material you need before heading off to buy supplies.
After that, install all necessary hardware pieces followed by painting or staining for added protection from weathering elements before finally installing onto tracks already mounted on walls within the garage area itself—and voila!
You now have beautiful new custom-made sliding barn doors ready to greet visitors into this part of your home! Thanks for reading our post about how to build barn doors for garage.
I am Rick. I grew up helping my dad with his handyman service. I learned a lot from him about how to fix things, and also about how to work hard and take care of business. These days, I’m still into fixing things- only now, I’m doing it for a living.
I’m always looking for new ways to help people grow and develop. That’s why I have created this blog to share all my experience and knowledge so
that I can help people who are interested in DIY repair.