
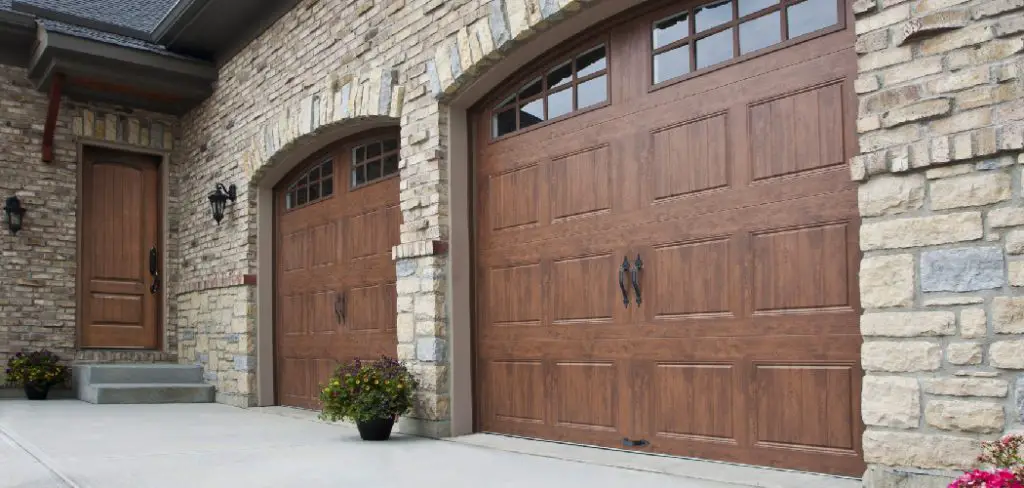
Garages are a necessary evil in many homes. They provide protection for vehicles and storage space, but they can also be unsightly and take up many spaces. If you’re looking to build a wooden garage door, there are a few things you need to know first. In this article, we’ll outline how to build a wooden garage door. Keep reading for more information!
Home improvement stores sell a variety of wooden garage door kits. These kits include all of your materials to get started, including pre-cut wood, hinges, and screws. If you’re looking to build a custom door, you’ll need to purchase all the materials yourself. Many home improvement stores carry a variety of wood types to find the perfect one for your door.
Things to Consider When Building Wooden Garage Door
Building a wooden garage door is a great way to add extra value to your home. It will keep your car and other belongings protected from the weather, but it can also improve the overall look of your property. However, before you start construction, you should keep a few things in mind.
1. Cost
One of the most important factors to consider when building a wooden garage door is cost. How much are you willing to spend? Garage doors can be expensive, so you’ll need to have enough money set aside for the project.
2. Quality
When it comes to wooden garage doors, you get what you pay for. If you want a door that will last for many years, invest in quality materials. Cheap materials are likely to warp, rot or rust over time.
3. Time
Building a wooden garage door can be a time-consuming project. Make sure you set aside enough time to complete the job properly.
4. Size
Before you start construction, you’ll need to measure the size of your garage. This will help you choose the right size door for your space.
5. Material
There are many different types of wood you can use for a garage door. Be sure to select a type that will withstand the weather and resist rot and decay.
6. Style
Garage doors come in all shapes and sizes, so you’ll need to choose a style that complements your home. There are hundreds of different designs to choose from, so you’re sure to find one that fits your needs.
7. Insulation
A well-insulated garage door can help keep your car and other belongings warm during the winter months and cool during the summer. If you live in a colder climate, invest in an insulated door.
8. Maintenance
Like any other piece of machinery, a wooden garage door requires regular maintenance to keep it in good condition. Be sure to clean and lubricate the door regularly to prevent it from rusting or warping.
Required Tools and Materials:
Tape Measure:
To obtain accurate measurements for your garage door.
Saw:
To cut the wooden planks to the required size. Be sure to use safety precautions while using a saw.
Drill:
This is for creating holes and attaching hinges, handles, and other hardware.
Wood Screws:
Attach the wooden planks together.
Hinges:
To connect the door panels and allow for movement.
Handles:
This is for easy opening and closing of the door.
Paint or Stain:
To protect the wood from the elements and add a decorative touch.
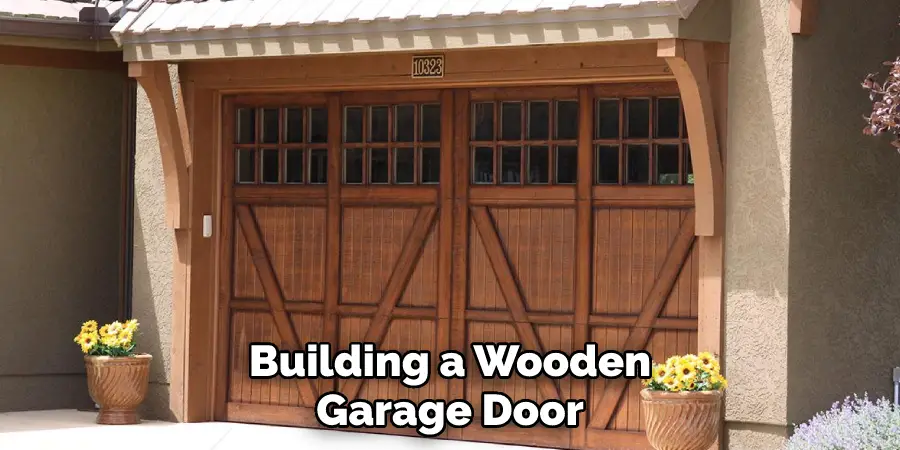
A Step-by-Step Guide on How to Build a Wooden Garage Door
Step 1: Garage Door Size
The size of your wooden garage door will depend on a few factors, such as the size of your garage and the type of wood you choose. For example, if you have a small garage, you may want to consider a smaller door made of lightweight wood. Conversely, if you have a large garage, you may need a heavy-duty door with stronger wood. You should also consider the type of climate you live in when choosing your door size.
If you live in an area with severe weather conditions, you may need a sturdier door to protect your belongings from the elements. Ultimately, the size of your wooden garage door will be determined by your specific needs and preferences.
Step 2: Choosing Materials
Once you have determined the size of your garage door, you will need to choose the materials you will use to build it. Plywood sheeting is a good option because it is strong and lightweight. You can also choose to use stiles, which are vertical pieces of wood that make up the door’s frame.
When choosing wood for your garage door, select a weather-resistant type that will not warp or crack in extreme temperatures. Cedar or mahogany are good choices for this purpose. You will also need to purchase hardware such as hinges, handles, and screws.
Step 3: Measuring the Garage Door Opening
Before you begin construction on your wooden garage door, you will need to measure the opening of your garage. This will help you determine the size and shape of your door.
Tape is used to measure the height and width of the opening. Then, use a pencil to draw out a diagram of the door on a piece of plywood. Be sure to add an extra inch to both the height and width to account for the framing.
Step 4: Style the Door
Once you have drawn out the dimensions of your door, you will need to style it. This step is optional, but it can add a touch of personality to your garage door. You can choose to add panels, carvings, or other decorative elements.
If you are not comfortable with woodworking, you can also purchase a pre-made door from a home improvement store. However, be sure to measure the dimensions of your opening before purchasing a door so that it will fit correctly. You can still add decorative elements to a pre-made door, such as painting or staining it.
Step 5: Cutting the Door
Now that your design is drawn out, it is time to start cutting the wood. Use a circular saw to cut the plywood according to your diagram. Wear safety goggles and a dust mask while cutting to avoid injury.
If you are using stiles, you will need to cut them to size. Use a miter saw or circular saw to make the cuts. If you are not comfortable using a saw, you can also have the stiles cut at a home improvement store. But be sure to double-check the measurements before purchasing the stiles.
Step 6: Assembling the Door
Once all of the pieces are cut, it is time to assemble the door. Use construction adhesive to attach the stiles to the plywood sheeting. Drill pilot holes before attaching the stiles to avoid splitting the wood.
If you are using a pre-made door, be sure to follow the assembly instructions. Most doors will come with detailed instructions on how to put them together.

Step 7: Installing the Hinges
The next step is to install the hinges on the door. Use a cordless drill to make pilot holes for the screws. Then, attach the hinges to the door using screws. Be sure to use washers on the screws to avoid damaging the wood. Repeat this process for all of the hinges on the door.
You may also need to install a center support bracket, depending on the size of your door. The center support bracket will help distribute the weight of the door and prevent sagging. It should be installed in the center of the door, about 12 inches from each end.
Step 8: Hang the Door
Now that the hinges are in place, it is time to hang the door. Have a helper hold the door in place while you screw in the hinges. Use a level to ensure that the door is hanging straight.
If you live in an area with severe weather conditions, you may consider installing a storm door over your wooden garage door. This will protect your garage from wind and rain damage. Be sure to use weather stripping around the edges of the door to prevent drafts. The storm door can be attached using screws and hinges, just like the main door.
Step 9: Painting or Sealing the Door
Once the door is installed, you may want to paint or seal it to protect it from the elements. Use a weather-resistant sealant or paint to keep the wood from warping or cracking.
Now that you know how to build a wooden garage door, you can customize it to fit your specific needs. Be sure to choose weather-resistant materials so that your door will last for years.
Building your own wooden garage door is a project that can be completed on the weekend. With a little bit of woodworking experience, you can have a beautiful and sturdy garage door for years.
Pros and Cons
Pros
There are many reasons why you might want to build your own wooden garage door. Perhaps you want a more traditional look for your home, or you’re looking for an affordable option that will still last for many years. Whatever your reasons, here are some of the pros of building a wooden garage door:
-You can save money by building your own door.
-You can choose the materials and design that best suits your needs.
-A wooden garage door is a great way to add curb appeal to your home.
-It’s a relatively easy project that most people can do themselves.
-A wooden garage door will last for many years if properly maintained.
If you’re considering building a wooden garage door, do your research first. There are many different wood and hardware options available, so you’ll want to select the right ones for your project. You may also want to consult with a professional carpenter or contractor to get some tips on how to build your door correctly. Then, with a little bit of planning and effort, you can build a beautiful and durable wooden garage door for years!
Cons
There are a few potential cons to building your own wooden garage door. Firstly, it may be more difficult than you anticipate, and if you’re not confident in your carpentry skills, it’s probably best to leave the job to a professional. Secondly, wooden garage doors require regular maintenance to keep them looking their best – including regular painting or staining. Finally, they can be quite pricey to build compared to other garage doors. So, if you’re on a tight budget, a wooden garage door may not be the best option.
How Much Will It Cost?
The cost of building a wooden garage door can vary depending on the quality of materials and tools you use, as well as the size and design of your door. On average, it can cost anywhere from $500 to $3000 to build a wooden garage door. This price includes all necessary materials and hardware.
If you choose to purchase a pre-made wooden garage door, the cost can range from $800 to $5000, depending on the quality and design of the door. Keep in mind that these prices are just estimates and can vary depending on your location and specific project needs.
It is also important to factor in the cost of any additional tools or equipment you may need for the project, as well as potential professional help or consultation if needed.
Frequently Asked Questions:
Q: How Long Does It Take to Build a Wooden Garage Door?
A: The time it takes to build a wooden garage door will depend on your skill level and the complexity of your design. It can range from a few hours to a full weekend project. You should also factor in time for painting or sealing the door. It’s always a good idea to give yourself extra time in case of unexpected setbacks. The most important thing is to take your time and do the job correctly for a long-lasting result. You can also enlist the help of a friend or family member to make the project go more quickly.
Q: What Type of Wood Should I Use for My Garage Door?
A: The type of wood you use will depend on your personal preference, budget, and climate. Cedar, redwood, and cypress are popular choices for wooden garage doors as they are naturally resistant to rot and decay. However, they can be more expensive than other types of wood. Pressure-treated lumber is another option, but it may not have as appealing of a look as natural wood. You can also use a combination of wood and composite materials for a more affordable and durable option.
Q: Can I Use Any Hardware for My Wooden Garage Door?
A: It is important to use sturdy, weather-resistant hardware for your wooden garage door. This includes hinges, screws, and handles. Be sure to choose hardware that is specifically designed for outdoor use and can withstand harsh weather conditions. It’s also a good idea to consult with a professional or do some research to ensure you are using the correct hardware for your specific design. You don’t want to risk the safety and durability of your door by using inadequate hardware. So, take your time in selecting the right hardware for your project.
Q: Do I Need Plans or Diagrams to Build a Wooden Garage Door?
A: It is recommended to have plans or diagrams when building a wooden garage door, especially if you are new to woodworking. This will help guide you through the process and ensure that all of your measurements are accurate. You can find plans and diagrams online, or you may want to consult with a professional for custom designs. It’s also a good idea to have someone with experience to assist you during the building process. It’s always better to be safe than sorry when it comes to building a sturdy and functional garage door.
Q: Can I Install a Wooden Garage Door in Any Climate?
A: While wooden garage doors can be installed in most climates, it is important to consider your specific location and weather conditions. Extreme temperatures or high levels of moisture may cause wood to warp or rot, so it’s important to properly seal and maintain your door to protect it from these elements. It’s also a good idea to consult with a professional in your area for specific advice on building and maintaining a wooden garage door in your climate.
Conclusion:
Garage doors are often an overlooked part of a home’s exterior, but they can make a big statement. Not only that, but they also play an important role in the security and functionality of your home. If you’re thinking about building a wooden garage door, we’ve got all the information you need to get started. First, we outlined how to build a wooden garage door.
You Can Check It Out To Build a Grow Room in a Garage
I am Rick. I grew up helping my dad with his handyman service. I learned a lot from him about how to fix things, and also about how to work hard and take care of business. These days, I’m still into fixing things- only now, I’m doing it for a living.
I’m always looking for new ways to help people grow and develop. That’s why I have created this blog to share all my experience and knowledge so
that I can help people who are interested in DIY repair.