Are you looking for a garage floor coating option that offers unbeatable durability, superior protection and lengthy life? Look no further than applying polyurea garage floor coating!

This revolutionary product is an easy-to-apply, long-lasting solution to create a beautiful finish while also helping to protect your concrete from stains, chemicals and abrasion. In this blog post, we’ll go over everything you need to know about how to apply polyurea garage floor coating from start to finish so you can have peace of mind knowing your investment in your property will last for years.
What is Polyurea?
Polyurea is a type of synthetic polymer that is created by combining an artificial resin and a curing agent. It is known for its incredible strength, resilience and resistance to damage from chemicals, abrasion and impact.
It is commonly used in industrial settings for waterproofing, corrosion protection and coating applications due to its fast curing time and versatility. It is also gaining popularity in residential settings, especially for garage floor coatings.
Needed Tools and Materials
Given below is a list of tools and materials you will need to apply polyurea garage floor coating:
- Polyurea Garage Floor Coating Kit
- Epoxy Primer
- Notched Squeegee
- Paint Roller With Extension Handle
- Brushes for Cutting in Corners and Edges
- Concrete Cleaning Solution (if Your Concrete Has Oil Spills or Stains)
- Concrete Etching Solution (if Your Concrete is Polished or Sealed)
- Floor Grinder With Diamond Grinding Wheel
- Floor Scraper
- Safety Goggles, Gloves and Respirator Mask
- Broom and Dustpan
10 Step-by-step Guide to Applying Polyurea Garage Floor Coating
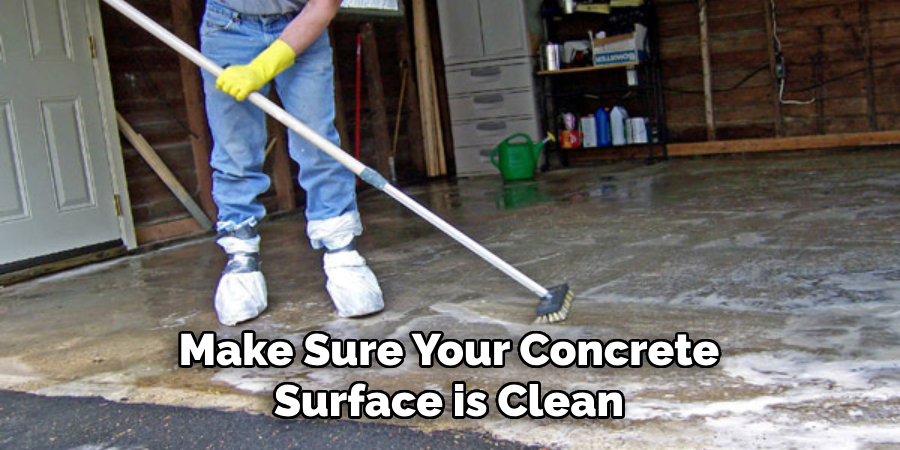
Step 1: Prepare the Surface
Before you start applying polyurea garage floor coating, you need to make sure your concrete surface is clean and free of any debris or contaminants. Sweep and mop the floor thoroughly to remove any dirt and dust. If there are any oil spills or stains, use a concrete cleaning solution to spot-treat those areas. If your concrete is polished or sealed, use a concrete etching solution to open up the pores of the surface for better adhesion.
Step 2: Fill Any Cracks or Holes
Fill in any cracks or holes in your concrete with an appropriate patching compound and let it dry completely. This step will ensure a smooth and even surface for the coating application.
It is recommended to let the patching compound cure for at least 24 hours before proceeding. But check the manufacturer’s instructions for specific curing times. It is also a good idea to sand down any high spots on the floor to avoid uneven coating application.
Step 3: Grind the Surface
For best results, it is recommended to grind the surface of your concrete. This will remove any remaining high spots, open up the pores for better adhesion and create a rough texture for the coating to bond with. Use a floor grinder with a diamond grinding wheel for this step. You can easily rent one from a local hardware store if you don’t want to invest in purchasing it.
Step 4: Clean the Surface Again
After grinding, clean the surface thoroughly again to remove any dust or debris. Sweep and mop the floor, making sure there is no residue left behind. If needed, use a commercial concrete cleaner to get rid of any remaining dust particles. You can also use a pressure washer for this step. It is important to have a completely clean and dry surface before proceeding. You can also use a leaf blower to remove any excess water or moisture.
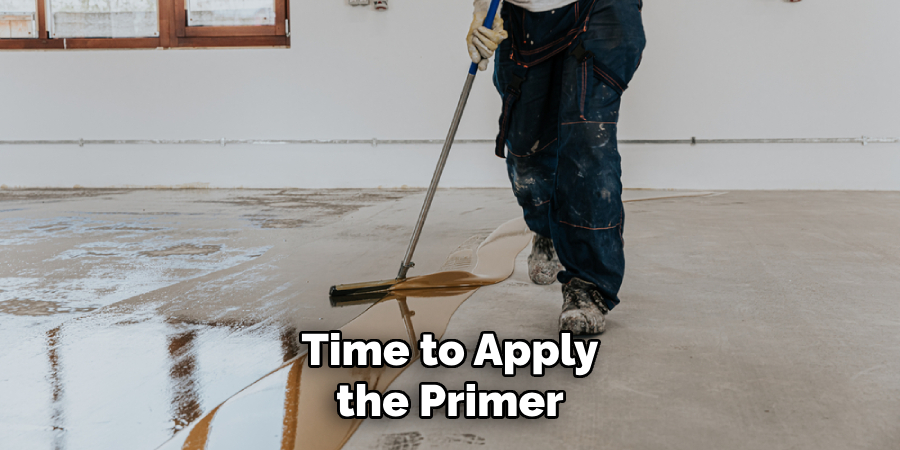
Step 5: Apply the Primer
Once your surface is clean and dry, it’s time to apply the primer. Use an epoxy primer specifically designed for polyurea coatings. Mix it according to the manufacturer’s instructions and apply it evenly using a notched squeegee. This step will help the polyurea coating adhere to the surface better and also prevent any moisture from seeping through. But make sure to not leave any puddles of primer on the floor.
Step 6: Mix the Polyurea Coating
Mix the polyurea coating according to the manufacturer’s instructions. The mixing process can vary depending on the brand, so make sure to read and follow the directions carefully. Some brands come with pre-measured A and B components that you simply mix together, while others may require you to add a different ratio of components. It is important to mix it well to ensure proper curing and a quality finish.
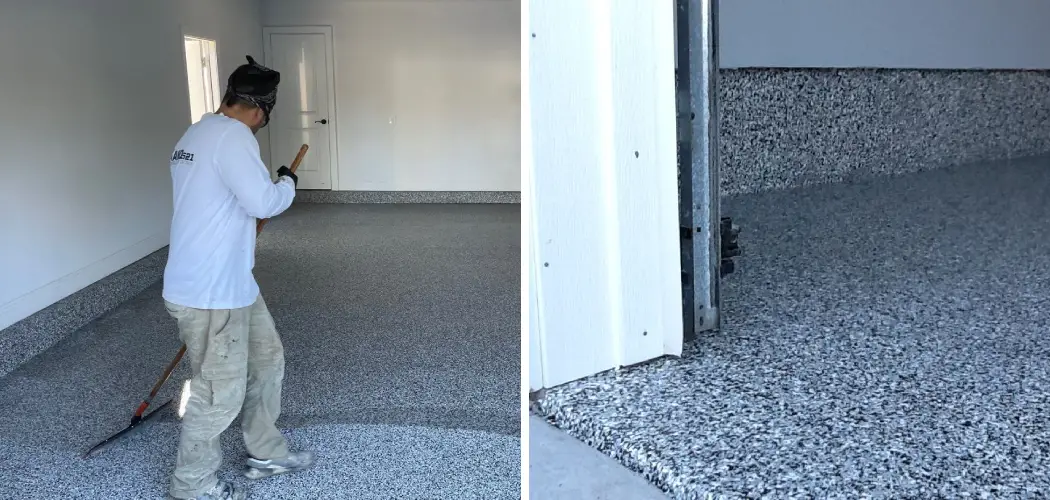
Step 7: Apply the Polyurea Coating
Once the polyurea coating is mixed, use a paint roller with an extension handle to apply it evenly. Start from one corner and work your way towards the exit so you don’t get trapped in a corner or wet coating.
Use a brush for cutting edges and corners. Apply the coating in thin and even coats, making sure to cover every inch of the surface. Make sure not to leave any puddles or drips. Otherwise, they will dry into hard bumps that will be difficult to remove.
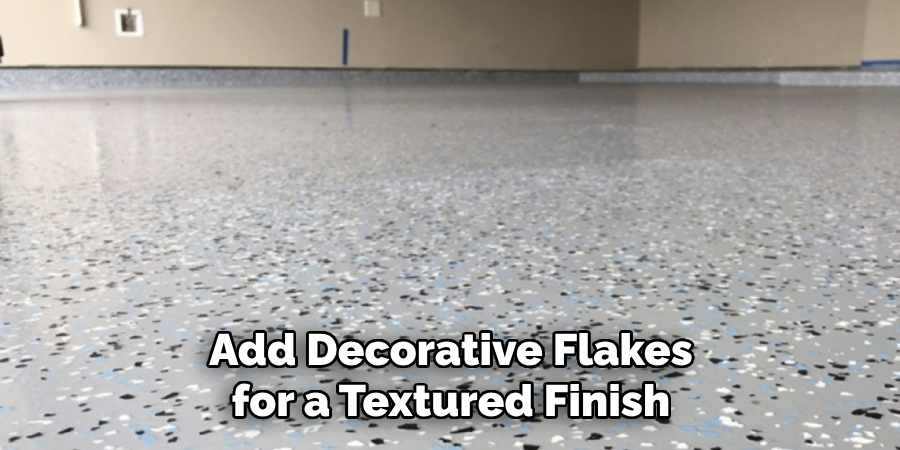
Step 8: Add Flakes (optional)
If you want to add decorative flakes for a textured finish, you can do so after applying the first coat of polyurea coating. Sprinkle the flakes evenly over the wet coating using a shaker or your hands. You can add as many or as few flakes as you want, depending on your desired look. Let it dry completely before proceeding. It is recommended to wait for at least 24 hours.
Step 9: Apply a Second Coat
Once the first coat is completely dry (usually takes 6-12 hours), you can apply a second coat of polyurea coating. This step will give your floor additional protection and ensure a longer lifespan.
Follow the same process as before, starting from one corner and working your way towards the exit. But this time, you can use a thicker coat for better coverage. However, make sure not to apply a coat that is too thick as it can cause drips and unevenness.
Step 10: Let it Cure
After applying the second coat, let your garage floor cure for at least 24 hours before using it. This will ensure that the coating has fully cured and is ready to handle heavy traffic and other potential abuses.
Keep in mind that curing times may vary depending on factors such as temperature and humidity, so make sure to check the manufacturer’s instructions for specific recommendations. Once cured, you can move your vehicles back into the garage and enjoy your newly coated floor!
Following these steps on how to apply polyurea garage floor coating will help you successfully apply polyurea garage floor coating and give your garage a durable, slip-resistant and attractive finish. With proper application and maintenance, this coating can last for many years, making it a worthwhile investment for any homeowner. So why wait? Get started on transforming your garage floor today!
Frequently Asked Questions
Q1. Can I Apply Polyurea Coating on My Garage Floor by Myself?
A1: Yes, you can apply polyurea coating on your garage floor by yourself as long as you follow the proper steps and safety precautions. It is important to read and follow the manufacturer’s instructions carefully for the best results.
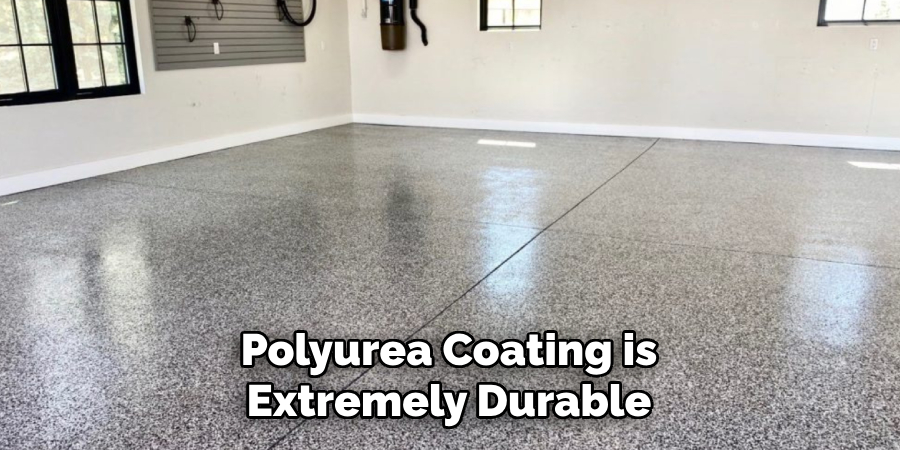
Q2. Is Polyurea Coating Durable?
A2: Yes, polyurea coating is extremely durable and can withstand heavy traffic, chemicals, and other potential abuses. It is also resistant to scratches, stains, and UV rays. Proper application and maintenance can further enhance its durability.
Q3. How Long Does Polyurea Coating Last?
A3: With proper application and maintenance, polyurea coating can last for many years. Some brands offer warranties of up to 20 years, making it a long-term investment for your garage floor. It is important to regularly clean and maintain the coating to ensure its longevity.
Q4. Can I Add Color to the Polyurea Coating?
A4: Yes, you can add color to polyurea coating by using pigments or mixing it with colored flakes. This allows for customization and gives your garage floor a unique look. However, keep in mind that adding color may affect the final cost of the coating.
Conclusion
So in conclusion on how to apply polyurea garage floor coating, applying a polyurea garage floor coating really is an easy task with the right supplies and guidance.
If you follow each of these steps, you will be able to finish in no time and enjoy your beautiful new industrial-looking garage floor for years to come. It can be as simple as priming the surface, mixing the components together, pouring it into place, rolling it level with a squeegee or a roller and then waiting for several hours while it sets.
Many homeowners have successfully done this job themselves, so why not try? Investing in this type of floor coating now could save you time and money in the future when repairs or replacements become necessary due to wear and tear. Get started on your garage makeover today and turn your ordinary space into something extraordinary!
I am Rick. I grew up helping my dad with his handyman service. I learned a lot from him about how to fix things, and also about how to work hard and take care of business. These days, I’m still into fixing things- only now, I’m doing it for a living.
I’m always looking for new ways to help people grow and develop. That’s why I have created this blog to share all my experience and knowledge so
that I can help people who are interested in DIY repair.