Are you looking for a quick and easy way to get your garage door back in working order? Are you struggling with a broken garage door spring? If so, it might be time to wind that pesky garage door spring! Still, trying to figure out where to start?
Relax – You don’t need to call a professional. Don’t worry; we’ve got the perfect guide here for you. We’ll show you exactly how to do it safely, quickly, and effectively so that your garage door is running again in no time.

With the right tools and patience, anyone can wind a new or existing garage door torsion spring safely and securely. So let’s dive in—do yourself a favor and read how to wind a garage door spring if you’re ready to learn about the beautiful world of winding those tricky springs! Keep reading for an easy-to-follow guide on accurately measuring and installing a new torsion door spring in your home garage!
Necessary Items
Before you start winding your garage door spring, gathering all the necessary items for the task is essential. These include:
- A new torsion garage door spring (if replacing an existing one)
- Safety glasses or goggles
- Leather gloves
- Two winding bars (usually provided with the new spring)
- A ladder tall enough to reach your garage door springs
- A tape measure
- A marker or pencil
- Winding cone pliers (optional but recommended for easier winding)
10 Steps on How to Wind a Garage Door Spring
Step 1: Safety First
Before you start any work on your garage door, it is crucial to keep safety in mind. These springs are tightly wound and under a lot of tension, so proceed cautiously. Wear safety glasses or goggles to protect your eyes and leather gloves to keep your hands safe.
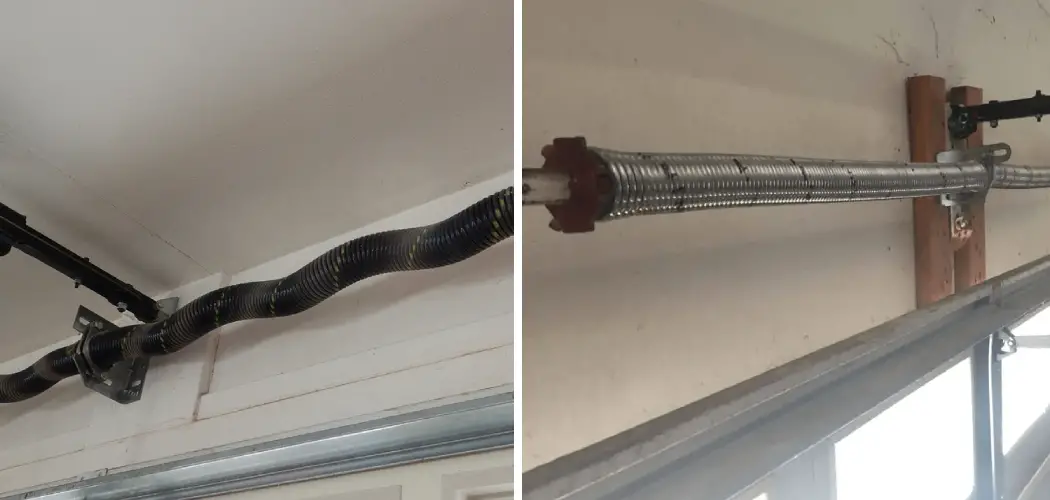
Step 2: Unwind the Old Spring
If you are replacing an existing spring, start by unwinding it completely. Using two winding bars, grow the old spring in a controlled manner while keeping the bars perpendicular to the ground. Be careful not to let go of the winding bars; the spring can snap back and cause injury.
Step 3: Measure the Spring Length
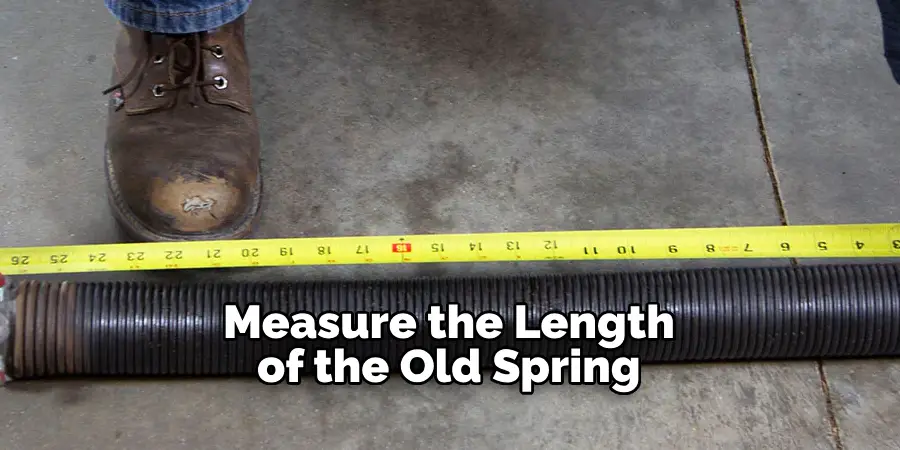
Measure the length of the old spring from one end to the other. Ensure to measure only the spiral part of the spring and not include the winding cones at either end. Record this measurement for later use.
Step 4: Determine the Number of Coils
Count the number of coils on your old spring. This will help determine the correct length and wind to add to your new spring to match the tension of the old one.
Step 5: Install the New Spring
Place the new torsion spring on your garage door’s shaft, ensuring it is centered and secured. Use the winding bars to keep the spring from moving or spinning while you work.
Step 6: Add the Required Number of Coils
Based on the number of coils counted in step four, calculate how many additional coils you need to add to match the length of your old spring. Follow the manufacturer’s instructions for winding direction and which end of the springs should be threaded first.
Step 7: Mark the Shaft
Mark the shaft at the end of each new coil using a marker or pencil. This will help you keep track of how many coils you have added and ensure that they are evenly distributed.
Step 8: Wind the Spring
Using both winding bars, begin winding the spring in small increments. Move from one side to the other while keeping an even number of turns on each side. Keep the winding bars perpendicular to the ground and use a pliers for better grip.
Step 9: Check Tension
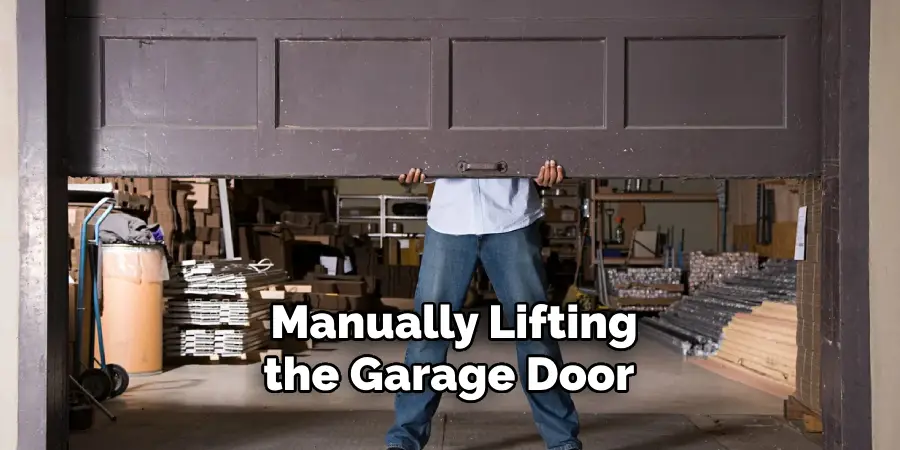
Once you have added the required number of coils, check the tension of your spring by manually lifting the garage door. It should open smoothly without any jerking or resistance. If there is enough tension, the door will be easy to open, and if there is too little tension, the door may stay open.
Step 10: Double Check Everything
Double-check everything before you call it a day and celebrate your successful winding job. Count the coils on both sides to ensure they are even, and measure the spring’s length again to ensure it matches your old one. Also, check the tension of the spring by opening and closing the door a few times.
Winding a garage door spring may seem daunting initially, but with these easy-to-follow steps and patience, you’ll have it done quickly! Remember always to prioritize safety, gather all necessary items beforehand, and take your time to ensure proper and secure winding. If you feel unsure or uncomfortable, calling a professional for assistance is always best. However, with the right tools and this guide, you can successfully wind your garage door spring like a pro.
8 Care Tips for Your Garage Door
Now that your garage door spring is wound and working correctly, it’s essential to maintain it properly. Here are eight care tips to keep in mind:
1. Lubricate the Moving Parts
Regularly lubricate your garage door’s moving parts, including hinges, rollers, and springs. This will help prevent rust and ensure smooth operation.
2. Inspect and Replace Worn Parts
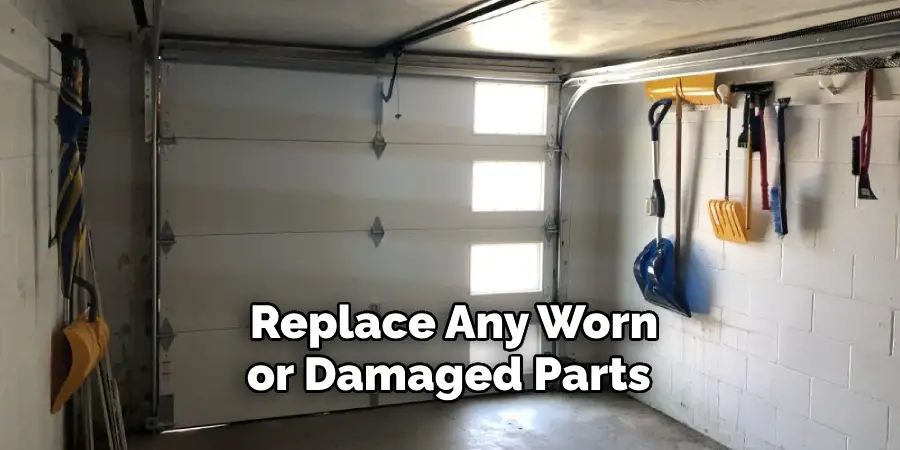
Inspect your garage door regularly and replace any worn or damaged parts immediately. This will prevent further damage to your door and ensure its proper functioning.
3. Keep the Tracks Clean
Clean your garage door tracks periodically to remove any dirt or debris that may hinder smooth operation.
4. Check the Balance
Test your garage door’s balance by disconnecting the opener and manually lifting the door halfway. If it stays in place, it is balanced correctly. If not, call a professional to adjust the springs.
5. Tighten Loose Bolts and Screws
Check for any loose bolts or screws on your garage door and tighten them as needed. This will prevent any parts from shifting or coming open while in use.
6. Keep the Door Clean
Regularly clean your garage door with mild soap and water to remove any dirt, grime, or debris that may build up over time.
7. Test the Safety Features
Make sure to test the safety features of your garage door, such as the auto-reverse mechanism. This will ensure the door stops and reverses if something is in its path.
8. Schedule Professional Maintenance

Finally, it’s always a good idea to schedule professional maintenance for your garage door at least once a year. A trained technician will be able to spot any potential issues and ensure that your door is working correctly and safely.
With these care tips, your garage door will remain in good condition for years, providing convenience, security, and peace of mind. Remember to always proceed with caution when handling a garage door spring, and if you encounter any issues or feel unsure about the process, feel free to seek professional assistance.
Frequently Asked Questions
How Often Should I Wind My Garage Door Spring?
The lifespan of a garage door spring can vary, but it is recommended to replace it every 5-7 years or whenever it shows signs of wear and tear.
Can I Do This Myself, or Should I Hire a Professional?
Winding a garage door spring can be dangerous, so it is always best to hire a professional if you are not experienced or comfortable with the process. However, with proper caution and safety measures, this can be a DIY project for those who feel confident in their abilities.
What Happens if I Don’t Wind the Spring Correctly?
If a garage door spring is not wound correctly, it can cause the door to become unbalanced and put unnecessary strain on the opener. This can lead to further damage and potentially dangerous situations. Therefore, it is crucial to take your time and follow all instructions carefully when winding a garage door spring.
Why Is Proper Maintenance Important for Garage Doors?
Proper maintenance is essential to keep your garage door functioning correctly and safely. Neglecting maintenance can lead to more significant issues and potentially costly repairs in the future.
Can I Use Any Type of Lubricant on My Garage Door?
It is best to use a lubricant specifically designed for garage doors, as they are made to withstand varying temperatures and conditions. Avoid using WD-40 or other general lubricants, as they may not suit your garage door’s needs. So, it is better to use a specialized lubricant that your garage door manufacturer recommends.
Conclusion
Winding a garage door spring may seem daunting, but it can be done safely and efficiently with the proper knowledge of how to wind a garage door spring and tools. Remember always to prioritize safety, gather all necessary items beforehand, and take your time to ensure proper and secure winding.
With regular maintenance and care, your garage door will continue to serve you well for years. So, if you have a broken garage door spring, don’t panic! Just follow these steps, and soon enough, your garage door will function like new again.
I am Rick. I grew up helping my dad with his handyman service. I learned a lot from him about how to fix things, and also about how to work hard and take care of business. These days, I’m still into fixing things- only now, I’m doing it for a living.
I’m always looking for new ways to help people grow and develop. That’s why I have created this blog to share all my experience and knowledge so
that I can help people who are interested in DIY repair.