Your garage door sensor is essential to your garage and is designed to keep you and your family safe. When your garage door sensor stops working, it can cause a significant inconvenience and pose a safety risk.
Troubleshooting your garage door sensor is often an easy fix, but it can be challenging for those without any experience in garage door repairs. In this blog post, we’ll guide you through the troubleshooting process on how to troubleshoot garage door sensors.
Can You Troubleshoot Garage Door Sensors?
Garage door sensors are an essential safety feature that ensures the door doesn’t close or stop moving whenever an obstruction is detected. While these sensors usually work flawlessly, malfunctioning can happen, which is an irritating experience.
Troubleshooting garage door sensors can seem daunting at first, but it’s essential to know how to identify and fix the problem’s cause. You don’t need to be an experienced handyman to troubleshoot these sensors; you only need some basic knowledge and the right tools. So, if your garage door is not functioning correctly, follow these simple troubleshooting steps to save yourself a call to a professional.
Why Should You Troubleshoot Garage Door Sensors?
Your garage door’s sensors are important in ensuring your safety and preventing damage to your vehicle. When they are working properly, they detect any object in the path of the door and prevent it from closing. However, when they malfunction, serious accidents can occur.
That’s why it’s crucial to troubleshoot garage door sensors whenever you notice any issues. This not only prevents accidents but also improves the overall functionality of the garage door. Don’t wait until it’s too late to address sensor problems – take action as soon as you detect any issues and ensure the safety of your family and property.
How to Troubleshoot Garage Door Sensors: A Step-By-Step Guide
Step 1: Check the Power Source
One of the most common issues with malfunctioning garage door sensors is a power source problem. Make sure that the sensor unit is connected to the power supply and that the LED light indicator on the sensor is on. You can also try unplugging the sensor unit and plugging it back in to reset the sensor system.
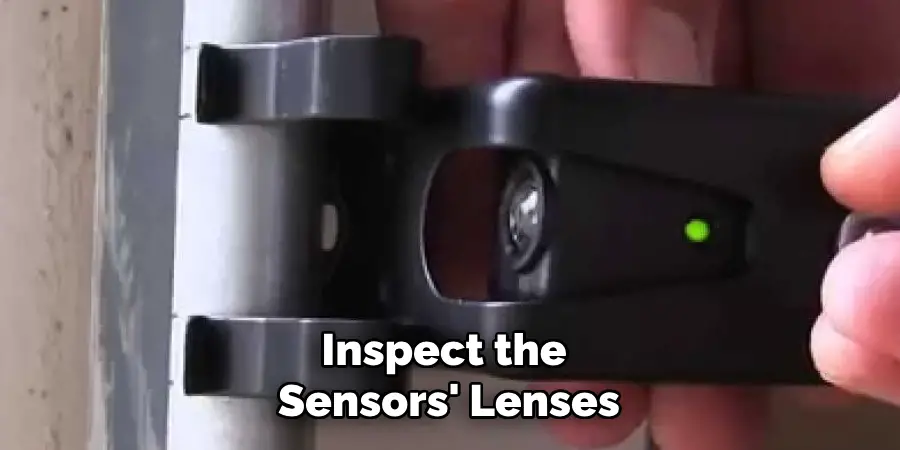
Step 2: Clear Any Debris Around the Sensors
Garage door sensors detect objects in their path, and they may not work correctly when they are dirty or obstructed. Inspect the sensors’ lenses and make sure they are clean and free from any debris, such as spider webs, dirt, and dust. Use a soft cloth or a brush to clean the sensors, and never use any chemicals to clean them.
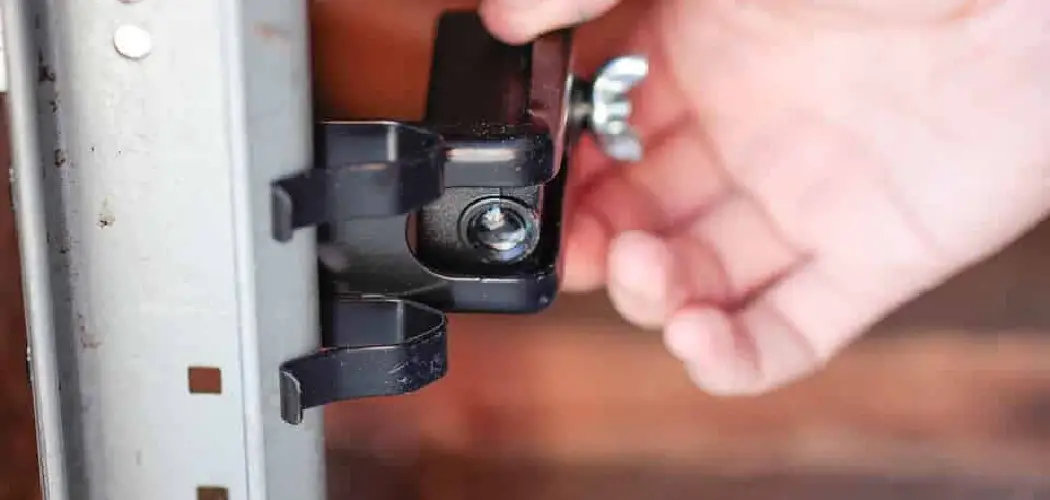
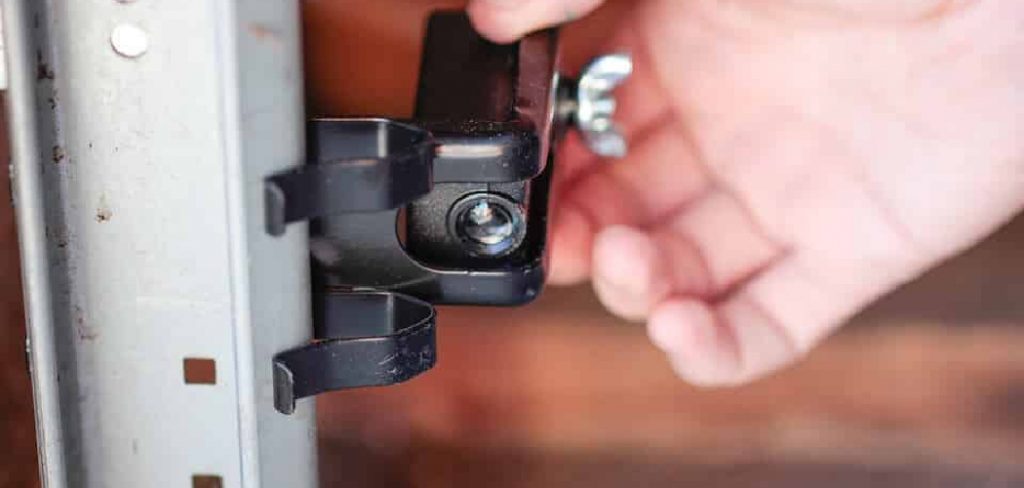
Step 3: Realignment of The Sensors
If checking the power source and cleaning the sensors doesn’t work, realigning the sensors may be the next step. The sensor lenses should face each other no more than six inches apart and be perfectly aligned. In most cases, they only need slight adjustments, so use a level to ensure perfect alignment.
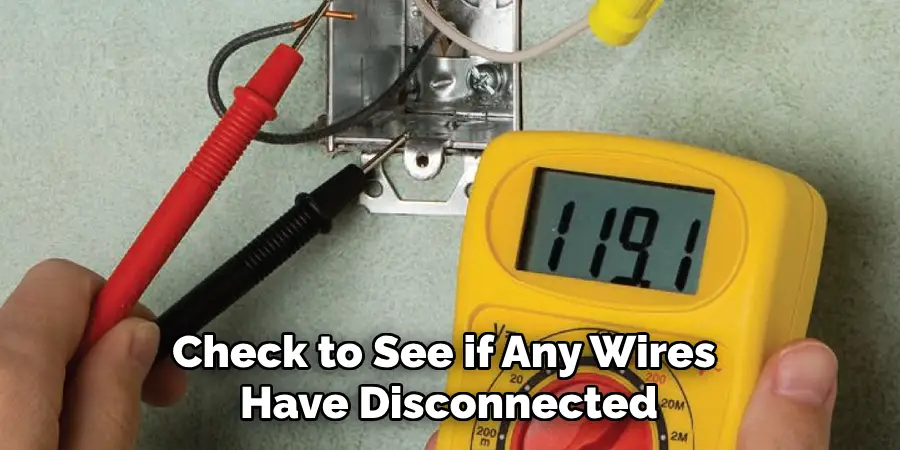
Step 4: Check for Damaged Wires
Sometimes, faulty garage door sensors may have damaged wires, which can cause them to malfunction. Check the wires’ connectors to ensure that they are firmly attached to the sensor unit and that none of the wires have damaged insulation. Worse yet, they may be frayed. If you find any wire damage, it is best to seek professional help to avoid risking electrocution.
Step 5: Observe the LED Lights
Modern garage door sensors come equipped with LED lights that indicate whether the sensors are working correctly or not. After following the above steps, observe the LED lights to see if they are both lit up and solid. If one or both of them are blinking, it may be a sign of an issue.
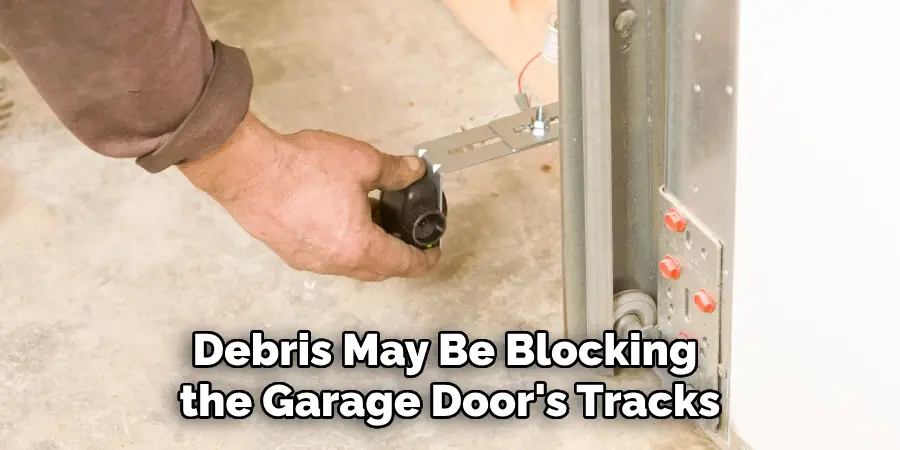
Step 6: Check the Tracks
Sometimes, objects or debris may be blocking the garage door’s tracks, preventing the sensors from working correctly. Inspect the tracks and remove any obstructions carefully. You can also use a level to ensure that the tracks are aligned correctly.
Step 7: Consult a Professional
If none of the above steps seem to solve the issue, it is best to seek the help of a professional garage door repair technician. They will have the necessary tools and expertise to troubleshoot and fix any issues with your sensors accurately.
By following these steps, you can effectively troubleshoot and fix any problems with your garage door sensors. Remember, prevention is always better than cure, so regularly clean and maintain your garage door sensors to avoid any future issues.
5 Considerations Things When You Need to Troubleshoot Garage Door Sensors
1. Check the Alignment of the Sensors
The first step when troubleshooting garage door sensors is to check the alignment of the sensors. The sensors should be mounted on either side of the garage door and lined up with each other. If they are not aligned properly, it can cause problems with the sensors detecting movement or blockages in the door’s path.
Additionally, ensure that no debris is blocking the sensors or obstructing their view of each other.
2. Check for Loose Wires
The next step is to check for any loose wires causing sensor issues. Look for any exposed wires or frayed cables and ensure all connections are secure and tight. Also, check to see if any wires have disconnected from their terminals. If so, you’ll need to reconnect them to ensure your garage door sensors function correctly.
3. Test the Batteries
If your garage door still isn’t working properly after checking for loose wires, then it’s time to test the batteries in your sensors. Make sure that you’re using fresh batteries and that they are installed correctly in both sensors. If you find that one or both of your batteries have died, replace them immediately and try testing your garage door again.
4. Check for Obstructions
Another common issue with garage door sensors is obstructions in their path of travel. Make sure that no objects are blocking either sensor from being able to detect motion or blockages in its path, as this can prevent it from functioning properly. Additionally, make sure that nothing is blocking either sensor’s view of its counterpart on the other side of the garage door track.
5. Clean Sensor Lenses
Finally, if you’re still having trouble with your garage door not opening or closing properly, then it’s time to clean off any dirt or debris from both sensor lenses. This will help ensure that both lenses are free from obstructions and can accurately detect motion or blockages in its path without any issues
5 Benefits of Troubleshoot Garage Door Sensors
1. Increased Safety
Garage door sensors are a great way to increase the safety of your home. The sensors detect when something is in the way of the garage door and will automatically reverse it, preventing any injury or damage that may occur if the door were to close on an object or person.
This feature also helps to reduce wear and tear on the door, as it won’t be closing onto something every time you open and close it.
2. Improved Security
Garage door sensors can also help to improve security by alerting you if someone is trying to gain access to your garage without permission. If a sensor detects movement near the garage door, it will sound an alarm, which can be set up to notify you of any suspicious activity. This can help to deter potential burglars and give you peace of mind knowing that your property is secure.
3. Easier Troubleshooting
Troubleshooting garage door sensors can be a difficult task for those who aren’t familiar with them. However, with modern technology, troubleshooting these systems has become much easier due to online tutorials. It provides step-by-step instructions on how to diagnose and fix common issues with sensors.
This makes it easier for homeowners to identify problems and take corrective action quickly before becoming more serious.
4. Reduced Maintenance Costs
Having garage door sensors installed can help reduce maintenance costs over time as they require less frequent servicing than manual systems do. As long as the sensors function properly, they don’t need much attention other than occasional cleaning or battery replacement when necessary. This means fewer service calls from technicians, saving you money in the long run.

5. Increased Home Value
Installing garage door sensors can also add value to your home if you decide to sell in future years, as buyers often look for homes with updated security features such as this one. These features could make your home more attractive than others on the market and potentially increase its sale price compared to similar homes without these features installed.
Conclusion
Troubleshooting garage door sensors may seem daunting, but you can fix the problem quickly and efficiently with the above steps. Always ensure the power supply works, clear any debris covering the sensor lenses, align the sensors, and check for damaged wires. If you have tried all the above steps to no avail, it’s best to call a professional.
Remember, keeping your Garage Door Sensor in good working condition ensures the safety and security of you and your family at all times, so never ignore any issues with your garage door sensors. Thanks for reading our post about how to troubleshoot garage door sensors.
I am Rick. I grew up helping my dad with his handyman service. I learned a lot from him about how to fix things, and also about how to work hard and take care of business. These days, I’m still into fixing things- only now, I’m doing it for a living.
I’m always looking for new ways to help people grow and develop. That’s why I have created this blog to share all my experience and knowledge so
that I can help people who are interested in DIY repair.