Have you ever noticed that your garage door doesn’t close properly? One of the many reasons this may happen is because the tracks are misaligned.
If you believe that this is the issue, you’re in luck because we’ll be discussing how to raise garage door track in this post. Doing it yourself can save you significant money, but you must plan things out and have the proper tools. With this guide, you can repair your garage door yourself without any outside help.
Can You Raise Garage Door Track?
Garage doors are an essential component of any garage. They provide secure protection to your vehicle, tools, and other items placed inside. The garage door track may become misaligned due to various reasons, such as extreme weather conditions, wear, or tear. This can cause problems like difficulty in opening or closing the door. So, can you raise the garage door track?
The answer is a resounding yes! You can successfully align your garage door track with the right tools, expertise, and patience. Remember, it’s best to consult a professional if you’re not confident in your DIY skills. A functional garage door track will ensure your garage is secure and protected, giving you peace of mind.
Why Should You Raise Garage Door Track?
Raising your garage door track may not be a task that immediately comes to mind when considering home improvements. Still, it can actually provide numerous benefits for your garage and, ultimately, your daily life.
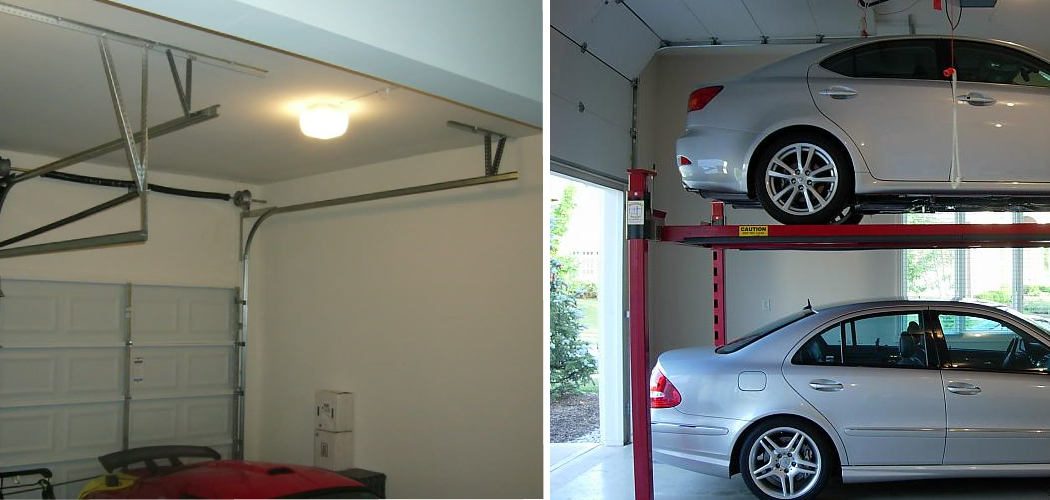
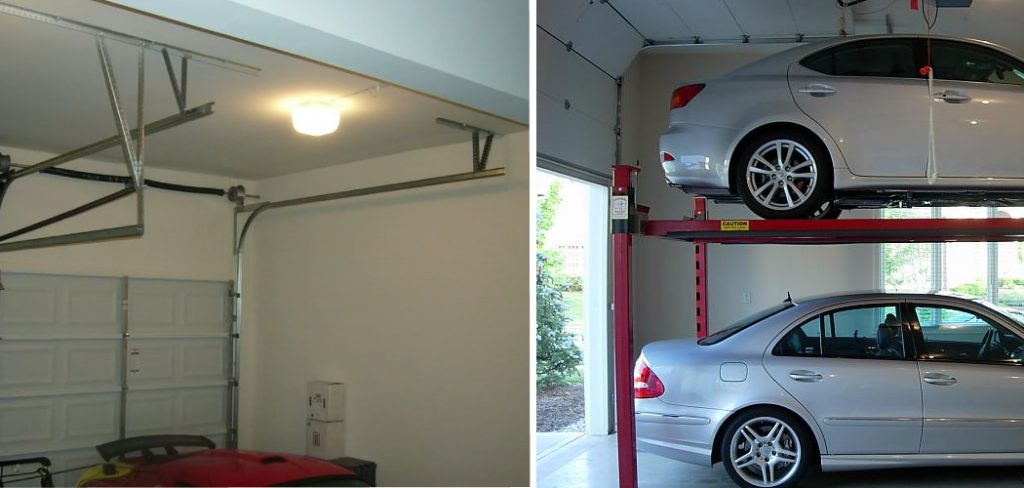
By raising the height of your garage door track, you can increase the overhead clearance and create more space for storing larger items or parking taller vehicles. This can transform your garage from a cluttered space into a versatile storage area. Additionally, raising the garage door track can improve ventilation and help regulate the temperature in the garage.
These improvements not only enhance the functionality of your garage but can also increase the resale value of your home. So, if you’re looking to maximize space and add value to your property, raising your garage door track may be a worthwhile investment.
How to Raise Garage Door Track: A DIY Guide
Step 1: Turn Off the Power
Start by turning off the power of your garage door. Make sure to unplug the garage door opener so that it doesn’t get switched on while you’re working. It’s crucial to be careful during this process because the tension in the springs can be dangerous.
Start by loosening the bolts that connect your tracks to the garage door using a socket wrench. Place the wrench on the bolt and then turn it counterclockwise until it is loosened completely. Be sure to hold on to the track securely when loosening the bolts. You don’t want to pull the bolts out of their slots, causing your door to fall.

Step 2: Lift the Door
Next, lift the door gradually until it clears the tracks. Locate the bolts or screws that are used to attach your tracks to the ceiling. Using your socket wrench, turn these bolts or screws in the counterclockwise direction until the tracks are in position.
To ensure the tracks are level, use a spirit level and make necessary adjustments. Once the tracks are level, tighten the bolts to keep the track securely in position.
Step 3: Raise the Garage Door and Insert the Wood
With the tracks steady and in position, raise the garage door and insert a piece of wood in the space between the door and the ground. This will help prevent the door from closing and allow you to inspect your work.
Use a spirit level to ensure the tracks are correctly aligned and make any necessary adjustments. Ensure that you tighten the bolts securely.
Step 4: Adjust the Brackets
After ensuring your tracks are level and secure, check the brackets. You may need to make some adjustments to ensure they are in line with the ceiling and properly aligned. Loosen the bolts on the brackets and use a hammer or mallet to gently tap them into place. Once you have made the necessary adjustments, tighten the bolts to secure the brackets.
Step 5: Check for any Gaps
Once you have completed adjusting the tracks and brackets, release the garage door from its open position by removing the piece of wood. Close the door and inspect for any gaps between the door and the ground. If there are any gaps,
use a rubber mallet to tap on the tracks until the gaps are eliminated. Check again with a spirit level to ensure that the tracks are still level.
Step 6: Lubricate and Test
To ensure smooth operation, lubricate the track and rollers. Apply a generous amount of silicone-based spray along the length of the track. Then, open and close the door to evenly distribute the lubricant. You have successfully raised your garage door track if the door operates smoothly.
Step 7: Turn on the Power
Once you have completed all the necessary steps and are satisfied with your work, turn on the power to your garage door opener. Test the door a few times to ensure it opens and closes properly.
If any adjustments need to be made, repeat the steps until your garage door operates smoothly and safely. Remember to always be cautious when working with garage door tracks, as they can be dangerous if not handled properly.
Now, you have successfully raised your garage door track and can enjoy a fully functional and safe garage door. So, follow these simple steps next time you need to adjust your garage door track!
5 Considerations Things When You Need to Raise Garage Door Track
1. Measure the Width of Your Garage
When raising a garage door track, it is important to measure the width of your garage before purchasing new tracks. This will ensure that you buy tracks that are the correct size for your garage. You should also measure the height of your ceiling and ensure the new tracks will fit underneath it.

2. Choose a Heavy-Duty Track
It is important to choose a heavy-duty track when raising a garage door track. Heavy-duty tracks are designed to withstand greater weight and pressure than lighter-duty models, which means they can handle heavier garage doors without buckling or bending.
Additionally, they are also more resistant to wear and tear over time, meaning they will last longer than lighter-duty models.
3. Consider Your Budget
When raising a garage door track, it is important to consider your budget before making any purchases. Tracks can range in price from relatively inexpensive models to more expensive ones, depending on their size and material type.
It is important to find a balance between quality and cost when choosing new tracks for your garage door so that you get the best value for your money.
4. Investigate Different Materials
Another consideration when raising a garage door track is the type of material you would like to use for the tracks. Steel is one of the most popular materials used for tracks due to its strength and durability, but aluminum or vinyl may be better suited for certain applications depending on your needs and budget.
5. Install New Tracks Properly
Finally, you must install new tracks properly when raising a garage door track to ensure its longevity and safety. Before installing any new parts or components, read through all instructions carefully and ensure you understand them thoroughly before beginning any work on your own or with help from professionals if necessary.
Benefits of Raise Garage Door Track
Raise garage door tracks offer a host of benefits for homeowners. One of the major benefits of raising your garage door track is that it provides additional clearance for your vehicle. You can park larger SUVs or trucks in your garage without worrying about hitting the tracks. Raising your garage door tracks can also create more storage space in your garage.

This is especially useful for homeowners with many items but limited storage space. Finally, raising your garage door tracks can also enhance the overall look of your garage. With more space and a smoother door movement, your garage will appear more polished and put-together. Raising your garage door track is an easy and effective way to improve your garage and make your life easier.
Some Common Mistakes People Make When Trying to Raise Garage Door Track
Raising a garage door track can seem easy, but unfortunately, many people make common mistakes that can lead to bigger problems. One of the most common mistakes is using the wrong tools. Using the wrong tools can cause damage to the door or track and can also make the task more difficult than it needs to be.
Another mistake is trying to raise the track alone. Raising the track without assistance can be dangerous and can lead to injury. Not paying attention to the manufacturer’s instructions can also result in mistakes. It is important to read and follow the instructions carefully to ensure that the track is raised correctly. By avoiding these common mistakes, you can safely and effectively raise your garage door track.
Conclusion
Keeping your garage door running smoothly is important. Maintaining your garage door’s track is one way to keep it running in good condition. The above guide lets you easily and quickly fix your garage door track.
Do-it-yourself repairs can save you money and keep your garage door running like a dream. Just remember to exercise caution throughout the process. Always turn the electricity off before beginning any repairs, and if you’re not comfortable doing it yourself, call a garage door repair professional. Thanks for reading our post about how to raise garage door track.
I am Rick. I grew up helping my dad with his handyman service. I learned a lot from him about how to fix things, and also about how to work hard and take care of business. These days, I’m still into fixing things- only now, I’m doing it for a living.
I’m always looking for new ways to help people grow and develop. That’s why I have created this blog to share all my experience and knowledge so
that I can help people who are interested in DIY repair.