Your garage door opener relies on a variety of components to function smoothly, and one of the critical but often overlooked parts is the capacitor. The capacitor is responsible for storing electrical energy, providing the necessary boost to start the motor when you activate your garage door.
Over time, capacitors can wear out or fail, leading to issues with your garage door’s operation. If you’ve noticed your garage door struggling to open or close, it might be time to test the capacitor. In this informative guide, we will walk you through the essential steps on how to test garage door capacitor, helping you diagnose potential problems and ensure the continued reliability of your garage door opener.
Whether you’re a seasoned DIY enthusiast or a homeowner looking to troubleshoot common garage door issues, this article will provide you with the knowledge and confidence to tackle capacitor testing effectively.
What a Capacitor Is and Its Role in a Garage Door Opener
A capacitor is a small electronic device that stores an electrical charge and can help regulate the flow of electricity. In a garage door opener, the capacitor helps start and stop the motor when you press or release the button on your remote control. It also helps to balance power levels in order to reduce speed and noise during operation.
Testing a capacitor is simple and can help you diagnose and repair issues with your garage door. The first step is to locate the capacitor, which will be attached to the motor of the opener. It may be found in a separate unit mounted near the ceiling or inside a metal box.
Once you have located it, use an ohmmeter or multimeter to measure the capacitance of your capacitor. This will tell you how much charge the capacitor is able to store. If the reading indicates a low capacitance, it may be time to replace the capacitor.
Next, disconnect the power from your garage door opener and test the continuity of the wires leading into and out of the capacitor. You can do this using an ohmmeter or multimeter set to measure resistance.
Importance of a Functioning Capacitor in a Garage Door Opener
A functioning capacitor in your garage door opener is essential in order for it to work properly. A capacitor helps power the motor, allowing it to open and close the door with ease. If your capacitor isn’t functioning correctly, you may notice that your door takes much longer to open or close than usual. Additionally, if a capacitor starts to lose power, your opener could make strange noises or become very loud when in use.
Testing the capacitor should be done if you’re experiencing any of these issues with your garage door opener. If the problem turns out to be a failing capacitor, then you can replace it with a new one and get your system back up and running again in no time.
To test the capacitor, you’ll need a voltage meter or tester and some protective gear such as rubber gloves and goggles. First, turn off the power to your garage door opener at the circuit breaker box. Then, locate the capacitor in your system and carefully disconnect any wires that are attached to it.

Once disconnected, set your voltage meter or tester to a low setting, such as 20V. Touch one of the meter’s probes to each end of the capacitor and observe the reading on the display. If you get a reading, that means your capacitor is functioning properly. However, if you get no reading at all, then it could be an indication that your capacitor is failing and needs to be replaced.
Signs that May Indicate a Faulty Capacitor
If your automatic garage door isn’t opening or closing properly, you may have a faulty capacitor. A few signs that point to a potential issue with the capacitor are:
- Door does not move when activated: If the door doesn’t move at all when pressed with the remote, it could indicate an issue with the capacitor.
- Door opens and closes slowly: A faulty capacitor can cause the door to open and close slower than usual.
- Abnormal noises when activating the door: If you hear strange noises or clicking while pressing the remote, it could be a sign of an issue with the capacitor.
Fortunately, testing your garage door capacitor is quick and easy – all you need is a multimeter and a few minutes of your time!
10 Steps How to Test Garage Door Capacitor
Step 1: Safety First
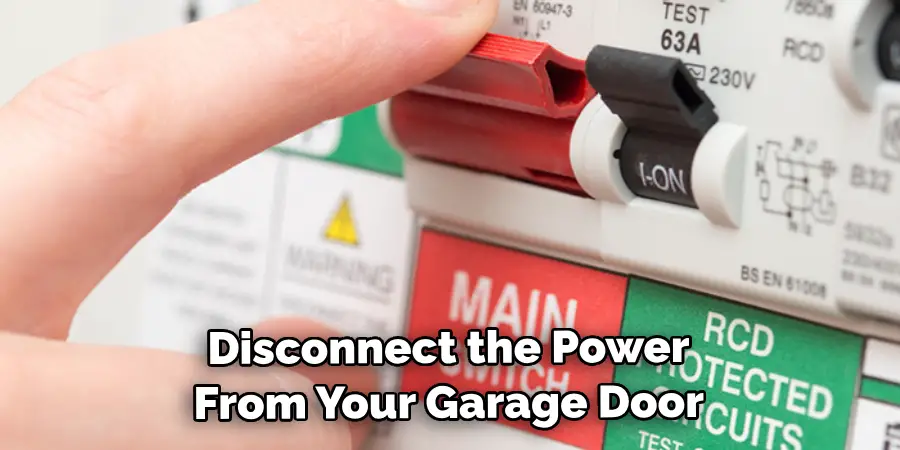
Before you begin testing your garage door capacitor, prioritize safety. Ensure that the power to the garage door opener is turned off to prevent any electrical accidents. You can disconnect it from the power source or turn off the breaker that supplies electricity to the garage door opener. Also, consider wearing safety gloves and eye protection to prevent any mishaps during the testing process.
Step 2: Gather Tools and Equipment
To test the garage door capacitor, you’ll need a few tools and equipment:
- Screwdriver
- Nut driver
- Multimeter (with capacitance measurement capability)
- Insulated screwdrivers
- Wire connectors
- Electrical tape
Ensure that you have all these tools readily available before proceeding.
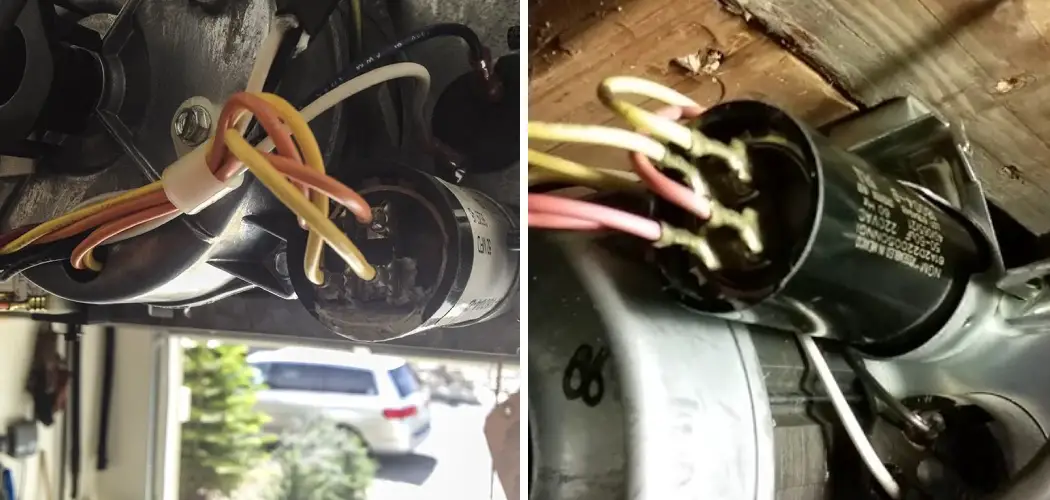
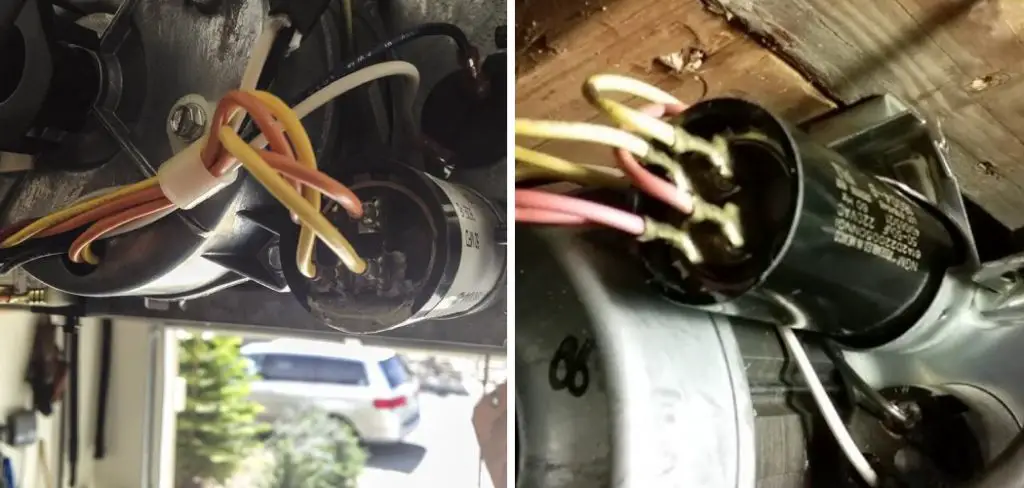
Step 3: Access the Capacitor
Locate the garage door opener’s motor unit, which typically hangs from the ceiling of the garage. You may need to use a ladder to reach it safely. Once you’ve accessed the motor unit, identify the capacitor. It is a cylindrical or oval-shaped component connected to the motor unit.
Step 4: Discharge the Capacitor
Before you can safely test the garage door capacitor, you need to discharge it to avoid any electrical shocks. Use an insulated screwdriver to bridge the capacitor’s two terminals. Make sure you touch the metal part of the screwdriver across both terminals, effectively short-circuiting the capacitor. This should discharge any stored electrical energy.
Step 5: Disconnect the Capacitor
After discharging the capacitor, use a nut driver or screwdriver to remove it from its mounting bracket or the motor unit. Carefully disconnect any wires or connectors attached to the capacitor terminals.
Step 6: Set Up Your Multimeter
Now, it’s time to set up your multimeter for capacitance measurement. Turn on your multimeter and select the capacitance (F) setting. Ensure that the range is suitable for the expected capacitance value of the garage door capacitor, typically within the microfarad (µF) range.
Step 7: Test the Capacitor
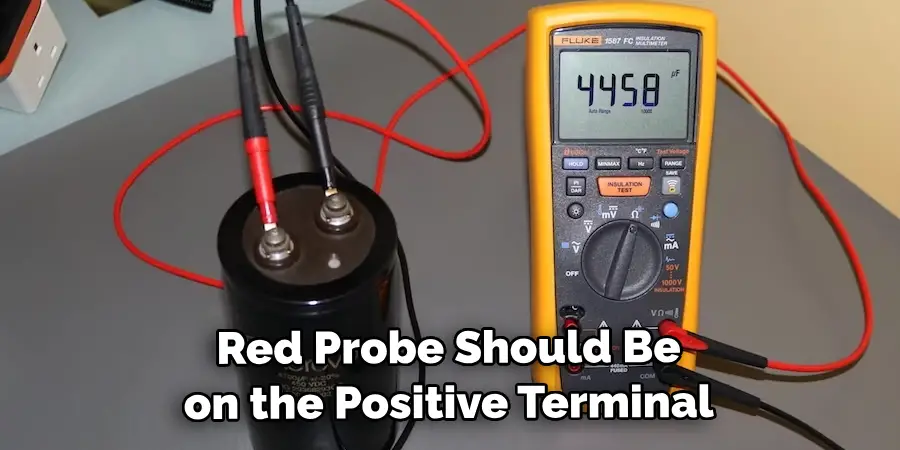
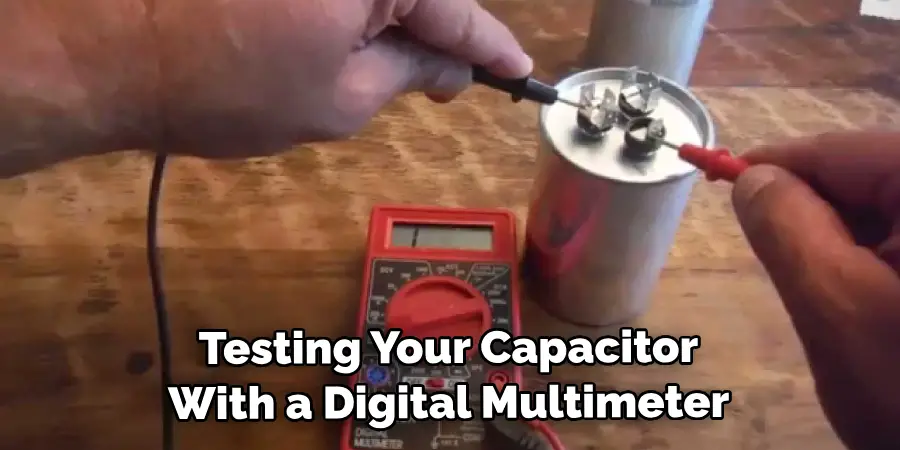
With your multimeter properly configured, it’s time to test the garage door capacitor. Place the multimeter’s probes on the capacitor’s terminals, making sure the polarity is correct. The red probe should be on the positive terminal, and the black probe on the negative terminal. Be gentle and ensure that the probes have good contact with the terminals.
Step 8: Read the Multimeter
The multimeter will display the capacitance value in microfarads (µF). Compare this reading to the capacitor’s rated capacitance, which is often printed on its label. If the reading is significantly different from the rated value, it indicates a faulty capacitor that needs replacement. A drastic drop in capacitance can lead to motor issues in the garage door opener.
Step 9: Reconnect the Capacitor
If the capacitor passes the test and its capacitance reading is within an acceptable range, you can proceed to reconnect it. Reattach the wires or connectors to the capacitor terminals and secure it back in its mounting bracket or the motor unit.
Step 10: Restore Power and Test the Garage Door Opener
After safely securing the capacitor, restore power to the garage door opener by turning on the breaker or reconnecting it to the power source. Test the garage door opener by operating it several times to ensure it functions smoothly. If you notice improved performance and no issues with the garage door’s movement, you have successfully tested and resolved any potential capacitor problems.
Safety Precautions for Testing Garage Door Capacitor
It’s important to take the necessary safety precautions before taking any action on your garage door capacitor. Before beginning, ensure that all power sources are disconnected from the unit and that you’re wearing protective equipment such as insulated gloves and eyewear. Once you’ve completed these steps, you can confidently move forward with testing your garage door capacitor.
There are two ways to test the garage door capacitor: with a digital multimeter or by using an ohmmeter. When testing your capacitor with a digital multimeter, measure both terminals of the unit to ensure they are within specification (around 10-15 ohms). If the reading is not within range, it might be time to replace your capacitor.
If you choose to use an ohmmeter to test the garage door capacitor, refer to your owner’s manual for the specific procedure you should follow. Typically, you’ll need to measure resistance across all three terminals of the capacitor and ensure it is within expected ranges. If not, it may be time to replace the unit.
Conclusion
In conclusion, testing a garage door capacitor is a relatively simple process that requires minimal tools and time. Testing the surface tension can indicate potential problems with the motor and if measured correctly, should help you understand the operation of your garage door opener. With this knowledge, you will be able to make informed decisions about when it’s time for repair or replacement of your opener or other components.
By following these steps, you can ensure the safety and security of your home while also saving on energy costs. Be sure to follow all instructions on how to test garage door capacitor carefully, and always consult an expert when in doubt. Happy testing!
I am Rick. I grew up helping my dad with his handyman service. I learned a lot from him about how to fix things, and also about how to work hard and take care of business. These days, I’m still into fixing things- only now, I’m doing it for a living.
I’m always looking for new ways to help people grow and develop. That’s why I have created this blog to share all my experience and knowledge so
that I can help people who are interested in DIY repair.