If you’re like most homeowners, you rely on your garage door opener to easily get in and out of your home. Garage door openers are a common convenience that many of us take for granted – until they stop working properly. If you’re experiencing problems with your garage door opener, don’t worry – it may be easier to fix than you think. In this blog post, we’ll teach you how to set up homelink garage door opener in just a few simple steps. So read on to learn more!
What Is a Homelink Garage Door Opener?
A Homelink garage door opener is a device that allows you to control your garage door from inside your car. It uses a wireless signal to communicate with the garage door opener and can be programmed to work with multiple brands of garage door openers.
Homelink garage door openers are typically installed in new cars but can also be retrofitted to older models. In addition to convenience, Homelink garage door openers can improve security by preventing strangers from opening your garage door.
Why Should You Set up Homelink Garage Door Opener?
For many homeowners, the garage is more than just a place to store the car. It’s also a workshop, a storage space, and a place to pursue hobbies. As such, it’s important to have a garage door that is both easy to use and secure. Homelink garage door opener is a reliable and convenient way to open and close your garage door without fumbling for keys or remote controls.
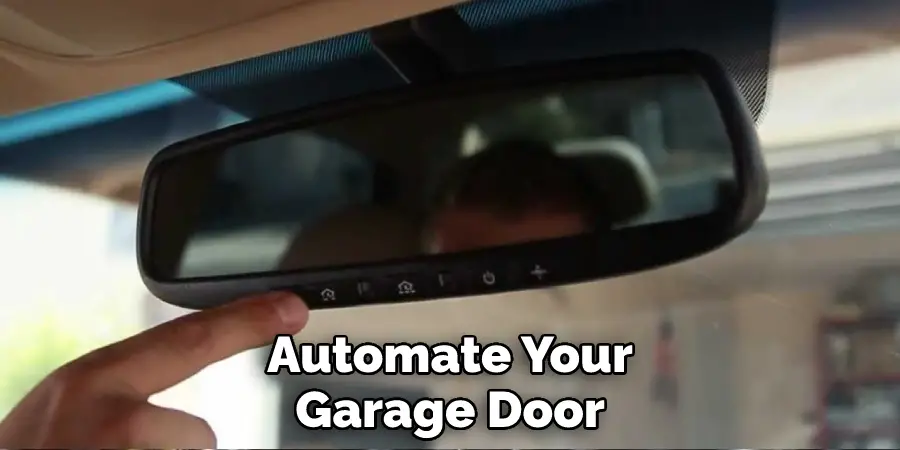
In addition, Homelink is integrated with many popular home automation systems, making it easy to automate your garage door and the rest of your home. So whether you’re looking for convenience or security, Homelink is an excellent choice for any homeowner.
Needed Materials:
Homelink Compatible Car:
The first thing you need to set up Homelink garage door opener is a car that comes equipped with this feature. If your car doesn’t have Homelink built-in, don’t worry – it can usually be installed as an aftermarket accessory.
Garage Door Opener:
Next, you’ll need the instructions and remote control for your garage door opener. Make sure to also have a ladder and step stool for easy access to the garage door opener.
Homelink Bridge:
Depending on your specific setup, you may also need a Homelink bridge. This device acts as an intermediary between your car’s Homelink system and your garage door opener, allowing them to communicate with each other.
9 Ways to Follow on How to Set up Homelink Garage Door Opener
1. Check the Compatibility
First and foremost, check if your garage door opener is compatible with Homelink. You can find this information in your car’s owner’s manual or by contacting the manufacturer of your garage door opener. If your opener is not compatible, you will need to purchase a special converter kit to make it work with Homelink. You can also check if your car is Homelink compatible by visiting https://homelink.com/compatibility.
2. Clear the Memory
Once you have verified that your opener is compatible, you will need to clear the memory in your Homelink system. This can be done by pressing and holding the two outer buttons on your Homelink garage door opener until the indicator light blinks. This will erase any previously programmed codes and allow you to start fresh. The indicator light should then remain solid.
3. Program the System
Now it’s time to program your Homelink system. Begin by pressing and holding the button on your garage door opener that you would like to program. While holding this button, press and hold the desired Homelink button until the indicator light starts blinking rapidly. Once this happens, release both buttons, and your Homelink should be programmed! You may need to press the Homelink button a few times to test it and ensure that it’s working.
4. Test the Connection
After programming your Homelink, it’s always a good idea to test the connection to ensure that everything is working properly. To do this, simply press the Homelink button and see if your garage door opener responds accordingly. If everything is working correctly, you’re all set! It’s always a good idea to test the connection periodically to make sure that everything is still working correctly.
5. Adjust the Settings
If you find that your garage door is opening or closing too quickly or slowly, you can adjust the settings on your Homelink system to fix this. To do so, press and hold the programmed Homelink button until the indicator light starts blinking rapidly. Once this happens, use the adjustment buttons (usually located on the back of your Homelink unit) to increase or decrease the sensitivity. The higher the sensitivity, the faster your garage door will open or close.
6. Reprogram If Necessary
If you make any changes to your garage door opener (such as a new remote control), you must reprogram your Homelink system to match. To do so, simply repeat the programming steps outlined above. This may also be necessary if you experience any issues with your Homelink, such as a weak signal or difficulty opening an older garage door. You can also consult your car’s owner’s manual for specific troubleshooting steps. It’s important to note that you may need to reprogram your Homelink periodically, so it’s always a good idea to keep the instructions handy.
7. Update the Firmware
From time to time, you may need to update the firmware on your Homelink system. This can usually be done by visiting the website of your car’s manufacturer and downloading the latest update. Once this is complete, follow the instructions on how to install the update on your Homelink system. But don’t worry – firmware updates are not required frequently and only necessary if there are significant changes or improvements to the Homelink system.
8. Consult the Manual
If you’re having trouble programming or using your Homelink garage door opener, be sure to consult your car’s owner’s manual for troubleshooting tips. In many cases, you can find solutions to common problems by simply consulting the manual. If you’re still having trouble, you can also reach out to the manufacturer for assistance. You can usually find their contact information on the Homelink website.
9. Contact Customer Support
Contact customer support for assistance if you’re still having trouble with your Homelink garage door opener. They will be able to help you troubleshoot the problem and get your system up and running in no time!
If you follow these steps and have the necessary materials, setting up your Homelink garage door opener should be a quick and easy process. Say goodbye to fumbling for keys or remotes, and hello to convenience and security with Homelink.
That’s it! You’ve now learned how to set up homelink garage door opener. With just a few simple steps, you can enjoy the convenience of opening and closing your garage door without ever having to step out of your car!
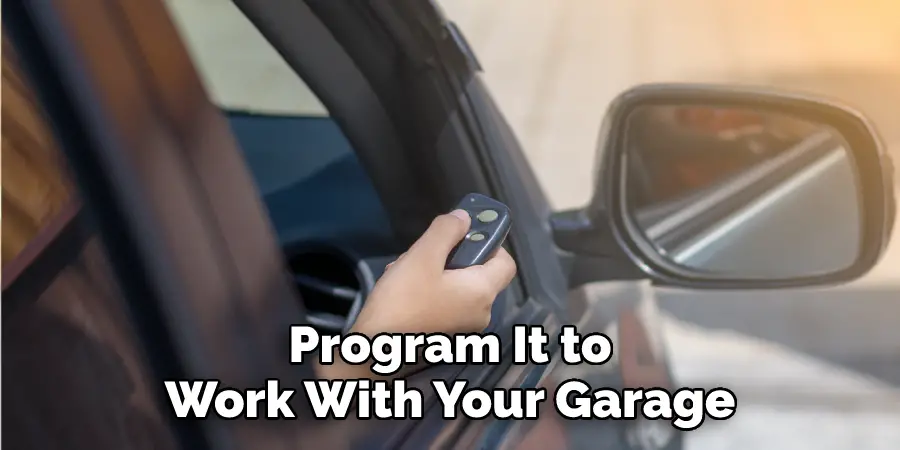
How to Program a Homelink Garage Door Opener
One of the most convenient features of a newer car is the Homelink garage door opener. This allows you to open and close your garage door without using a physical key or remote. However, to use this feature, you first need to program it to work with your garage door opener. However, the process is quite simple and only takes a few minutes to complete.
First, you must find the “learn” button on your garage door opener. This is usually located near the top of the unit. Once you have found the button, press and hold it until the light on the unit begins to blink. Next, go back to your car and press and hold the Homelink button that you want to program. After a few seconds, the light on the garage door opener should stop blinking, indicating that the two units are now communicating.
Finally, test the system by pressing the Homelink button again. The door should open or close, depending on its current position. With just a few quick steps, you can enjoy the convenience of a Homelink garage door opener.
The Benefits of Having a Homelink Garage Door Opener
A Homelink garage door opener is a great investment for any homeowner. Not only does it provide the convenience of being able to open and close your garage door from inside your car, but it also offers several other benefits. For instance, a Homelink garage door opener can help increase your home’s security. By controlling the garage door inside your car, you can ensure that it is closed and locked before you leave.
Additionally, a Homelink garage door opener can help improve your home’s energy efficiency. By keeping the garage door closed when it is not in use, you can help to prevent warm air from escaping in the winter and cool air from escaping in the summer. As a result, you can save money on your energy bills each month. A Homelink garage door opener is a valuable addition to any home.
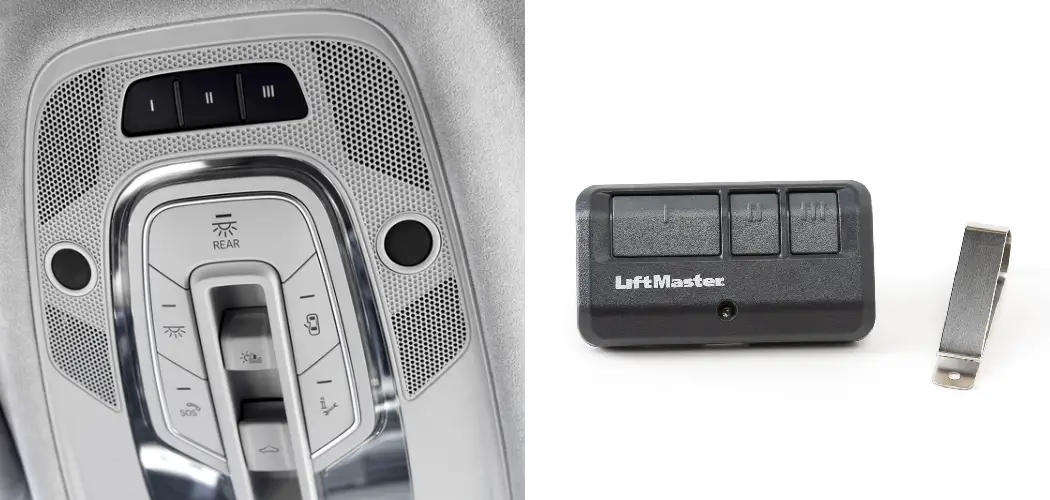
How to Set up LiftMaster Homelink Garage Door Opener
If you have a LiftMaster garage door opener, you can use the Homelink feature to set it up so that it can be operated with your car’s remote control. To do this, you must program the Homelink button in your car to transmit the code for your particular garage door opener. The process is fairly simple and only takes a few minutes to complete.
First, locate the learn button on your garage door opener. It is typically located on the back of the unit near the light bulb socket. Press and hold the learn button until the light on the unit begins to blink. Then, press and hold the programmed Homelink button in your car for two seconds.
The light on the garage door opener will stop blinking, indicating that it has learned the code from your car’s remote. You can now operate your garage door with the Homelink button in your car. Keep reading for more information about how to set up homelink garage door opener.
What Are Some Tips for Keeping Your Homelink Garage Door Opener in Good Condition?
Your Homelink garage door opener is a complex piece of machinery, and like any machine, it requires regular maintenance to keep it in good working order. Here are a few tips to help you keep your garage door opener in top condition:
1. Check the batteries: The batteries in your garage door opener are the first line of defense against power failures. Make sure to check them regularly and replace them as necessary.
2. Test the safety features: Your garage door opener has several safety features, such as sensors that prevent the door from closing if something is in the way. These features are designed to keep you and your family safe, so test them regularly.
3. Clean the tracks: The tracks that your garage door opener runs on can get dirty and dusty, which can cause the door to stick or even malfunction. To clean your tracks, wipe them down with a damp cloth.
4. Lubricate the moving parts: The moving parts of your garage door opener need to be lubricated regularly to ensure smooth operation. Use a light lubricant such as WD-40 or 3-in-1 oil, and apply it sparingly to avoid attracting dirt and dust.
By following these simple tips, you can help keep your garage door opener in good working condition for years to come.
Do You Need to Use Professionals?
No, you do not necessarily need to use professionals to set up your Homelink garage door opener. The process is relatively simple and can be done by most homeowners with just a few tools. However, if you are unfamiliar with the steps or do not feel comfortable completing the task on your own, it is always best to consult a professional for assistance. They can help ensure that the setup is done correctly and safely.
Additionally, professionals may be able to offer additional tips or insights on how to maximize the use of your Homelink garage door opener. Overall, it is up to personal preference whether to seek professional help or not, but keep in mind that it can save you time and potential headaches in the long run.
Frequently Asked Questions:
Q: How Do I Program My Homelink Garage Door Opener?
A: To program your Homelink garage door opener, first locate the “learn” button on your garage door opener. Press and hold it until the light starts blinking, the go to your car and press and hold the Homelink button you want to program. Once the light on the opener stops blinking, the two units are now communicating. The process may vary slightly depending on the make and model of your garage door opener.
Q: Can I Use a Homelink Garage Door Opener with Any Car?
A: Most newer cars come equipped with Homelink garage door openers, but if your car does not have this feature, you may be able to purchase a universal Homelink kit and have it installed in your car. You can also contact your car’s manufacturer to see if it is possible to add this feature to your specific model.
Q: Can I Program Multiple Garage Doors with My Homelink System?
A: Yes, you can program multiple garage doors with your Homelink system. Simply repeat the programming process for each additional door that you want to control with your car’s remote. The Homelink system can store codes for up to three different garage doors.
Q: Is a Homelink Garage Door Opener Compatible with All Types of Garage Doors?
A: Most Homelink garage door openers are compatible with all types of garage doors, including those made of wood, steel, and aluminum. However, it is always best to check the compatibility of your specific opener before purchasing one. Additionally, if you have an older garage door opener, it may not be compatible with Homelink technology. In this case, you may need to upgrade your opener to a newer model.
Q: Can I Still Use My Regular Garage Door Remote After Setting Up Homelink?
A: Yes, you can still use your regular garage door remote after setting up Homelink. The two systems will work independently of each other and will not interfere with one another. This allows for added convenience and flexibility in operating your garage door. You can use whichever system is most convenient for you at any given time.
Conclusion
Setting up your Homelink is a breeze, and in just a few minutes, you could be opening and closing your garage door from the comfort of your car. If you have any questions about how to set up homelink garage door opener, or if you need help troubleshooting any issues, feel free to contact a professional. And be sure to follow the tips above to keep your garage door opener in good working condition. Thanks for reading!
I am Rick. I grew up helping my dad with his handyman service. I learned a lot from him about how to fix things, and also about how to work hard and take care of business. These days, I’m still into fixing things- only now, I’m doing it for a living.
I’m always looking for new ways to help people grow and develop. That’s why I have created this blog to share all my experience and knowledge so
that I can help people who are interested in DIY repair.