
No one ever thinks about their garage door hinges until they break. And by then, it’s usually too late. Replacing garage door hinges isn’t as hard as you might think, but there are a few things to keep in mind. In this blog post, we’ll walk you through how to replace garage door hinges, step by step. So read on for all the information you need to get the job done right!
Summary: Replacing garage door hinges is a fairly easy task that can be accomplished by following a few basic steps. First, align the hinge with the door panel and drill pilot holes in the appropriate spots. Then, attach the hinge to the panel with screws. If any of the hinges or garage door sections are damaged, it is best to replace them before replacing the hinges to ensure proper functionality.
What Causes Garage Door Hinges to Break?
A few different things can cause garage door hinges to break. One of the most common causes is simply wearing and tear. Over time, the hinges can become weak and eventually give out. Another common cause is rust. If your garage door hinges are made of steel, they’re susceptible to rusting over time. Again, this can cause them to break or become weak.
Additionally, if your garage door is unbalanced, that can put extra stress on the hinges and cause them to break. The other main cause of broken garage door hinges is impact damage. If something hits the door, it can damage the hinges and cause them to break. Lastly, if the garage door is installed incorrectly, that can also lead to hinge problems.
Why Should You Replace Garage Door Hinges?
You might want to replace your garage door hinges for several reasons. First, if they’re broken or damaged, it’s important to replace them so that your garage door operates correctly. Additionally, if the hinges are rusty or old, replacing them can help to improve the look of your garage door.
If you do not replace them, the rust will continue to spread and can eventually damage other parts of the door. Another reason to replace garage door hinges is if you’re changing the style of your garage door.
For example, if you’re installing a new garage door or changing the color of your garage door, you might want to replace the hinges to match. Finally, if you want to upgrade your garage door, replacing the hinges is a great way to do that. Newer, higher-quality hinges can help improve your garage door’s function and look.
Step by Step Guide On How to Replace Garage Door Hinges
1. Gather Necessary Tools and Materials:
Before starting the hinge replacement process, ensure you have the necessary tools and materials. You’ll need a new set of garage door hinges, a cordless drill or power drill, a socket wrench or adjustable wrench, a step ladder, and safety gear such as gloves and goggles.
2. Disconnect Power to Garage Door Opener:
Disconnect the power to the garage door opener by unplugging it or turning off the circuit breaker. This is a crucial safety step to prevent the door from accidentally opening or closing while you’re working on it.
3. Examine Hinges for Replacement:
Examine the garage door hinges to determine which ones need to be replaced. Hinges are typically numbered, with the lowest numbers at the bottom of the door and increasing as you move up. Look for signs of wear or damage, such as cracks or rust.
4. Raise and Secure the Garage Door:
Lift the garage door to its fully open position, ensuring it stays securely open. Use a C-clamp or locking pliers to secure the door by attaching it to the garage door track just below the bottom roller. This will prevent the door from falling during the hinge replacement process.
5. Remove the Damaged Hinge:
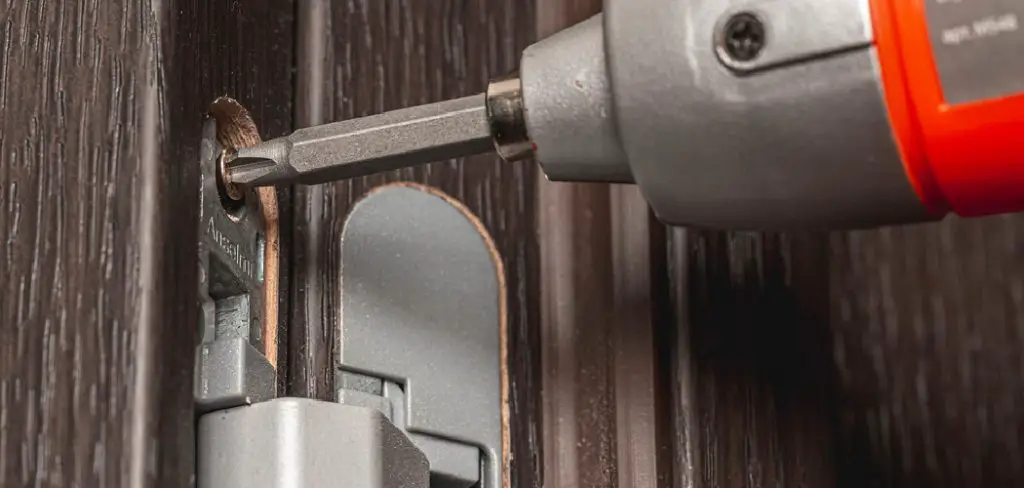
Using a socket wrench or adjustable wrench, remove the nuts and bolts securing the damaged hinge to the door panel and the roller. Keep track of the hardware, as you may need to reuse it when installing the new hinge. Once the hardware is removed, carefully slide the hinge off the roller and remove it from the door.
6. Install the New Hinge:
Align the new hinge with the mounting holes on the door panel and roller. Make sure the hinge is oriented correctly, with the number facing outward and the curved part facing away from the door. Reuse the old hardware or use new nuts and bolts to secure the hinge in place, tightening them with a socket wrench or adjustable wrench.
7. Check Hinge Alignment and Operation:
Once the new hinge is installed, ensure it is properly aligned with the other hinges and that the roller moves freely within the hinge. If necessary, make minor adjustments by loosening the hardware and repositioning the hinge until proper alignment and operation are achieved.
8. Repeat for Additional Hinges:
If you need to replace more than one hinge, repeat steps 5-7 for each additional hinge. Be sure to work on one hinge at a time to maintain stability and control over the garage door.
9. Remove C-Clamp and Lower Door:
Once all the hinges have been replaced and properly aligned, remove the C-clamp or locking pliers from the garage door track. Carefully lower the door, ensuring it operates smoothly and without any resistance.
10. Test Garage Door Operation:
With the door fully closed, reconnect the power to the garage door opener. Test the door’s operation by opening and closing it several times using the opener. Ensure the door moves smoothly and that the replaced hinges are functioning correctly.
11. Perform Maintenance on Other Hinges and Rollers:
While you’re replacing the damaged hinges, it’s a good idea to inspect and maintain the other hinges and rollers on your garage door. Look for signs of wear or damage, and lubricate the moving parts with a high-quality garage door lubricant. This will help extend the life of your garage door and prevent future issues.
By following these steps, you can successfully replace garage door hinges and ensure the smooth and safe operation of your garage door. Remember, regular maintenance and timely replacement of worn or damaged parts can help prolong the life of your garage door and prevent costly repairs in the future.
12. Inspect Garage Door Balance:
It’s important to check the balance of your garage door after replacing the hinges. To do this, disconnect the garage door opener by pulling the emergency release cord. Manually lift the door to the halfway point and let go. If the door stays in place, the balance is correct. If the door falls or rises, the door’s balance may be off and might require further adjustments or professional assistance.
13. Check Garage Door Springs:
While you’re working on the hinges, take the time to inspect the garage door springs. The springs are responsible for counterbalancing the weight of the door and are under a significant amount of tension. Look for signs of wear, rust, or damage. If you notice any issues, contact a professional garage door technician to inspect and replace the springs if necessary, as this task can be dangerous if not performed correctly.
14. Inspect Weatherstripping and Seals:
After replacing the hinges, inspect the weatherstripping and seals around your garage door. These components help keep out drafts, moisture, and pests, and they can wear down over time. If the weatherstripping or seals are damaged, replace them to maintain the energy efficiency and security of your garage.
15. Clean and Paint Garage Door:
Replacing hinges provides an excellent opportunity to clean and paint your garage door. Wipe down the door with a damp cloth to remove dirt and debris, and then apply a fresh coat of paint or protective finish if needed. This not only enhances the appearance of your garage door but also provides an additional layer of protection against the elements.
By taking the time to replace damaged hinges and perform routine maintenance on your garage door, you can help ensure its smooth operation and prolong its lifespan. Regularly inspecting the various components, such as hinges, rollers, springs, and weatherstripping, allows you to identify and address potential issues before they become major problems. With proper care and maintenance, your garage door will continue to serve you well for years to come.
You Can Also Check It Out How to Keep Lizards Out of Garage
Additional Tips and Warnings on How to Replace Garage Door Hinges
Tips:
1. Be sure to use the proper tools when removing and replacing your hinges.
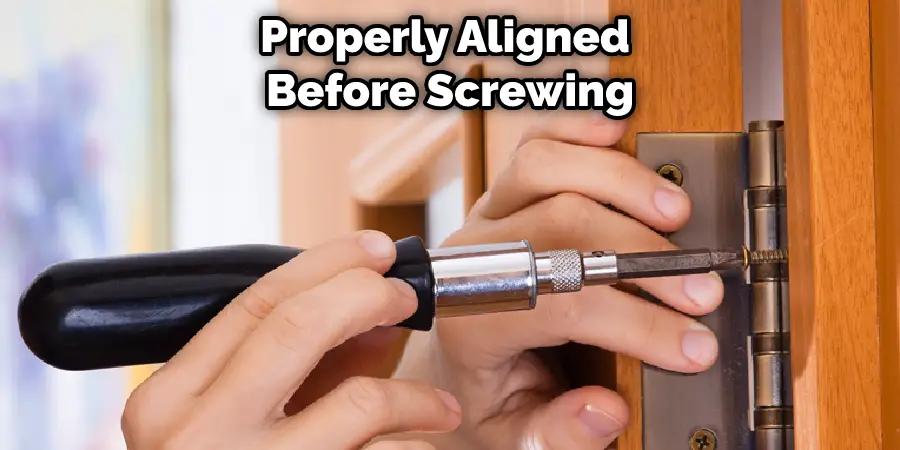
2. Make sure that the new hinges are properly aligned before screwing them in place.
3. Check the condition of your other hardware, such as your springs and tracks, before reattaching your door.
Warnings:
1. Be careful when working with tools near your garage door.
2. Ensure the new hinges are properly secured before testing your garage door.
3. Do not attempt to replace your hinges if you are not experienced with working with tools and hardware.
4. Always call a professional if you are unsure about any aspect of the replacement process.
How Much Does It Cost To Replace Garage Door Hinges?
The cost to replace garage door hinges will vary depending on the type of hinge you need, the number of hinges you need, and the difficulty of the installation. In most cases, you can expect to pay between $50 and $100 for the materials and labor. However, the costs could be higher if you have a complex installation or need a specialty hinge.
Conclusion
So there you have it, a complete guide on how to replace garage door hinges. Follow the steps carefully and take your time to ensure a successful installation. With a little patience and some elbow grease, you can have your garage door working like new in no time. Thanks for reading!
You Can Check It Out How to Connect Myq Garage Door Opener to Wifi
I am Rick. I grew up helping my dad with his handyman service. I learned a lot from him about how to fix things, and also about how to work hard and take care of business. These days, I’m still into fixing things- only now, I’m doing it for a living.
I’m always looking for new ways to help people grow and develop. That’s why I have created this blog to share all my experience and knowledge so
that I can help people who are interested in DIY repair.