If you’re like me, you have a small garage with limited storage. And if you have a trailer, it doesn’t fit in the garage. In this post, I’ll show you how to lower trailer to fit in garage. This easy process can be done with basic tools and minimal experience. Follow these simple steps, and you’ll have your trailer in the garage in no time.

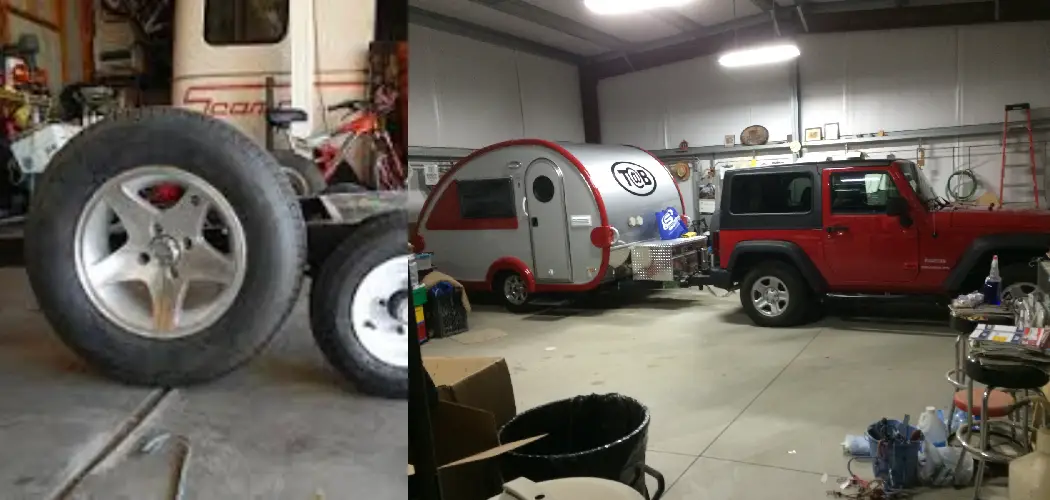
Can a Trailer Fit in a Garage?
This is a common question with many variables. The answer is, “It depends.” It depends on your garage’s size and the trailer’s height and length. If you have a small garage, your trailer will likely not fit. But if you have a more oversized garage, there’s a good chance it will. It also depends on the height of your trailer.
If it’s a tall trailer, it might not fit in the garage. But if it’s a shorter trailer, it might. And finally, it depends on the length of your trailer. If it’s an extended trailer, it might not fit in the garage. But if it’s a shorter trailer, it might. So, as you can see, there are a lot of variables. The good news is that, in most cases, you can lower your trailer so that it will fit in the garage. This easy process can be done with basic tools and minimal experience.
Step by Step How to Lower Trailer to Fit in Garage
How to Prevent Rust on Your Trailer
Lowering a trailer to fit it inside a garage requires careful planning and execution to ensure a safe and successful maneuver. Whether you have a travel trailer, boat trailer, or any other type of trailer, following the right steps will help you navigate the process effectively. In this guide, we will walk you through the steps to lower a trailer to fit it inside a garage.
Step 1: Measure the Trailer and Garage
Before attempting to lower the trailer, it’s crucial to measure both the trailer and the garage dimensions to ensure a proper fit. Take the following measurements:
- Trailer Height: Measure the height of the trailer from the ground to the highest point, such as the roof or an antenna. This measurement will help determine if the trailer can fit through the garage door opening without any modifications.
- Garage Door Opening: Measure the height and width of the garage door opening. Compare these measurements with the trailer’s height to determine if the trailer can pass through without scraping or damaging the garage door.
Step 2: Prepare the Garage
To create a safe and suitable environment for lowering the trailer, you may need to make some preparations. Follow these steps:
- Clear Obstacles: Remove any obstacles, such as bicycles, tools, or other items, from the garage. Create enough space to maneuver the trailer safely.
- Check Floor Level: Ensure that the garage floor is level and free of any debris or loose objects that may hinder the movement of the trailer.
- Measure Ceiling Height: Measure the height of the garage ceiling to determine if it provides enough clearance for the trailer. Consider any light fixtures, beams, or other obstructions that may affect the trailer’s height.
Step 3: Lower the Trailer Hitch
To lower the trailer hitch, follow these steps:
- Position the Tow Vehicle: Back up the tow vehicle so that the trailer hitch is directly aligned with the garage door opening.
- Disconnect the Trailer: Uncouple the trailer from the tow vehicle by releasing the hitch coupler or the fifth-wheel hitch, depending on the type of trailer you have. Follow the specific instructions for your trailer to ensure a safe disconnection.
- Secure the Tow Vehicle: Once the trailer is uncoupled, secure the tow vehicle by engaging the parking brake and chocking the wheels to prevent any movement.
Step 4: Deflate the Tires
If the trailer’s height is still too tall to fit through the garage door opening, you may need to deflate the tires slightly to lower the overall height. Here’s how:
- Consult the Trailer Manual: Refer to the trailer’s manual for information on the recommended tire pressure and the maximum deflation allowed. It’s important not to deflate the tires beyond the manufacturer’s recommendations.
- Deflate the Tires: Use a tire pressure gauge and let some air out of each tire until you achieve the desired height reduction. Be cautious not to deflate them too much, as it can compromise the trailer’s stability and safety.
Step 5: Secure the Trailer
To ensure the trailer remains stable and secure during the lowering process, follow these steps:
- Use Wheel Chocks: Place wheel chocks behind the trailer’s wheels to prevent any unintentional movement.
- Engage Stabilizer Jacks: If your trailer is equipped with stabilizer jacks, lower them to provide additional stability.
- Distribute Weight: If possible, evenly distribute the weight inside the trailer to maintain balance and stability during the lowering process.
Step 6: Lower the Trailer
With the necessary preparations in place, you can now proceed to lower the trailer. Follow these steps:
- Align the Trailer: Position the trailer directly in front of the garage door opening, ensuring it is centered and aligned.
- Lower the Trailer Slowly: Using the trailer’s leveling jacks or hydraulic system (if available), begin lowering the trailer gradually. Lower it in small increments, monitoring the height and clearance as you go.
- Observe Clearance: Continuously assess the clearance between the trailer and the garage door opening. Keep an eye on the height, width, and any potential obstacles that may impede the trailer’s movement.
- Utilize Spotters: If possible, have someone assist you by providing guidance from outside the garage. They can help you navigate the trailer and ensure a safe and precise lowering process.
- Watch for Door Clearance: Pay close attention to the clearance between the top of the trailer and the garage door opening. Ensure there is sufficient space for the trailer to pass through without scraping or damaging the door.
- Slow and Controlled Movements: Lower the trailer at a slow and controlled pace, making minor adjustments as necessary. It’s important to maintain steady and careful movements to prevent any sudden jolts or mishaps.
- Monitor Ceiling Height: Keep an eye on the trailer’s height in relation to the garage ceiling. Ensure there is ample clearance to avoid any collisions or damage to the trailer or the garage.
- Proceed with Caution: Exercise caution and patience throughout the entire lowering process. Take your time and make any necessary adjustments to ensure a safe and successful maneuver.
Step 7: Enter the Garage
Once the trailer is lowered to a suitable height, you can now proceed to enter the garage. Follow these steps:
- Check for Clearance: Confirm that there is enough clearance on all sides of the trailer to maneuver it into the garage without scraping or damaging the walls.
- Proceed Slowly: Enter the garage at a slow and controlled speed, maintaining steady movements. Keep a close eye on the trailer’s position to ensure it aligns properly with the desired parking spot.
- Mind the Wheels: Be cautious of the trailer’s wheels and ensure they do not come into contact with the garage walls or any other obstacles.
- Align and Park: Once inside the garage, align the trailer with the designated parking spot. Make any necessary adjustments to position it correctly.
Step 8: Secure the Trailer
After successfully parking the trailer inside the garage, take the necessary steps to secure it:
- Engage Parking Brake: Activate the trailer’s parking brake to prevent any unintentional movement.
- Stabilize the Trailer: If your trailer is equipped with stabilizer jacks, extend them to provide added stability and support while parked.
- Chock the Wheels: Place wheel chocks in front and behind the trailer’s wheels to further prevent any potential movement.
By following these steps and exercising caution, you can safely lower a trailer to fit it inside a garage. Remember to carefully assess measurements, gradually lower the trailer, and be mindful of clearances throughout the process. With proper planning and execution, you can successfully maneuver your trailer into the garage and ensure its safe storage.
1. Keep It Clean.
The first step is to keep your trailer clean. This will help to prevent rust from forming. To clean your trailer, simply wash it with soap and water. Be sure to get all of the dirt and grime off. You can also use a pressure washer to clean your trailer.
2. Apply Wax.
After you’ve cleaned your trailer, the next step is to apply wax. This will help to create a barrier between the metal and the elements. To apply wax, simply use a sponge or a cloth. Apply the wax in a circular motion. Be sure to cover the entire trailer.
3. Use a Cover.
Another way to prevent rust is to use a cover. This will keep your trailer protected from the elements. There are many different types of covers available. Be sure to choose one that is made from a durable material.
4. Store It Indoors.
If possible, you should store your trailer indoors. This will keep it protected from the elements. You can store your trailer in a shed or a barn if you don’t have a garage. If you live in an apartment, you can store your trailer in a storage unit.
5. Inspect It Regularly.
It’s important to inspect your trailer regularly. This will help you to spot any rust that may be forming. If you see rust, you can take steps to remove it. To inspect your trailer, simply look it over from top to bottom.
6. Remove Rust ASAP.
If you see rust on your trailer, removing it as soon as possible is important. Rust can spread quickly, so it’s important to take care of it immediately. There are many different ways to remove rust. For example, you can use a wire brush, sandpaper, or a chemical rust remover.
7. Paint It.
After removing the rust, the next step is to paint your trailer. This will help to prevent rust from forming in the future. To paint your trailer, simply choose a paint that is made of metal. Apply the paint in a well-ventilated area. If possible, apply the paint in a garage or a shed.

8. Use Rust Inhibitor.
Another way to prevent rust is to use a rust inhibitor. This is a product that you can apply to your trailer. It will help to prevent rust from forming. There are many different types of rust inhibitors available. Be sure to choose one that is made for trailers.
Tips and Warnings on How to Lower Trailer to Fit in Garage
Tips:
- 1Be sure to check your wheels before you begin.
- Consider removing any cargo from the trailer to make it lighter and easier to lower.
- Inspect your trailer for any damage that could make it unsafe.
- Make sure the area around your trailer is clear of obstacles.
- Have someone else present to help you lower the trailer if possible.
Warnings:
- Do not attempt to lower your trailer without choking the wheels first.
- Never lower your trailer more than is necessary to clear an obstacle.
- Be careful not to damage the trailer or its contents while lowering it.
- Note that lowering a trailer can be dangerous if not carefully done.
- Always follow the manufacturer’s instructions for lowering your particular trailer.

Conclusion
This article has provided information on how to lower trailer to fit in garage. So if you’ve struggled to figure out how to lower your trailer so it will fit in your garage, we’ve got the solution for you. Following these simple steps, you can safely and easily lower your trailer without any heavy lifting or expensive tools. So what are you waiting for? Get started today and have your garage back to yourself in no time.
I am Rick. I grew up helping my dad with his handyman service. I learned a lot from him about how to fix things, and also about how to work hard and take care of business. These days, I’m still into fixing things- only now, I’m doing it for a living.
I’m always looking for new ways to help people grow and develop. That’s why I have created this blog to share all my experience and knowledge so
that I can help people who are interested in DIY repair.