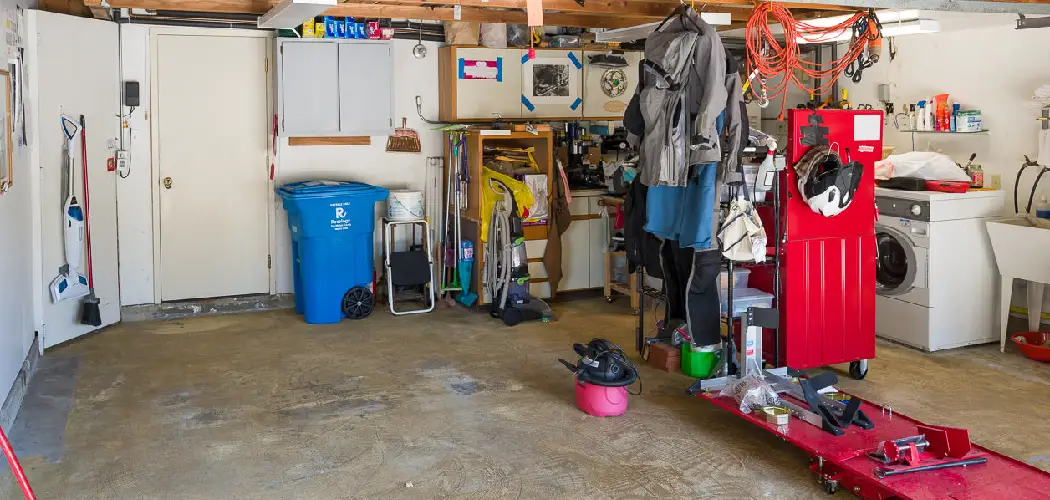
You may not think of your garage as part of your home, but unfinished garage walls can make your whole house look bad. Updating your garage is a great way to add value if you’re planning to sell your home. And if you’re not planning to sell, painting your garage is still a good idea – it will make your space more comfortable and inviting. This article will discuss how to paint unfinished garage walls like a pro. Keep reading.

Garage walls are typically made of concrete, which can be a difficult surface to paint. In addition, if your garage walls are unfinished, they may be covered in dirt, dust, and grime – all of which will need to be removed before you can begin painting. Many people choose to use a pressure washer to clean their garage walls, but if you don’t have one, you can also use a broom and a bucket of soapy water.
Summary: If you have unfinished garage walls and want a fresh look, painting them is a great option! You can transform your garage walls into a clean, polished space with the right tools and techniques. Before you start painting, you’ll need to prepare the walls by cleaning, sanding, and patching any holes or cracks. Choosing the right type of paint for your garage walls is important, such as a semi-gloss or satin finish that is durable enough to withstand moisture and everyday wear and tear.
What Are Unfinished Walls?
Unfinished walls are simply walls that have not been painted or finished. They may be bare concrete, drywall, or some other material. Many people choose to paint unfinished walls to give them a more finished appearance. Painting unfinished walls is a relatively easy process and can be completed in a few hours.
One of the main reasons to paint unfinished garage walls is to protect them from the elements. Rain, snow, and ice can all cause damage to bare concrete or drywall. Paint will help seal these surfaces and keep them looking good for longer.
Another reason to paint unfinished garage walls is to make them more attractive. A blank, unfinished wall can be uninviting and boring. A coat of paint can brighten up the space and make it more welcoming.
Finally, painting unfinished garage walls can help improve the insulation of the space. Bare concrete and drywall are not very effective insulators, but a coat of paint can help trap heat or cold air. This can make your garage more comfortable to use all year round.
What You’ll Need?
- Tape measure
- Level
- Chalk line
- Latex primer
- Paint roller and extension pole
- Oil-based paint
- Paintbrush
A Step by Step Guide on How to Paint Unfinished Garage Walls
Step 1: Choose the Right Paint and Supplies
Before starting the painting process, select the appropriate paint for your garage walls. Generally, a good-quality latex paint is ideal for garage walls due to its durability, ease of application, and quick drying time. Additionally, gather the necessary supplies, such as:
- Paint roller and tray
- Paintbrushes (angled and standard)
- Painter’s tape
- Drop cloths or plastic sheeting
- A ladder or step stool
- Sandpaper (120-grit)
- Joint compound (if needed)
- Primer
Step 2: Prepare the Garage
Remove all items from the walls, including hooks, shelves, and other fixtures, and clear the surrounding area to create a workspace. Cover the floor, outlets, and any other areas you want to protect from paint splatters with drop cloths or plastic sheeting. Make sure your garage is well-ventilated by opening doors and windows or using fans.
Step 3: Inspect and Repair the Walls
Examine the walls for any imperfections, such as holes, cracks, or uneven surfaces. If needed, use joint compound to fill any gaps or repair damaged areas. Apply the compound with a putty knife, smoothing it out evenly, and allow it to dry according to the manufacturer’s instructions. Once dry, use 120-grit sandpaper to sand the repaired areas until they are smooth and flush with the surrounding wall.
Step 4: Clean the Walls
Remove dust, dirt, and debris from the walls using a broom, vacuum, or damp cloth. Be sure to remove cobwebs and pay special attention to corners and crevices. Allow the walls to dry thoroughly before proceeding to the next step.
Step 5: Sand the Walls
Using 120-grit sandpaper, lightly sand the entire surface of the walls to remove any rough spots and create a smooth, even surface for painting. This will help the paint adhere better and result in a more polished finish. After sanding, wipe down the walls with a damp cloth to remove any dust or debris.
Step 6: Apply Painter’s Tape
Apply painter’s tape to the edges of the walls, baseboards, door frames, and window frames to protect them from paint. Be sure to press the tape firmly to create a tight seal and prevent paint from bleeding through.
Step 7: Prime the Walls
Priming the walls before painting is especially important for unfinished garage walls, as it helps seal porous surfaces and provides a base for the paint to adhere to. Apply a coat of primer to the walls using a paint roller, working in small sections and using a brush for detailed areas. Allow the primer to dry according to the manufacturer’s instructions.
Step 8: Paint the Walls
Begin by stirring the paint thoroughly to ensure an even color and consistency. Pour the paint into a paint tray and dip the paint roller into the paint, allowing it to absorb evenly. Start painting the walls using a “W” or “M” pattern, working in small sections to maintain a wet edge and ensure even coverage. Use a paintbrush for detailed areas, such as corners and edges. Apply the first coat of paint to the entire garage and allow it to dry according to the manufacturer’s instructions.
Step 9: Apply Additional Coats
Inspect the walls after the first coat of paint has dried to determine if additional coats are necessary. Typically, at least two coats of paint are required to achieve full coverage and a uniform finish. If needed, apply additional coats, allowing each coat to dry according to the manufacturer’s instructions.
Step 10: Remove Painter’s Tape
Once the final coat of paint is dry, carefully remove the painter’s tape by pulling it at a 45-degree angle away from the wall. Step 11: Clean Up and Dispose of Supplies
Properly clean and store brushes, rollers, and other painting tools for future use. Dispose of empty paint cans, used painter’s tape, and other debris according to local regulations. Be sure to clean any paint spills or splatters promptly to prevent staining.
Step 12: Reinstall Fixtures and Furnishings
Once the paint is fully dry and the area is clean, reinstall any hooks, shelves, or other fixtures you removed from the walls before painting. Return any furniture or items that were moved or stored during the painting process, ensuring they are positioned safely and securely.
Step 13: Ventilate the Garage
Allow the garage to remain well-ventilated for several days after painting to ensure the paint fumes dissipate completely. Keep doors and windows open or use fans to circulate air and speed up the drying process.
Step 14: Inspect the Finished Walls
Take a final look at the newly painted garage walls to ensure the paint coverage is even and consistent. Touch up any areas where the paint appears thin or uneven, if necessary.
Step 15: Perform Regular Maintenance
To maintain the appearance and longevity of your painted garage walls, perform regular maintenance, such as cleaning and dusting. This will help prevent dirt and debris from accumulating and keep your garage looking fresh and well-kept.
By following these steps, you can successfully paint unfinished garage walls, resulting in a polished and durable finish. Proper preparation, attention to detail, and patience during the painting process will ensure a high-quality result that enhances the appearance and functionality of your garage space.
Tips
- Make sure the surface is clean and free of debris before painting.
- If you are using a primer, be sure to use one specifically designed for garage walls.
- Use a roller or brush to apply the paint, and make sure to get into all the nooks and crannies.
- Paint in thin coats, allowing each to dry completely before applying the next.
- Be careful not to drip paint on your car or other surfaces in the garage.
When painting unfinished garage walls, it’s important to take your time and do the job right.
What Is the Best Paint for Garage Walls and Ceilings?
If you’re like most people, your garage is probably unfinished. The walls and ceiling are probably bare concrete or drywall. And that’s fine! But if you want to spruce up your space a little bit, or if you’re planning to use your garage for more than just storage, you’ll need to paint the walls and ceiling.
Here’s a quick guide to help you choose the best type of paint for your garage walls and ceilings.
Regular Latex Paint:
This is the most common type of paint, and it can be used on both walls and ceilings. It’s easy to apply and clean.
Water-Based Epoxy Paint:
This type of paint is best for concrete or metal surfaces. It’s durable and long-lasting, and it doesn’t require much maintenance.
Oil-Based Epoxy Paint:
This type of paint is also best for concrete or metal surfaces, but it’s even more durable than water-based epoxy paint. It was also more expensive.
Consult a professional painting contractor if you’re not sure which type of paint is best for your garage. They’ll be able to help you choose the right paint and give you some tips on how to apply it correctly.
Conclusion
Now that you know how to paint unfinished garage walls, it’s time to get started on your project! We hope you found this guide helpful. Please share with your friends and family who may be looking to do a similar project if you did.
You May Also Read: How to Fix Garage Door Wheel Off Track
I am Rick. I grew up helping my dad with his handyman service. I learned a lot from him about how to fix things, and also about how to work hard and take care of business. These days, I’m still into fixing things- only now, I’m doing it for a living.
I’m always looking for new ways to help people grow and develop. That’s why I have created this blog to share all my experience and knowledge so
that I can help people who are interested in DIY repair.