
If you’re looking to add a floor drain to your garage, there are a few things you’ll need to consider. This is a relatively easy task that can be completed in a few hours. Here are the steps you need to take to install a floor drain in your garage.
In this blog post, we’ll go over how to install a floor drain in an existing garage, including what supplies you’ll need and how to position the drain properly. You can rest assured that your new floor drain will be installed correctly and efficiently by following these steps. Read on for more information!
Different Types of Floor Drains in Existing Garage:
1. Cast Iron Floor Drain with Round or Square Top:
This type of floor drain is usually the most common and can be found in both new and existing garages. It features a round or square top with a cast iron body. The grate at the top can be removed for easy cleaning.
2. Cast Iron Floor Drain with Trap:
This floor drain also has a cast iron body, but it features a built-in trap to prevent sewer gases from entering the garage. The trap must be filled with water at all times to work properly.
3. PVC Floor Drain with Trap:
PVC floor drains with traps are commonly used in residential applications such as laundry rooms, utility rooms, and garages. These floor drains are easy to install and can be found at most hardware stores.
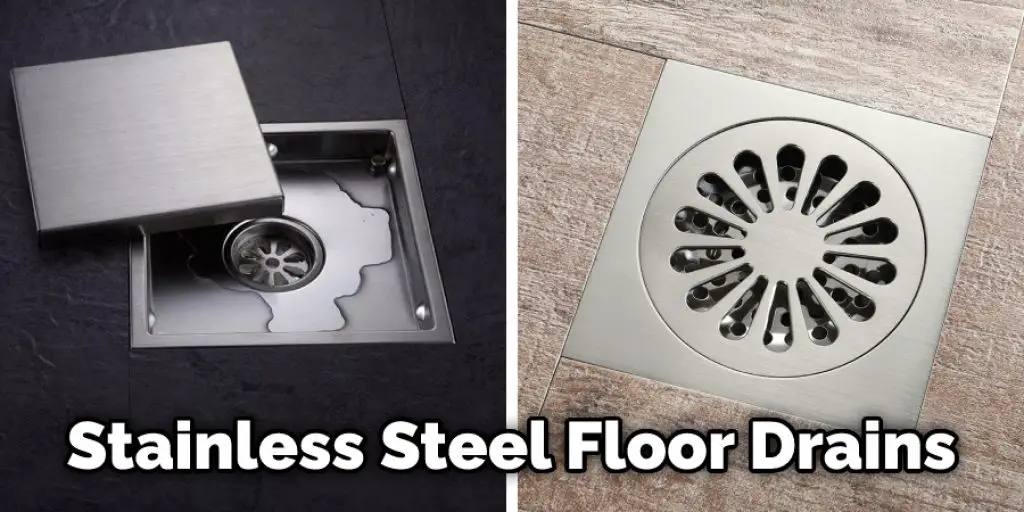
4. Stainless Steel Floor Drain:
Stainless steel floor drains are more durable than PVC drains and are often used in commercial applications. However, they are also more expensive. If you are looking for a long-lasting floor drain, a stainless steel model may be the best option.
5. Rubbermaid Floor Drain:
This is a great product for those who want to install a floor drain in their garage but don’t want to go through the hassle of concrete work. The product comes with everything you need for installation, and it’s extremely easy to use. Attach the flange to the drainpipe, seal the joint with silicone, and then set the drain in place.
6. Linear Shower Drain:
A linear shower drain is a type of floor drain installed in a straight line. This type of drain is often used in showers with stone or ceramic tile floors. Linear shower drains are available in various materials, including stainless steel, PVC, and cast iron.
7. Trench Garage Floor Drains:
A trench drain is a great option if you have a lot of water or debris on your garage floor. They are installed in a trench on the floor and can be either covered or open. The most important thing to consider when choosing a trench drain is the size of the opening. Also, make sure to choose one that will be able to catch all the water and debris that comes into your garage.
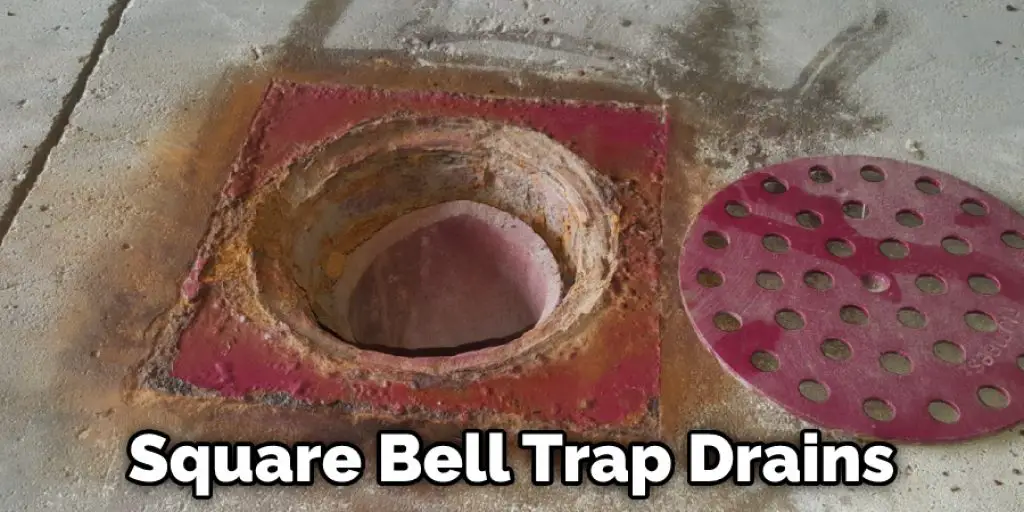
8. Square Bell Trap Drains:
There are square bell trap drains that can be installed in an existing garage. The installation procedure is similar to installing a floor drain in a new garage, with a few exceptions. First, the square bell trap drain must be glued to the garage floor using a waterproof adhesive.
Second, the drain pipe leading from the square bell trap drain must be attached to the main sewer line using a coupling. Finally, once the square bell trap drain is installed, it is important to test it periodically to ensure that it is functioning properly.
Choosing the Appropriate Floor Drain:
There are a few factors you need to consider when selecting a floor drain for your garage:
1. Drain location:
It would help if you determined where the drain would be located in your garage. The most common location is in the center of the garage, but you may also choose to put it near a wall or in another area.
2. Size and Shape:
Floor drains come in various sizes and shapes, so you need to choose one that will fit the dimensions of your garage. If you’re not sure what size or shape to get, ask a salesperson at the store or measure the drain opening in your garage.
3. Materials:
You’ll need a few materials to install a floor drain in your garage, including a drain grate, a PVC pipe, and a drain catch basin. You may also need some silicone caulk and concrete sealer, depending on the state of your garage floor.
4. The Drain System:
Most floor drains rely on a gravity-based drainage system. The water will flow down the drain pipe and into the sewer or septic tank. However, some floor drains have a pump system that helps move the water away from the garage. If you’re not sure which type of drain you need, ask a salesperson at the store.
5. Building Regulations:
When installing a floor drain in an existing garage, certain building regulations must be adhered to. The most important is ensuring that the drain is installed at least 2 feet below the garage floor. This is to ensure that any water that does enter the garage will be able to flow freely out and away from the structure.
6. Capacity:
The capacity of a floor drain is important to consider, especially if your garage is used for storage or other activities that could produce a lot of water. Floor drains come in different capacities, so be sure to choose one that is large enough to handle the amount of water you expect to generate.
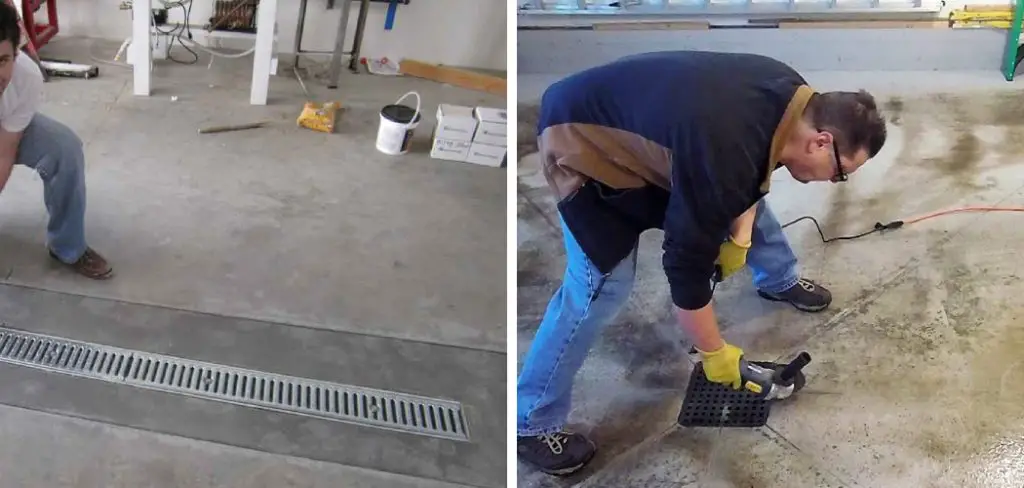
Step-by-Step Guide: How to Install a Floor Drain in an Existing Garage
Step 1: Clear the Area Around the Drain Opening.
Clear all the debris from around the drain opening using a shovel or rake. This will give you a clear area to work in and help prevent any accidents. It would help if you also made sure that there were no obstructions or blockages in the drain pipe leading to the main sewer line. You may need to use a plumbing snake to clear out any clogs.
Step 2: Cut a Circle Around the Drain Opening.
Now that the hole is cut, you will need to cut a circle around the drain opening. This can be done with a jigsaw or a hole saw. The size of the circle will depend on the size of your drain. Make sure to make the hole as round as possible to ensure a tight fit for the drain. Otherwise, water may leak out of the sides.
Step 3: Remove the Old Drain.
Remove the old drain by unscrewing it from the floor. If the old drain is welded in place, you will need to use a chisel and hammer to break it free. Again, be careful not to damage the surrounding concrete. You may also need to remove any old concrete or debris from the drain hole. It is important to have a clean surface for the new drain to sit on.
Step 4: Take a Measurement.

Using a tape measure, measure the drain opening. This will help you determine what floor drain size you need to buy. You can also measure the depth of the drain hole to ensure that you purchase a drain that is deep enough.
Step 5: Purchase a New Drain.
Now that you have taken a measurement, it is time to purchase your new floor drain. First, make sure to get the same size as your old one. Floor drains come in various shapes and sizes, so make sure to get the right one for your needs. There are also many different materials that floor drains are made out of. Choose the one that best suits your needs and your budget.
Step 6: Remove the Concrete Slap.
Locate the floor drain in the garage. The floor drain should be located near the door that leads into the house. Use a chisel and hammer to remove the concrete around the floor drain. Be very careful not to damage the floor drain itself.
Step 7: Install the Floor Drain.
Once the concrete has been removed, it’s time to install the new floor drain. Start by applying a generous amount of plumber’s putty around the base of the drain. Next, place the drain into the hole and tighten the bolts that hold it in place. Finally, more plumber’s putty should be applied around the edges of the drain to create a seal.
Step 8: Test the Drain.
Once the drain is installed, it’s time to test it out. Please turn on the water and let it run for a few minutes. Check for any leaks around the edges of the drain. If there are no leaks, your new floor drain is installed and ready to use.

Following these steps will help you successfully install a floor drain in your existing garage. Remember to always follow safety precautions and consult with a professional if needed. A properly installed floor drain can protect your garage from water damage and keep it clean and dry for years to come.
Additional Tips and Advice:
Here, we have given some tips on how to install a floor drain in an existing garage.
1. Always use a floor drain when draining water from your garage.
2. If you have an existing floor drain, make sure it is clean and clear of debris before using it.
3. If you do not have a floor drain, you can install one yourself. Follow these steps:
4. Find the lowest point on your garage floor and mark it with a chalk line.
5. Drill a hole at the marked spot and insert the flange of the floor drain.
6. Using a level, make sure the flange is properly aligned before tightening the screws.
7. Connect the drainpipe to the floor drain and extend it out of the garage.
8. Make sure the drainpipe is properly secured before using it.
Should You Hire a Professional to Install a Garage Floor Drain?
Installing a floor drain in your garage is not difficult, but it requires some knowledge and planning. If you are not familiar with plumbing or concrete work, it is best to hire a professional to do it. However, if you are comfortable with basic plumbing and construction skills, you can easily install a floor drain yourself.
The first step in installing a garage floor drain is to identify the location of the drain. The drain should be located in a low spot in the garage where water will collect. Once you have found the perfect location for the drain, you will need to mark the area around it, so you know where to cut the hole for the drain.
Use a hammer and chisel to create a big enough hole for the floor drain. The hole size will depend on the size of the floor drain you are using. Once the hole is cut, place the floor drain in the hole and secure it in place with concrete screws.
How Do You Install a Drain in an Existing Concrete Floor?
If you have a concrete floor in your garage that doesn’t have a drain, you may wonder how to install one. Drains are essential for garages because they allow water and other liquids to flow away from the area, preventing pooled water and potential flooding. Plus, having a drain in your garage will make it much easier to clean up any spills or messes.
If you’re ready to install a drain in your garage, here are the steps you need to take:
1. Locate the spot where you want to install the drain. The best place for a floor drain is usually in the middle of the garage, near the door that leads into your house. This will allow any water or liquids to flow away from the door and into the drain.
2. Mark the spot where the drain will go with a pencil or pen.
3. Use a hammer and chisel to make a small hole in the concrete at the marked spot. The hole should be big enough to fit the drain’s catch basin.
4. Place the catch basin into the hole and secure it with concrete screws.
5. Attach the drain pipe to the catch basin and ensure it is properly secured.
6. Cover the drainpipe with gravel or rocks to prevent any debris from clogging it up.
7. Flush the drain with water to ensure that it is working properly.
If you have any questions or concerns about how to install a floor drain in an existing garage, be sure to consult a professional before starting the installation process.
Frequently Asked Questions:
Q: How Often Should I Clean My Garage Floor Drain?
A: It is recommended to clean your garage floor drain at least once a year or more frequently if you notice any clogs or buildup. You can use a combination of hot water and vinegar or a commercial drain cleaner to clear any blockages. It’s also a good idea to inspect your drain periodically for any signs of wear and tear.
Q: Can I Install a Floor Drain Myself?
A: Yes, you can install a floor drain yourself if you have the proper tools and knowledge. However, if you are not familiar with plumbing or concrete work, it is best to hire a professional for the job. This will ensure that the floor drain is installed correctly and functions properly. You can also consult with a professional before starting the installation process to ensure you have all the necessary materials and knowledge.
Q: Are There Different Types of Floor Drains?
A: Yes, there are different types of floor drain systems available in the market. Some have removable grates, while others have fixed grates or no grates at all. There are also different sizes and materials to choose from, depending on your specific needs and preferences. Be sure to research and choose a floor drain that best suits your garage’s layout and purpose.
Q: What Should I Do If My Floor Drain is Leaking?
A: If your floor drain is leaking, it could be due to a loose connection or damaged seal. First, try tightening any connections and see if that solves the issue. If not, you may need to replace the seal around the drain or even the entire drain itself if it is damaged. It’s always best to consult with a professional plumber if you’re unsure about how to fix a leaking floor drain.
Q: Do I Need to Maintain My Floor Drain?
A: Yes, regular maintenance is essential for keeping your floor drain functioning properly. This includes cleaning it regularly and inspecting it for any signs of wear and tear. It’s also a good idea to flush the drain with water every so often to prevent any potential clogs from forming. Additionally, be sure to address any leaks or damages promptly to avoid bigger issues in the future.
Final Words:
Installation of a floor drain in an existing garage is not as difficult as one might think. It can be a relatively easy project that can be completed in just a few hours with the right tools and basic knowledge. First, measure the area where you want to install the drain and cut the hole using a jigsaw or circular saw. The hole should be slightly larger than the diameter of the drain to fit snugly into place.
Installing a floor drain in your garage is a great way to protect your investment and clean your space. If you’re thinking of installing one in your garage, be sure to follow the steps we’ve outlined on how to install a floor drain in an existing garage so that the job goes smoothly. Have any questions about the process? Leave them in the comments section below, and we’ll do our best to answer them.
You Can Check It Out To Keep Water Out of Garage
You Can Check It Out To Adjust Craftsman Garage Door Opener
I am Rick. I grew up helping my dad with his handyman service. I learned a lot from him about how to fix things, and also about how to work hard and take care of business. These days, I’m still into fixing things- only now, I’m doing it for a living.
I’m always looking for new ways to help people grow and develop. That’s why I have created this blog to share all my experience and knowledge so
that I can help people who are interested in DIY repair.