
If you’re like most people, then you probably don’t overthink about your garage door opener. However, if you have a Craftsman model, there may come a time when you need to make some adjustments. This article will show you how to adjust craftsman garage door opener. So whether your opener is having trouble opening or closing the door, or it’s just not working as smoothly as it used to, read on for tips on getting it up and running like new again.
A garage door opener is an essential part of our daily life. It helps us to open and close the door without any problem. But sometimes, it happens that the opener gets jammed or does not work correctly. In such cases, we need to adjust it according to our needs. Unfortunately, many people do not know how to adjust, so they face many problems.
Summary: To adjust a Craftsman garage door opener, you should start by checking the alignment of the sensors and adjusting them if necessary. Then, you can adjust the force settings to ensure the door opens and closes smoothly without excess strain on the motor. Finally, you can adjust the travel settings to ensure the door opens and closes completely and doesn’t make excessive noise.
Tools and Materials
- Adjustable wrench
- Ladder
- Pliers
- Screwdriver
- Socket wrench set
- Tape measure
A Stepwise Guide on How to Adjust Craftsman Garage Door Opener
Step 1: Gather Necessary Tools and Supplies
Before you begin adjusting your Craftsman garage door opener, make sure you have the following tools and supplies:
- Flathead screwdriver
- Stepladder or sturdy platform
- Craftsman garage door opener manual (for reference)
- Safety goggles
Step 2: Close the Garage Door
Ensure the garage door is fully closed before making any adjustments. This will provide a stable starting point for making adjustments and reduce the risk of injury or damage.
Step 3: Disconnect Power to the Garage Door Opener
For safety reasons, disconnect the power to the garage door opener before making any adjustments. Unplug the opener from the electrical outlet or, if hardwired, switch off the circuit breaker that supplies power to the opener.
Step 4: Locate the Adjustment Controls
Climb the stepladder or platform to access the Craftsman garage door opener. Locate the adjustment controls, which are typically found on the back or side of the unit. There are two main types of adjustments: travel limits and force adjustments. Refer to your garage door opener manual if you are having difficulty locating the controls.
Step 5: Adjust the Travel Limits
The travel limits control the distance the garage door travels when opening and closing. If the door does not fully open or close, or if it reverses direction before reaching the desired position, you may need to adjust the travel limits.
- Locate the “Up” and “Down” travel limit adjustment screws on the garage door opener.
- Using a flathead screwdriver, turn the appropriate screw in small increments (usually 1/4 turn at a time). Turning the screw clockwise will increase the travel distance, while turning it counterclockwise will decrease the travel distance.
- Reconnect power to the garage door opener and test the door’s operation. If the door still does not open or close properly, repeat the adjustment process until the desired travel distance is achieved.
- Once the door is operating correctly, disconnect the power again before proceeding to the next step.
Step 6: Adjust the Force Settings
The force settings control the amount of force the garage door opener applies when opening and closing the door. If the door struggles to open or close, or if it reverses direction due to excessive resistance, you may need to adjust the force settings.
- Locate the “Open Force” and “Close Force” adjustment screws on the garage door opener.
- Using a flathead screwdriver, turn the appropriate screw in small increments (usually 1/8 turn at a time) to increase or decrease the force. Turning the screw clockwise will increase the force, while turning it counterclockwise will decrease the force.
- Reconnect power to the garage door opener and test the door’s operation. If the door still struggles to open or close, or if it reverses direction, repeat the adjustment process until the desired force level is achieved.
- Once the door is operating correctly, disconnect the power again before proceeding to the next step.
Step 7: Test the Safety Reversal System
After adjusting the travel limits and force settings, it’s essential to test the safety reversal system to ensure it’s functioning correctly.
- Reconnect power to the garage door opener.
- Place an object, such as a 2×4 board or a roll of paper towels, on the ground in the path of the closing door.
- Operate the garage door opener to close the door. When the door contacts the object, it should automatically reverse direction and open again.
- If the door does not reverse as expected, refer to your garage door opener manual for instructions on adjusting the safety reversal system or contact a professional garage door technician for assistance.
Step 8: Reconnect Power and Perform Final Testing
Once you have completed all adjustments and tested the safety reversal system, reconnect power to the garage door opener. Perform several tests of the garage door’s opening and closing operation to ensure everything is functioning correctly and smoothly.
Step 9: Adjust the Remote Control Range (Optional)
If you are experiencing issues with the range of your remote control, you may need to adjust the antenna on the garage door opener. Locate the antenna wire, which is typically a single-strand wire hanging from the unit. Ensure that the wire is hanging straight down and not touching any metal components, as this can interfere with the signal. If necessary, reposition the wire to improve the remote control’s range.
Step 10: Maintain Proper Balance and Alignment of the Garage Door
Regularly inspect the garage door for proper balance and alignment. An unbalanced or misaligned door can cause the opener to work harder and wear out more quickly. To check the door’s balance, disconnect the opener by pulling the emergency release cord and manually lift the door halfway. If the door remains in place, it is properly balanced. If it falls or rises on its own, contact a professional garage door technician for assistance.
Step 11: Perform Regular Maintenance
To keep your Craftsman garage door opener operating smoothly and efficiently, perform regular maintenance on the opener and other garage door components. This includes lubricating moving parts, such as rollers, hinges, and tracks, as well as tightening any loose bolts or screws. Check the garage door opener manual for specific maintenance recommendations.
Step 12: Consult a Professional for Assistance
If you encounter difficulties adjusting your Craftsman garage door opener or if you suspect the opener or garage door requires repair, consider consulting a professional garage door technician. They can provide expert advice, perform necessary repairs, and ensure that your garage door opener is functioning safely and efficiently.
By following these steps, you can successfully adjust your Craftsman garage door opener to improve its performance and ensure the safe operation of your garage door. Regular maintenance and adjustments can help extend the life of your garage door opener and prevent potential damage or safety hazards.
Tips
- Firstly, check the door for any blockages or obstructions.
- Secondly, make sure that the opener is correctly plugged into an outlet and that there is power running.
- Thirdly, ensure that the safety sensors are unobstructed and aligned correctly. These are usually located at the bottom of the garage door opening.
- Fourthly, if the garage door opener still does not work after following these tips, you may need to replace the batteries in the remote control.
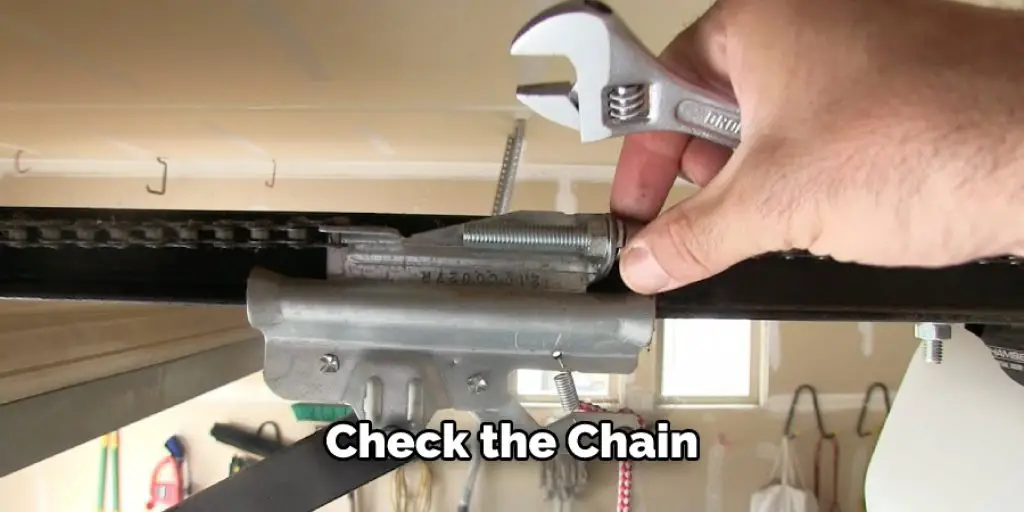
- Fifthly, if you have a chain drive opener, you may need to adjust the tension on the chain. This can be done by loosening or tightening the screws on the motor unit.
- Lastly, if you have any other questions or concerns, please consult the Craftsman Garage Door Opener Owner’s Manual.
How Do You Set the Limit on a Craftsman 1/2 Hp Garage Door Opener?
If you have a Craftsman 1/2 HP garage door opener, you may need to adjust the limit on occasion. The limit is what tells the opener when to stop running. If it is set too low, the door will not close all the way. If it is set too high, the door may close too quickly and could come down on someone or something. You can easily adjust the limit yourself following these steps:
1. Locate the two square-headed bolts that hold the motor unit to the garage ceiling. These are usually located near the back of the unit.
2. Loosen the bolts with a wrench or socket set, but do not remove them altogether.
3. Find the white plastic limit switch lever. This is located on the side of the motor unit, near where the garage door opener chain connects to it.
4. Pivot the limit switch lever until the garage door moves the correct distance. For example, if the door is not closing, pivot the lever towards the “CLOSE” mark. If the door closes too quickly, pivot the lever towards the “OPEN” mark.
5. Once you have adjusted the limit switch lever, tighten the two square-headed bolts to hold it in place.
It is always a good idea to test your garage door opener after making any adjustments to ensure it is working correctly and safely.
Why Does My Garage Door Close Then Open?
If you have a Craftsman garage door opener and you’ve noticed that it’s been closing and then immediately opening back up, a few things could be causing this. It could be an issue with the sensors, the remote, or the chain. Let’s take a look at each of these possibilities so you can try to fix the problem yourself.
The first thing to check is the sensors. The sensors tell the opener when something is in the way of the door, and it needs to stop. If they’re not working correctly, the opener will think that something is in the way even when there isn’t, and it will try to close but then open back up again. To test the sensors, put something in the way of the door (like a box) and then try to close it. If the door doesn’t close, the sensors are working, and you can move on to the next step.
The second thing to check is the remote. The batteries in the remote may be dying, and that’s why the opener isn’t responding correctly. Try replacing the batteries, and then see if that fixes the problem.
The last thing to check is the chain. If the chain is loose, then it could be causing the opener to malfunction. To fix this, you’ll need to tighten the chain.
Conclusion
Craftsman garage door openers are a popular choice for many homeowners. However, sometimes the settings on these openers can be tricky to adjust. In this article, we walked through the process of how to adjust craftsman garage door opener so that it functions properly for your home.
I am Rick. I grew up helping my dad with his handyman service. I learned a lot from him about how to fix things, and also about how to work hard and take care of business. These days, I’m still into fixing things- only now, I’m doing it for a living.
I’m always looking for new ways to help people grow and develop. That’s why I have created this blog to share all my experience and knowledge so
that I can help people who are interested in DIY repair.