There’s so much to think about when you go deer hunting. You have to pick the right weapon, aim for the perfect spot, and be aware of your surroundings. But what do you do when you successfully kill a deer? How do you hang it up in your garage? Don’t worry. We’ve got you covered. In this post, we’ll teach you how to hang a deer in garage. It’s not as hard as it seems, but there are a few things you need to keep in mind. So read on and learn how to become a pro at deer hanging!
Hanging a deer in your garage is simpler than you might think. In fact, all you need is a few basic tools and supplies. Many people like to use a hoist or scale to weigh the deer, but this is unnecessary. Instead, you can use ropes and pulleys to hang the deer from its antlers if you have a sturdy tree nearby.
Summary: To hang a deer in the garage, you will need a sturdy rope or hoist, a gambrel, and a clean, flat surface. First, attach the gambrel to the deer’s hind legs and hoist the animal up to a comfortable height. Always use the rope to secure the deer to a ceiling beam or other overhead support.
A Stepwise Guide on How to Hang a Deer in Garage
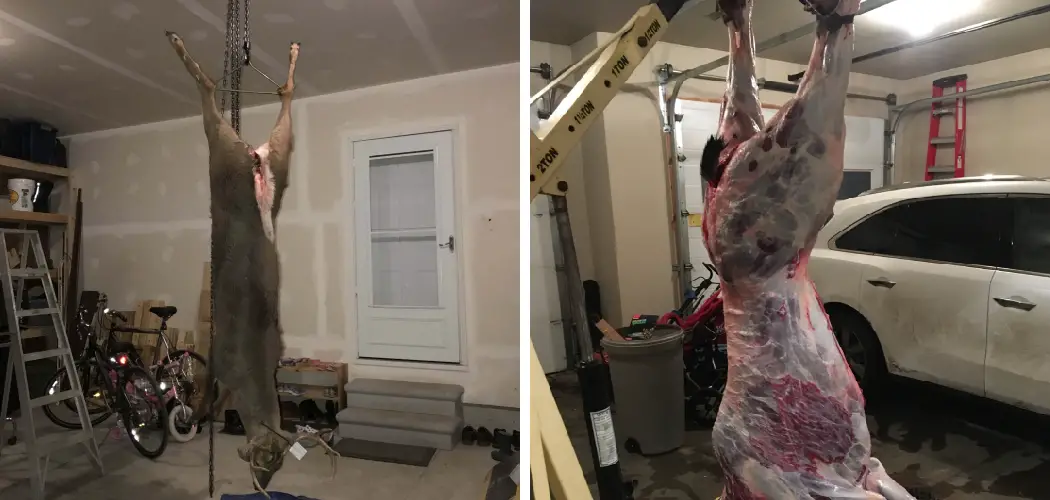
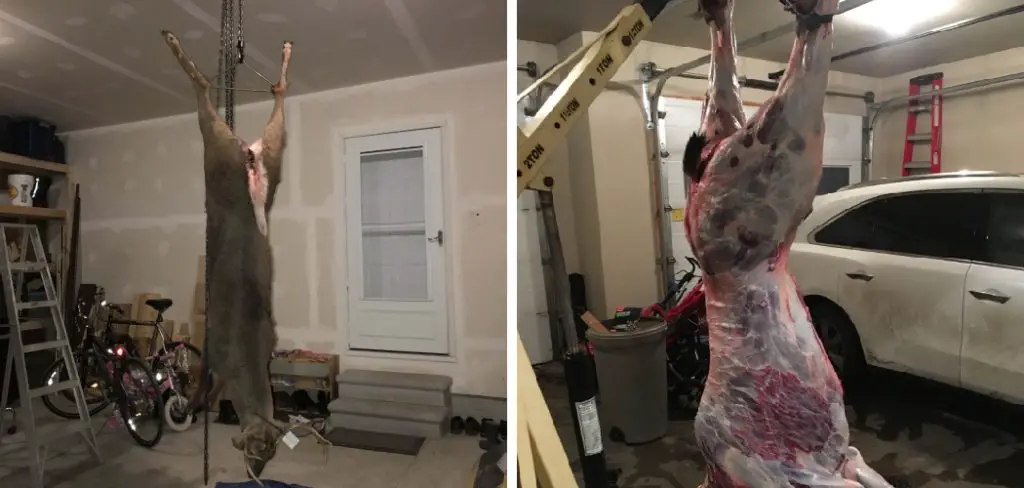
Hanging a deer in your garage is a common practice for hunters who want to field dress and process their game. Properly hanging the deer ensures easy access and allows for efficient processing. In this guide, we will walk you through the steps to hang a deer in your garage.
Step 1: Prepare the Work Area
Before hanging the deer, clear the area in your garage where you plan to work. Remove any obstacles or clutter to create a clean and spacious workspace. Ensure there is enough overhead clearance to hang the deer without any obstructions.
Step 2: Gather the Necessary Equipment
To hang a deer in your garage, you will need a few essential tools and equipment. These include a gambrel, a strong rope or chain, a sturdy hook or pulley system, a ladder or step stool, a sharp knife, and gloves for safety and handling.
Step 3: Install the Gambrel
A gambrel is a device used to hang and support the deer by its hind legs. Locate a suitable area on the ceiling or overhead structure of your garage to install the gambrel. It should be strong enough to support the weight of the deer. Attach the gambrel securely using bolts, screws, or other appropriate fasteners, ensuring it is stable and can hold the weight.
Step 4: Prepare the Deer
Before hanging the deer, you need to field dress it. Use a sharp knife to make a small incision in the deer’s abdomen, carefully avoiding puncturing any internal organs. Begin to gut the deer by removing its entrails. This process should be done outdoors or in a designated area to minimize mess and ensure proper disposal.
Step 5: Attach the Rope or Chain to the Deer
With the deer properly field dressed, attach a strong rope or chain to the gambrel. Make sure the attachment is secure and can support the weight of the deer. Double-check the knot or fastening mechanism to ensure it will hold during the hanging process.
Step 6: Lift the Deer
Using a ladder or step stool, lift the deer by the hind legs and guide them onto the gambrel. Make sure the deer is centered and balanced on the gambrel to prevent it from tipping or falling. Take extra caution to avoid injury while lifting the deer, as they can be heavy.
Step 7: Adjust the Height and Position
Once the deer is hanging securely, adjust the height and position to a comfortable working level. Ensure that the deer is at a height where you can easily reach all parts for processing. Adjust the rope or chain as needed to achieve the desired position.
Step 8: Secure the Hanging System
Check the stability and security of the hanging system. Make sure the rope or chain is not slipping or loosening. Verify that the gambrel and attachment points are firmly in place. It’s essential to ensure the deer is stable and won’t fall during processing.
Step 9: Begin Processing
With the deer properly hung, you can now begin the processing tasks, such as skinning, quartering, and deboning. Use a sharp knife and follow proper techniques to avoid accidents. Work methodically and safely, keeping the workspace clean and organized.
Step 10: Clean Up and Dispose of Waste
As you process the deer, keep the area clean and dispose of waste appropriately. Have bags or containers ready for collecting unwanted parts, such as entrails, bones, and other scraps. Dispose of these items according to local regulations or guidelines.
Step 11: Maintain Hygiene and Safety
Throughout the hanging and processing process, it is crucial to maintain good hygiene and safety practices. Wear gloves and protective clothing to minimize contact with blood and other contaminants. Wash your hands regularly and clean the work area to prevent the spread of bacteria or disease.
Step 12: Disassemble and Clean Up
Once you have finished processing the deer, it’s time to disassemble the hanging system and clean up the work area. Carefully lower the deer from the gambrel, ensuring that it is done safely and without any damage. Remove the rope or chain and store them appropriately for future use.
Step 13: Clean and Sanitize
Thoroughly clean and sanitize the work area after processing the deer. Dispose of any remaining waste, sweep the floor, and wipe down surfaces to remove any blood, dirt, or debris. Use a suitable cleaning agent or disinfectant to ensure a hygienic workspace.
Step 14: Properly Store the Meat
After processing, it’s important to store the deer meat properly. Package the meat into suitable containers or vacuum-sealed bags. Label and date the packages for easy identification. Store the meat in a cool environment, such as a refrigerator or freezer, to maintain its freshness and quality.
Step 15: Dispose of Waste Responsibly
Dispose of any remaining waste, such as bones, scraps, or unwanted parts, in accordance with local regulations. You can contact local authorities or waste management facilities for guidance on proper disposal methods.
Step 16: Clean and Maintain Equipment
Clean and inspect your equipment, such as the gambrel, ropes or chains, and knives, after use. Remove any debris or residue and ensure they are stored in a clean and dry location. Regularly check and maintain the equipment to ensure its functionality and longevity.
Step 17: Consider Safety and Legal Requirements
When hanging a deer in your garage, it’s important to consider safety and legal requirements. Ensure that you comply with local laws and regulations regarding hunting, processing, and hanging game animals. Adhere to safety guidelines to prevent accidents and injuries during the process.
Step 18: Seek Professional Assistance if Needed
If you are unsure about any aspect of hanging or processing a deer in your garage, or if you encounter challenges or difficulties, it’s always a good idea to seek professional assistance. Contact experienced hunters, meat processors, or local hunting associations for guidance and support.
By following these steps, you can successfully hang a deer in your garage for field dressing and processing. Remember to prioritize safety, hygiene, and proper disposal throughout the process. With practice and experience, you can efficiently process your harvested game while ensuring the quality and freshness of the meat.
Tips and Tricks
- Make sure you have a sturdy beam or rafter to hang the deer from.
- Try to avoid areas near the garage entrance, as they will be in the way and potentially cause traffic problems.
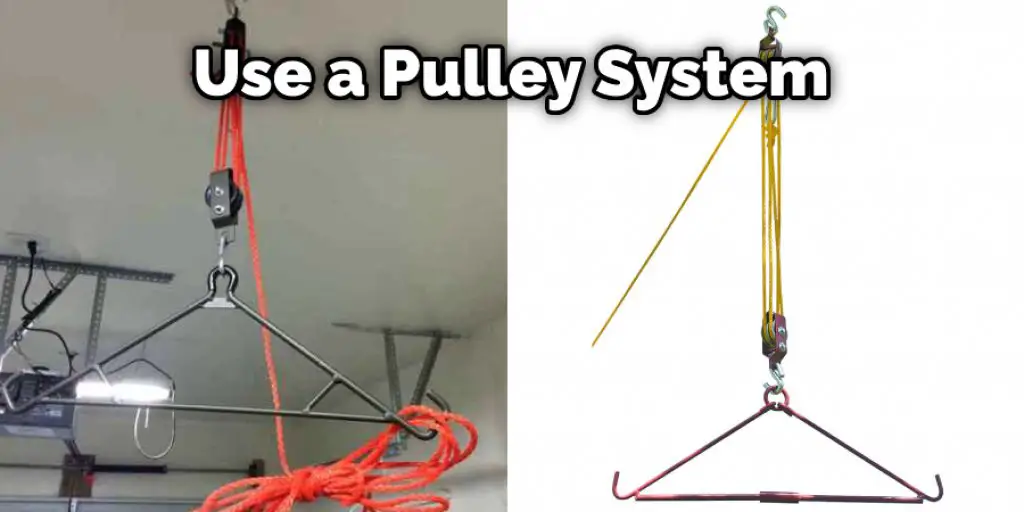
- Use a pulley system or hoist to make the process easier.
- Dress the deer properly before hanging it, using an appropriate method for skinning and butchering.
- Hang the deer by the neck, ensuring that it is straight and facing down.
- If you are not comfortable with butchering or skinning the deer yourself, find a professional who can do this.
- Properly dispose of the remains once you have finished butchering.
What Is the Best Temperature to Hang a Deer?
The best temperature to hang a deer for butchering is between 34 and 40 degrees Fahrenheit. This allows the muscles to relax, making the meat more tender, and preventing the growth of bacteria that can cause food poisoning. However, if the temperature is too cold, the meat will become freezer burned.
In addition, if the temperature is too warm, the meat will spoil more quickly. It is important to carefully monitor the temperature when hanging a deer for these reasons. Most hunters prefer to hang their deer in a cool, dark place, such as a garage or basement. You can ensure that your deer is properly hung and safe to eat by taking these precautions.
How Do You Hang a Deer Hanger?
Depending on the size of the deer hanger, you will need either one or two people to help with this project. Start by finding a large tree branch that is big enough to hold the deer hanger. If you are using a ladder, ensure that it is securely placed before climbing up.

Once you are in position, take the deer hanger and place it over the branch. If you are using two people, have one person hold the hanger in place while the other secures it with rope or twine. Once the deer hanger is secure, you can add your decorations. These can include anything from ribbons and garlands to lights and bows. When finished, step back and enjoy your handiwork!
Conclusion
So there you have it – everything you need to know about how to hang a deer in garage. You can quickly and easily get your deer carcass ready for butchering or processing by following these simple steps. If you have any questions or feedback, let us know in the comments section below. Thanks for reading!
You May Also Read: How to Install a Floor Drain in an Existing Garage
I am Rick. I grew up helping my dad with his handyman service. I learned a lot from him about how to fix things, and also about how to work hard and take care of business. These days, I’m still into fixing things- only now, I’m doing it for a living.
I’m always looking for new ways to help people grow and develop. That’s why I have created this blog to share all my experience and knowledge so
that I can help people who are interested in DIY repair.