
Do you want to reclaim some space in your garage and get organized? Hanging up a bicycle can be an effective way to achieve both of these goals. Not only does it free up floor space, but it also ensures that your prized possession is kept securely out of harm’s way.

Although the task may seem intimidating at first, with a few simple steps you can learn how to hang a bicycle in your garage quickly, easily and safely. So if you’re ready to take back control of your storage area and keep bikes off the ground then read on how to hang a bicycle in garage- we’ll show you all the tips and tricks for mounting a bike on the wall just like a pro!
Things to Consider Before Hanging Your Bike
The Type of Wall You Will Be Using to Hang the Bike:
Whether it’s concrete, wood or drywall, make sure the surface is strong enough to support the weight of your bicycle.
The Location:
Choose a spot that is easily accessible and won’t interfere with other items in your garage.
The Height:
Consider how high or low you want your bike to be placed on the wall. Keep in mind that it should be high enough to clear any obstructions but low enough for you to reach comfortably.
The Weight of Your Bicycle:
Different types of bikes have different weights, so make sure the wall mount or hook you choose can support the weight of your specific bike.
Necessary Tools and Materials
Before you begin, make sure you have the following tools and materials at hand:
- Drill
- Stud Finder
- Wall Anchors (if Necessary)
- Screwdriver or Drill Bit
- Adjustable Wrench
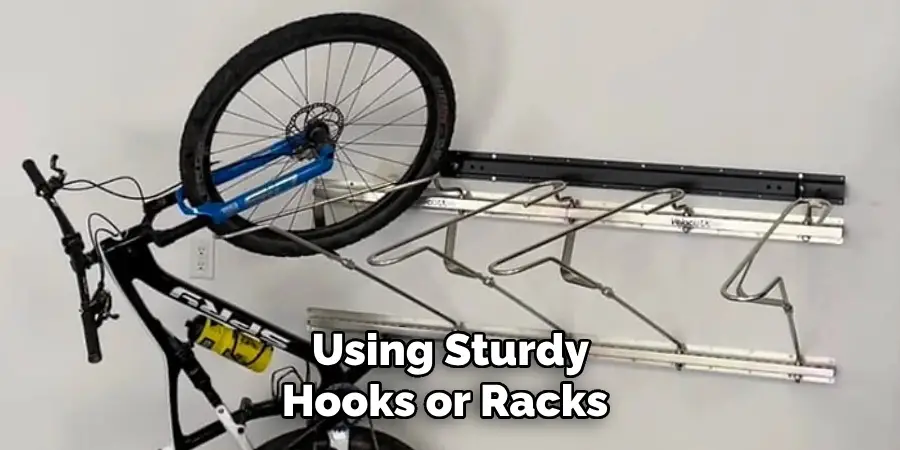
- Bike Storage Hooks or Racks
11 Step-by-step Guidelines on How to Hang a Bicycle in Garage
Step 1: Choose the Location
The first step in hanging a bicycle in your garage is to choose the location where you want to mount it. This should be a spot that is easily accessible and out of the way.
You also want to make sure there is enough space around the bike for it to be stored safely without getting damaged. You can choose to hang the bike vertically or horizontally depending on your preference and available space.

Step 2: Find a Stud
Using a stud finder, locate the studs in the wall where you want to hang your bike. This is important because the studs provide the necessary support for the weight of the bike.
If you don’t have studs in the desired location, you will need to use wall anchors to support the weight. It’s always best to hang your bike on a stud whenever possible. But if you have to use wall anchors, make sure they are rated for the weight of your bike.
Step 3: Measure and Mark
Once you have found the studs, measure and mark where you want to hang the bike. The measurement will depend on the length of your bike and how high or low you want it to be.
Make sure to level your marks so that the bike will hang straight. It’s also a good idea to mark the location of each stud so that you can easily find them later. You can use a ruler or measuring tape for accurate measurements.
Step 4: Pre-drill Holes
Using a drill, pre-drill holes in the marked spots. This is especially important if you are using wall anchors. If you are drilling into a stud, it’s still a good idea to pre-drill so that the screw can easily go in without splitting the wood.

This also ensures that the screws go in straight and secure. It’s recommended to use a drill bit that is slightly smaller than the diameter of your screws.
Step 5: Install Wall Anchors (if necessary)
If you are using wall anchors, now is the time to install them. Follow the instructions on the package carefully and make sure they are securely in place before proceeding to the next step.
It’s important to use the correct size and type of wall anchors for the weight of your bike. The last thing you want is for your bike to come crashing down because the wall anchors couldn’t support its weight.
Step 6: Mount Bike Hooks or Racks
Using a screwdriver or drill bit, attach the bike hooks or racks to the wall at the marked spots. Make sure they are level and securely attached to the wall. If you are using racks, make sure they are wide enough to hold the width of your bike tires. Although hooks are a popular choice, racks provide more support and stability for your bike. It’s up to you which option you prefer.
Step 7: Adjust Hooks or Racks
Once the hooks or racks are attached, you may need to make some adjustments so that the bike hangs evenly. You can do this by loosening or tightening the screws on the hooks or racks to level them out. It’s important to have a level bike so that it doesn’t fall off the wall. The hooks or racks should also hold the bike securely in place.
Step 8: Prepare Bike
Before you hang your bike, make sure to prepare it for storage. This includes lowering the seat and handlebars, removing any accessories or loose items, and making sure the gears are in a safe position.
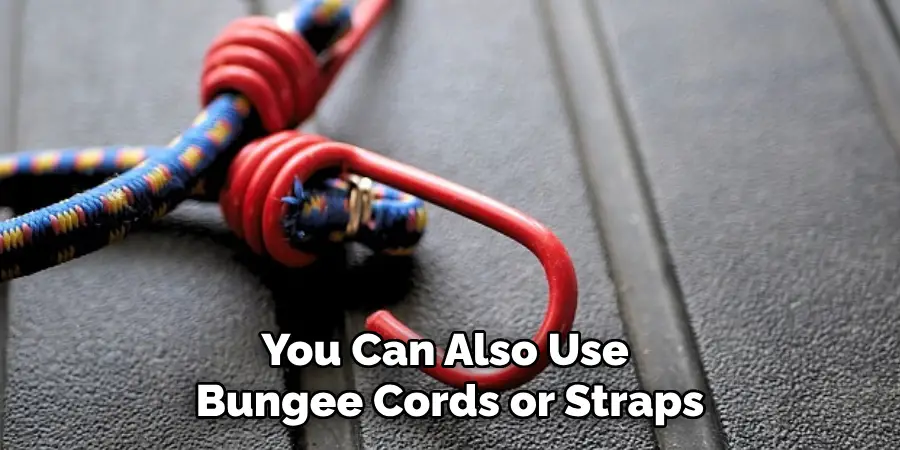
You can also use bungee cords or straps to secure the wheels so that they don’t turn while hanging. It’s also a good idea to clean your bike before hanging it up. But if you’re short on time, don’t worry – you can always clean it later.
Step 9: Hang Bike on Hooks or Racks
Once you have prepared your bike, it’s time to hang it on the hooks or racks. Carefully lift the bike and place it on the hooks or racks so that both wheels are securely resting in their designated spots. Make sure the bike is level and sits comfortably in place before letting go.
However, do not let go until you are confident that the bike is hanging securely. You can always make adjustments if needed. It’s also a good idea to have someone else help you with this step.
Step 10: Test Stability
After hanging your bike, give it a gentle shake to test its stability. If it seems loose or wobbly, make any necessary adjustments by tightening the screws on the hooks or racks. It’s important to have a stable bike so that it doesn’t fall off the wall and potentially cause damage.
It’s also a good idea to periodically check the stability of the hooks or racks and make any adjustments as needed. But with proper installation, your bike should hang securely for a long time.
Step 11: Enjoy Your Organized Garage
Congratulations, you have successfully learned how to hang a bicycle in your garage! Not only does your bike now have a safe and secure spot to be stored, but it has also freed up valuable floor space. You can now enjoy a more organized and clutter-free garage.
Just make sure to always take necessary precautions when hanging and storing your bike, such as using sturdy hooks or racks and regularly checking for stability.
Following these step-by-step guidelines on how to hang a bicycle in garage will ensure that your bike is hung properly and securely in your garage. So go ahead, pick a spot, grab your tools, and start hanging your bicycle today! Happy riding!
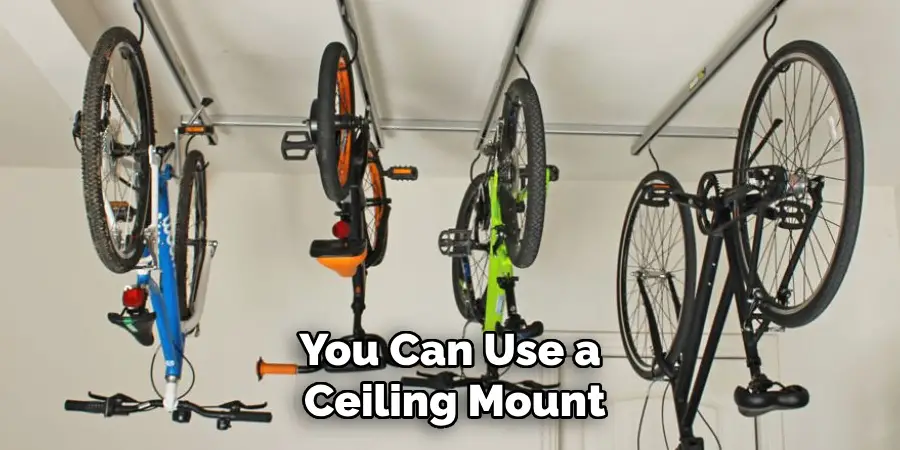
How Much Will It Cost to Setup the Ceiling Mount?
As the cost of a ceiling mount or pulley system will vary depending on the brand and type, it’s best to research and compare prices before making a purchase. Additionally, you may also need to factor in any additional costs such as tools or installation fees.
It’s recommended to choose a high-quality and sturdy option for proper support and safety of your bike. You can also consult with a professional for advice on the best type of ceiling mount or pulley system for your specific garage setup and bike weight. Overall, the cost of setting up a ceiling mount is typically less expensive than installing hooks or racks on a wall.
Frequently Asked Questions
Q1: Can I Hang My Bike on Drywall Without Studs?
A1: It is not recommended to hang your bike on drywall without studs as drywall is not strong enough to hold the weight of a bike. It’s best to locate and use studs for proper support or use wall anchors if necessary.
Q2: How Do I Clean My Bike Before Hanging It Up?
A2: To clean your bike, you can use a mild soap and water solution to wipe down the frame and components. Make sure to dry it thoroughly before hanging it up. You can also use a bike-specific cleaning product for a more thorough cleaning.
Q3: Can I Hang Multiple Bikes on the Same Hooks or Racks?
A3: It’s not recommended to hang multiple bikes on the same hooks or racks as it can cause instability and damage. Each bike should have its own designated spot on the hooks or racks for proper support and storage. However, you can use a multi-bike rack if you need to store more than one bike in a small space. Always refer to the weight limit and installation instructions for proper usage.
Q4: Can I Use a Ceiling Mount or Pulley System Instead?
A4: Yes, you can use a ceiling mount or pulley system to hang your bike in your garage. This is a great option if you have limited wall space or want to keep your bike out of the way. However, make sure to follow installation instructions carefully and regularly check for stability to ensure proper support and storage.
Conclusion
To wrap up, if you have a bike that needs to be hung in the garage, don’t worry! Hanging a bike can be easy and secure if done properly. Remember to take into consideration the weight of your bicycle and purchase an adequate mounting hook for it.
Additionally, make sure to choose a variety of tools such as a hammer, wrench, adhesive hooks or screw hooks to complete this task. Doing so will ensure that the bicycle is safely stored and out of the way in your garage.
Finally, it is important to enjoy the ride when cycling around outdoors! So now that your bike has been successfully mounted within your garage, go off and explore something new! Thanks for reading this article on how to hang a bicycle in garage.
I am Rick. I grew up helping my dad with his handyman service. I learned a lot from him about how to fix things, and also about how to work hard and take care of business. These days, I’m still into fixing things- only now, I’m doing it for a living.
I’m always looking for new ways to help people grow and develop. That’s why I have created this blog to share all my experience and knowledge so
that I can help people who are interested in DIY repair.