
When your garage door cables break, it can be a major hassle. You may not know how to fix them or where even to start. This blog post will walk you through how to fix garage door cables and show you what you need to do the job. So if your garage door cables have gone rogue, don’t worry – we’ll help you take care of it! Keep reading to learn more.
Summary: If your garage door cables are broken, frayed, or loose, it’s important to fix them before they cause further damage or become a safety hazard. To fix garage door cables, you will need first to disconnect the power to the garage door opener, release the tension from the springs, and then remove the old cables.
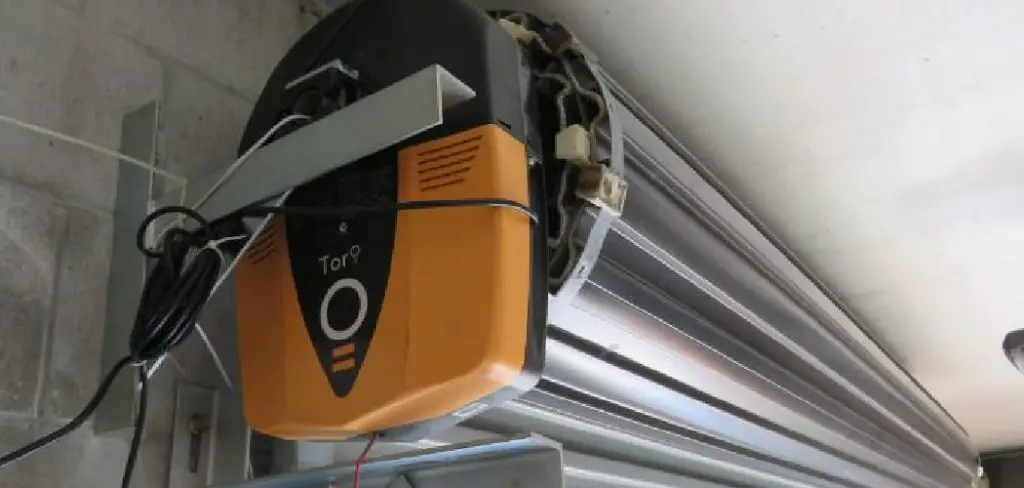
What Causes Garage Door Cables to Break?
There are a few different reasons why your garage door cables might break. However, the main reason that garage door cables break is due to wear and tear. Over time, the cables can become frayed or even completely severed. This is usually caused by the door being opened and closed frequently, which puts a lot of stress on the cables.
Another reason that garage door cables might break is due to rust. Rust can cause the cables to snap or break completely. This is usually more of a problem in older homes, where the garage door cables may not have been replaced in many years.
Additionally, garage door cables can break if they become tangled. This can happen if the door is opened too quickly or if something is blocking the door’s path. If the cables become tangled, they can snap or break.
The other possibility is that the cables will become wrapped around the door itself, which can damage the door and cause it to malfunction. Lastly, if the garage door opener is not properly aligned, the cables can become misaligned and eventually break.
Why Its Important to Fix Garage Door Cables
Garage door cables are an important part of the garage door system. The cables are what lift the door up and allow it to close. Without the cables, the door would not be able to open or close. Additionally, the cables help balance the door, which is important for safety and function.
If the cables break, the door will not be able to open or close. This can be a major inconvenience, especially if you use your garage door frequently. Another problem is that the door can become unbalanced if the cables break. This can cause the door to fall, which could seriously injure someone. Additionally, an unbalanced door can be very difficult to open and close.
Finally, if the cables are not properly aligned, the door opener can become damaged. So it’s important to fix the cables as soon as possible.
You Can Check It Out To Safely Run a Generator in a Garage
A Complete Guide on How to Fix Garage Door Cables
1. Gather Necessary Tools and Materials:
Before starting the repair process, make sure you have the necessary tools and materials to get the job done. You’ll need safety gloves, safety goggles, a ladder, a set of wrenches, a pair of winding bars, a set of pliers, and a C-clamp. You may also need some replacement cables if the existing ones are damaged or frayed.
2. Inspect the Garage Door Cables:
Begin by inspecting the garage door cables to determine the extent of the damage. Check for fraying, kinks, or other signs of wear and tear. If the cables appear to be in good condition, you may not need to replace them; however, if they show signs of damage, it’s best to replace them to prevent further problems.
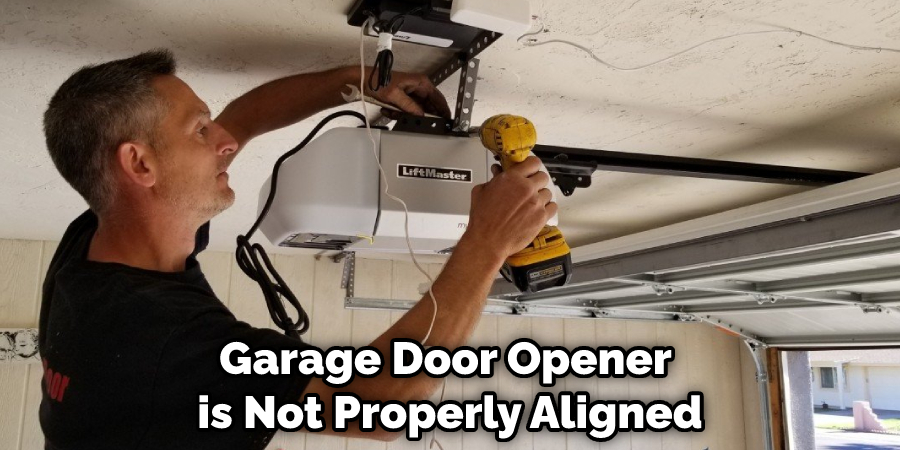
3. Disengage the Garage Door Opener:
To ensure your safety, disconnect the power to the garage door opener by unplugging it or turning off the circuit breaker. Then, disengage the garage door from the opener by pulling the emergency release cord, which is typically red and located near the top of the door.
4. Open the Garage Door Manually:
With the garage door opener disengaged, carefully lift the garage door to the fully open position. If the door is too heavy or difficult to lift, ask for help from a friend or family member.
5. Secure the Garage Door in the Open Position:
Once the door is fully open, use a C-clamp to securely lock it in place by clamping it onto the garage door track just below the bottom roller. This will prevent the door from falling or closing during the repair process.
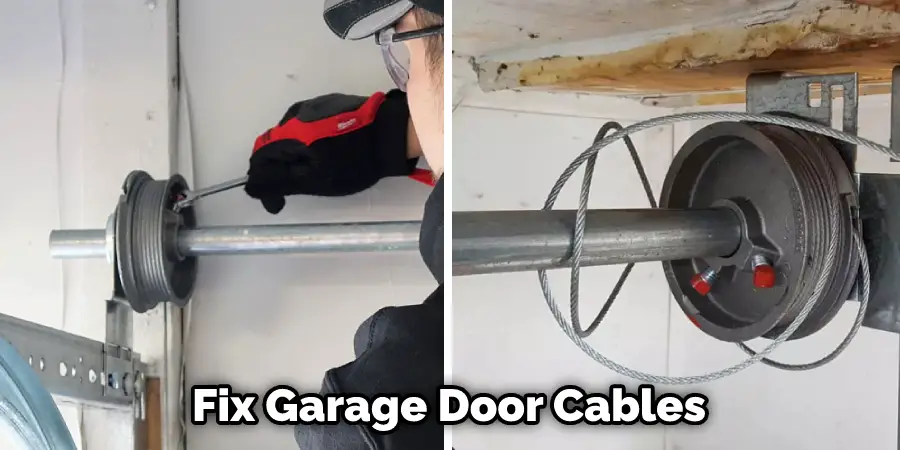
6. Locate the Cable Drums:
Now, find the cable drums on either side of the garage door. These are usually found near the top of the door, just below the torsion spring assembly. The cables wrap around these drums and help to lift and lower the door.
7. Loosen the Set Screws on the Cable Drums:
Using a wrench, carefully loosen the set screws on both cable drums. These screws hold the cable drums in place and keep tension on the cables.
8. Unwind the Cable from the Drums:
With the set screws loosened, carefully unwind the cables from the drums by rotating the drums counterclockwise. Use caution when handling the cables, as they may be under tension and could snap. Make sure to keep track of the number of turns you unwind so that you can later apply the same tension when installing the new cables.
9. Remove the Old Cables:
Now that the cables are unwound, you can remove them from the drums and the brackets at the bottom of the garage door. Use pliers to disconnect the cables from the brackets and then carefully pull them off the drums.
10. Install the New Cables:
Feed the new cables onto the drums, making sure they are properly seated in the grooves. Attach the cables to the bottom brackets of the garage door using pliers or a wrench. Make sure the cables are straight and free of any kinks or twists.
11. Wind the Cables onto the Drums:
To wind the cables back onto the drums, rotate the drums clockwise while keeping tension on the cables. Use the same number of turns you counted when unwinding the old cables to ensure the proper tension is applied. Once the cables are wound, tighten the set screws on the drums to secure them in place.
12. Check the Cable Tension and Alignment:
With the cables wound onto the drums, inspect them to ensure they are properly aligned and tensioned. Both cables should have the same amount of tension, and the door should be able to move smoothly without any resistance.
13. Test the Garage Door Balance:
Remove the C-clamp from the garage door track and carefully lower the door halfway down. The door should stay in place without any assistance. If it doesn’t, the cables may need to be adjusted for proper tension. To do this, raise the door back to the open position, secure it with the C-clamp, and adjust the cable tension by either adding or removing turns on the drums.
After adjusting the cable tension, lubricate the cables and other moving parts to ensure smooth operation and extend the life of your garage door cables. Apply a high-quality garage door lubricant to the cables, drums, and other moving parts. This will reduce friction and wear, making the door easier to open and close.
With the cables properly installed and adjusted, reengage the garage door opener by pulling the emergency release cord toward the door. This will reconnect the door to the opener mechanism. Then, restore power to the garage door opener by plugging it back in or turning on the circuit breaker.
Finally, test the garage door operation by opening and closing it using the garage door opener. The door should move smoothly and without any resistance. If you notice any issues or the door is still not functioning correctly, repeat the previous steps to make any necessary adjustments or consult a professional garage door technician for further assistance.
Remember, safety should always be your top priority when working on garage doors. The cables and springs are under a significant amount of tension and can cause serious injuries if not handled properly. If you’re ever in doubt about your ability to safely fix your garage door cables, don’t hesitate to call a professional for help. By following these steps, you can effectively repair your garage door cables and ensure the safety and functionality of your garage door for years to come.
Tips and Warnings on How to Fix Garage Door Cables
Tips:
- Be sure to disconnect the power to your garage door opener before beginning any repair work.
- Examine the cables for fraying or wear and tear. If you see any damage, it’s best to replace the entire cable.
- To remove a damaged cable, use a pair of pliers to loosen the set screw that secures the cable to the garage door.
- Once the cable is loose, you can pull it out and thread a new one through the pulleys.
- To reattach the new cable, reverse the steps you used to remove the old one.
Warnings:
- Never attempt to repair or replace garage door cables without professional help.
- Wear gloves and safety glasses when working with garage door cables.
- Never stand or lean on the garage door while working on it.
- Do not attempt to repair or replace garage door cables if you are not experienced in do-it-yourself home repairs.
How Much Does It Cost to Fix Garage Door Cables?
The cost of fixing garage door cables will vary depending on the severity of the problem. If the cables are simply loose, you may be able to fix them yourself. However, if the cables are damaged or misaligned, you’ll need to call a professional. The average cost of hiring a professional to fix garage door cables is $75.
Conclusion
So there you have it! Everything you need to know about how to fix garage door cables. Be sure to follow these tips and warnings to avoid any accidents or injuries. Then, if you’re still having trouble, don’t hesitate to call a professional. They’ll be able to help you get your garage door up and running in no time. Thanks for reading!
I am Rick. I grew up helping my dad with his handyman service. I learned a lot from him about how to fix things, and also about how to work hard and take care of business. These days, I’m still into fixing things- only now, I’m doing it for a living.
I’m always looking for new ways to help people grow and develop. That’s why I have created this blog to share all my experience and knowledge so
that I can help people who are interested in DIY repair.