
The garage door opener is an essential device every homeowner should have. It simplifies the act of opening and closing garage doors while keeping our properties secure.
It is common for us to lose or damage the opener, necessitating device deactivation. In this article, we will explore the step-by-step process of how to deactivate garage door opener.
Can You Deactivate the Garage Door Opener?
Garage door openers have become a staple in our daily lives, providing us with convenience and added security. However, have you ever wondered if it’s possible to deactivate your garage door opener? The answer is yes! There are various reasons why you might want to deactivate it temporarily or permanently.
For instance, if you’re going on vacation, you might want to turn off your garage door opener to prevent any unwanted intruders from accessing your home. Deactivating your garage door opener may seem daunting, but it’s a simple process that you can do yourself. By following the manufacturer’s instructions or seeking assistance from a professional, you can take control of your garage door opener and ensure your home’s safety and security.
Why Should You Deactivate Garage Door Opener?
Your garage door opener is a powerful tool that makes entering and exiting your home a breeze. However, there are times when you should deactivate it. One reason is if you’re going on vacation and won’t be using your garage for an extended period. This will help prevent anyone from breaking into your garage while you’re away.
Additionally, if you’ve moved into a new home, it’s important to deactivate any existing garage door openers to ensure previous owners or tenants can’t access your garage. Lastly, deactivation is key if you’re experiencing any issues with your garage door opener, as leaving it activated could result in a dangerous malfunction. Be proactive and stay safe by deactivating your garage door opener when necessary.
How to Deactivate Garage Door Opener: A Step-by-Step Guide
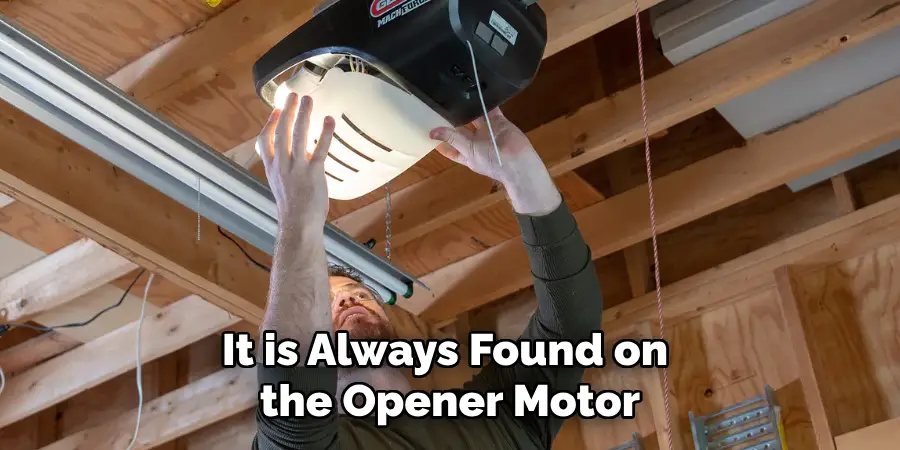
Step 1: Locate the Deactivation Switch
First, locate the deactivation switch on your garage door opener. The location of the switch differs from one opener brand to the other. Nevertheless, it is always found on the opener motor. Most manufacturers place it on the back or sides of the opener motor.
Step 2: Disconnect the Wires
Locate the wires that connect the opener motor to the opener control unit. They are often connected to screws in the motor. Once you identify the wiring mechanism, carefully disconnect the wires using a pair of pliers. Ensure no power is flowing into the device before you start disconnecting the wires.
Step 3: Remove the Opener Motor
The opener motor will have a mounting mechanism that you will have to loosen. Most manufacturers use screws to hold the motor in place. Once you remove the screws, take the motor out of the opener. Be careful not to damage any of the other components of the opener.
Step 4: Deactivate the Motor Circuit Board
To deactivate the motor circuit board, you need to remove the cover of the circuit board. Most garage door openers have a cover you must pull or snap off. Once you remove the cover, you will see a small switch on the circuit board. Flip the switch to deactivate the circuit board. You will hear a click sound, indicating that the switch has moved to the off position.
Step 5: Put Everything Back Together
After deactivating the circuit board, place the motor back into the opener. Ensure that the screws sit tightly in their place and the wiring mechanism is correctly reconnected. Turn the power on to the opener and test if the garage door opens and closes. Ensure you do all these steps cautiously, as incorrectly connecting the wires can cause serious accidents.
Step 6: Test the Deactivation
To confirm that you have successfully deactivated your garage door opener, try opening and closing your garage door using the remote or wall control. If the door does not respond to either of these controls, you have successfully deactivated the opener.
Step 7: Keep Children Safe by Locking the Door
Once you have successfully deactivated your garage door opener, keeping the door locked is essential. This will prevent any accidental door openings while you are working on it. You can use a padlock or a manual lock to secure the door until you reactivate the opener.

After following these seven simple steps, you should know how to safely deactivate your garage door opener. Remember to always follow the manufacturer’s instructions and exercise caution when working with electrical devices. Regularly deactivating your opener can also help prolong its lifespan and ensure it functions efficiently in the future.
5 Considerations Things When You Need to Deactivate Garage Door Opener
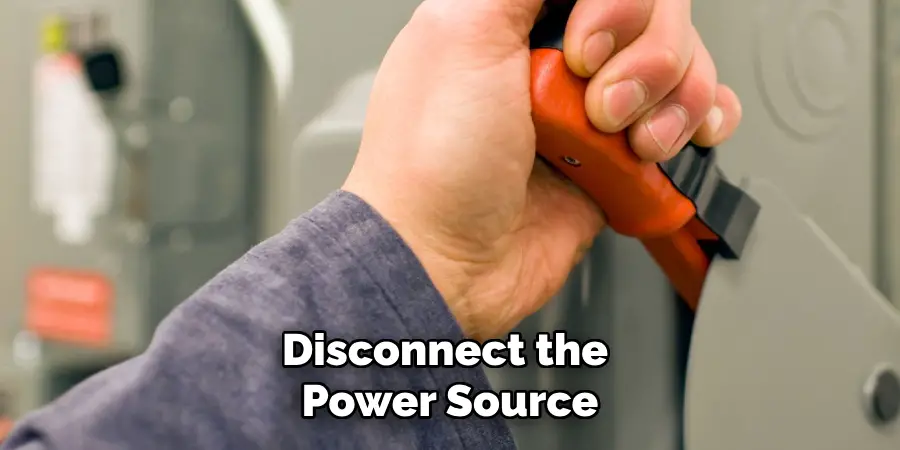
1. Unplugging the Power Source
The first thing you need to do when you need to deactivate your garage door opener is unplug the power source. This will ensure that the opener’s motor is not running and that no power is going to it.
You should also turn off any light bulbs connected to the opener, as this can cause a short circuit. Once you have unplugged the power source, you can then proceed with deactivating the garage door opener.
2. Disconnecting the Motor
The next step in deactivating your garage door opener is disconnecting the motor from its power source. This involves unscrewing any screws or bolts that are holding it in place and then carefully pulling out the wires that are connecting it to its power source.
Once this has been done, you can disconnect any other system components, such as sensors or remote controls, before deactivating your garage door opener.
3. Removing Any Wires
Once all of the components of your garage door opener have been disconnected, you should then remove any wires that are still connected to it. This includes both power and control wires, as these could cause a short circuit if left connected while deactivating your garage door opener.
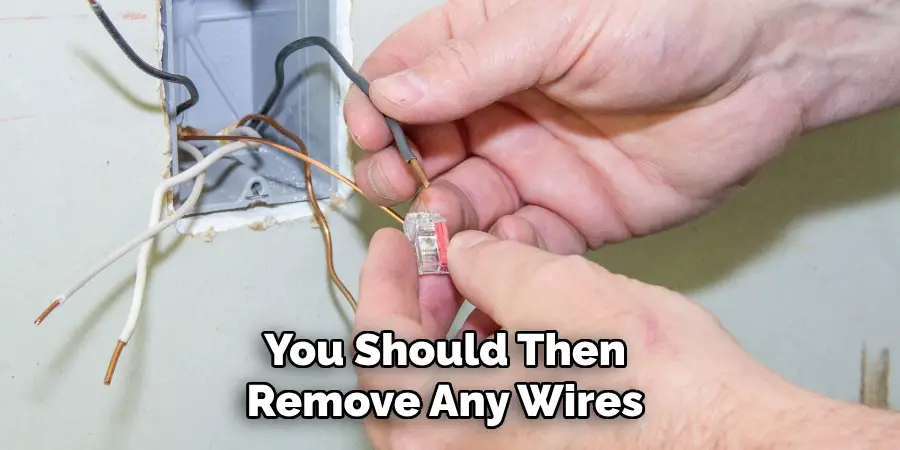
Once all of these wires have been removed, you can safely deactivate your garage door opener.
4. Testing Your Garage Door Opener
Before deactivating your garage door opener, it is important to test it first to ensure everything is working correctly and there are no issues with its operation. You should start by testing each component individually, such as sensors or remote controls, before testing the entire system together as a whole unit.
If everything appears to be working properly, you can then move on to safely deactivating your garage door opener without fear of damaging anything else in your home or causing an electrical hazard in your home’s wiring system.
5. Turning Off All Power Sources
Finally, once all components of your garage door opener have been tested and found to be working properly, you should turn off all power sources associated with it before actually deactivating it completely.
This includes turning off any light bulbs connected directly or indirectly to their power source and unplugging any cables from their outlets and switches so they do not remain powered after being disconnected from their respective devices and systems.
Benefits of Deactivate Garage Door Opener
A deactivated garage door opener may seem like an inconvenience, but it can actually provide many benefits. For one, it can prevent potential break-ins by disabling the remote access to your garage. Turning off your garage door opener can save you money on your energy bill by ensuring that your garage door doesn’t accidentally open or close due to a malfunction.
Furthermore, manually taking control of your garage door can provide you with an added layer of security and peace of mind, knowing that you have complete control over who can access your home through the garage. All of these benefits make deactivating your garage door opener a worthwhile endeavor for any homeowner.
Some Common Mistakes People Make When Trying to Deactivate Garage Door Opener
Deactivating a garage door opener may seem simple, but it’s not uncommon for people to make mistakes. One common mistake is attempting to deactivate the opener while the door is still in motion. This can cause the opener to malfunction and potentially even result in injury.
Another mistake is failing to properly disconnect the power source before attempting to deactivate the opener, which can pose a safety hazard. It’s also important to ensure that the deactivation process is completed correctly to avoid accidentally reactivating the opener later on.
Deactivating a garage door opener can be a straightforward and stress-free process by being mindful of these potential pitfalls and following the proper steps.
Conclusion
As we’ve seen, deactivating a garage door opener for our homes is a simple process that any homeowner can execute with the right tools. It is crucial to follow every step carefully, ensuring our safety and that of those around us.
If you aren’t confident in the deactivation process, don’t hesitate to ask for professional help. By using this guide, you’ll secure your garage from unwanted intrusion and keep your home safe. Thanks for reading our post about how to deactivate garage door opener.
I am Rick. I grew up helping my dad with his handyman service. I learned a lot from him about how to fix things, and also about how to work hard and take care of business. These days, I’m still into fixing things- only now, I’m doing it for a living.
I’m always looking for new ways to help people grow and develop. That’s why I have created this blog to share all my experience and knowledge so
that I can help people who are interested in DIY repair.