Are you frustrated with the lack of accessibility to your garage? Have you been searching for an easy, cost-effective way to get into your space without hurting yourself? Are you ready to tackle a new do-it-yourself project? Look no further! Building stairs and steps at home can seem daunting, but following these step-by-step instructions will make it much more manageable.

With a few simple tools and materials, you can create safe access that is strong enough to support people and heavier items. These steps are perfect for accessing the space above your garage—a storage loft or workspace—and add character and style to any home. Read on below for tips on how to build garage steps quickly and affordably.
Necessary Items
- Measuring tape
- Level
- Carpenter’s square
- Circular saw or hand saw
- Drill and drill bits
- Hammer and nails/screws
- Wood for the steps: 2x4s, 2x6s, or any other sturdy wood that can handle weight and weather conditions.
- Concrete blocks or bricks (optional) for stairs with more than one step
- Safety gear: gloves, safety glasses, ear protection
What is Garage Steps?
Garage steps are a set of stairs or steps that provide access to a garage from the outside. They can be built on any type of terrain, whether it’s flat ground or a slope. These steps are typically made of wood and can range from one step to multiple levels depending on the height of your garage entrance. Garage steps often have a handrail for added safety, especially if they are more than one step.
10 Steps on How to Build Garage Steps
1. Measure and Plan
The first step in any DIY project is proper planning. Measure the space where you want to install the steps and determine how many steps you will need based on the height of your garage floor. This will also help you choose the length and width of your steps.
2. Gather Materials
Once you have your measurements, gather all necessary materials from the list above. Make sure to purchase extra wood in case of mistakes or errors. It’s always better to have more than not enough.
3. Cut the Stringers
Stringers are the supporting elements for your steps and will determine the rise and run of each step. Cut out the stringers according to your measurements using your circular or hand saw. You will need two stringers for every flight of steps.
4. Cut the Steps
Cut out the steps from your chosen wood material using your circular saw. Make sure to cut them slightly shorter than the length of each step to allow for overhang and safe walking space.
5. Attach the Stringers to the Garage
Using a level, make sure the stringers are plumb and attach them to the garage wall using nails or screws. If the steps are freestanding, connect them using braces.
6. Attach the Steps
Using a carpenter’s square, ensure each step is level and attach them to the stringers using screws or nails. Make sure they are spaced evenly for safety and stability.
7. Add Support Blocks (optional)
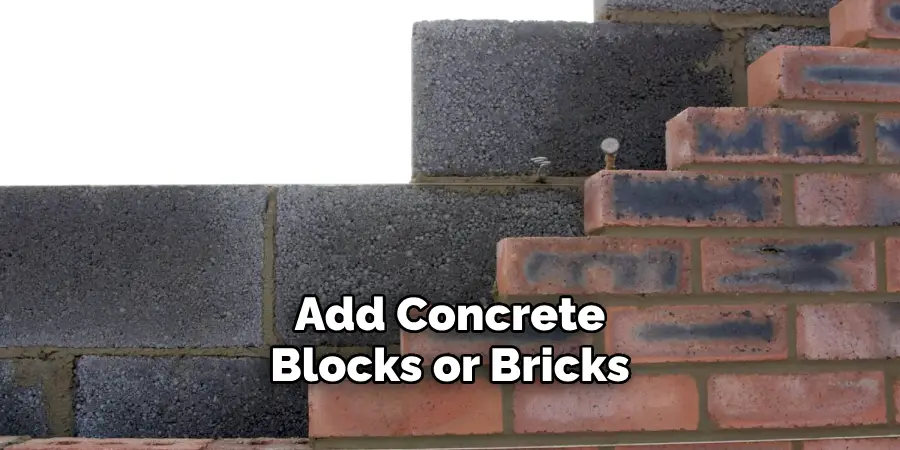
If your steps have more than one step, add concrete blocks or bricks under each step for support and stability. Make sure they are evenly spaced and level.
8. Finish and Stain
Once all steps are securely attached, sand down any rough edges and apply a wood stain or finish to protect against weathering. This is also an excellent opportunity to add color or personality to your steps.
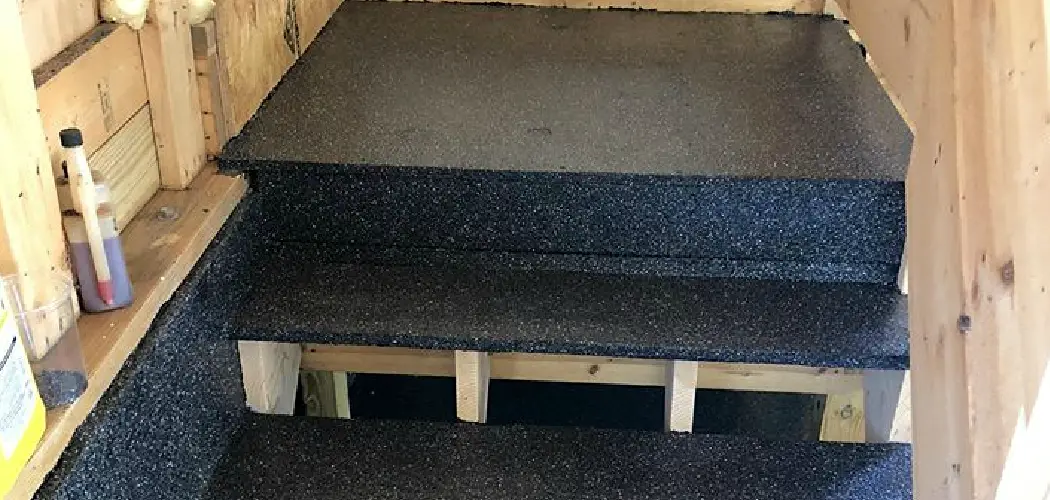
9. Add Non-Slip Tread (optional)
You can purchase non-slip tread strips and attach them to each step for safety. This will help prevent slips and falls, especially during rainy or snowy weather.
10. Test and Enjoy Your New Steps
After completing your DIY garage steps, test them out and ensure they are sturdy and safe. Now, you can easily access your garage space without hassle or danger.
Building garage steps may seem daunting, but it can be easily accomplished with the right tools and materials. Following these step-by-step instructions and taking necessary safety precautions, you can create safe and stylish access to your garage space. So go ahead and tackle this DIY project – your back (and your belongings) will thank you!
8 Benefits of Building Garage Steps
1. Increased Accessibility

The most obvious benefit of building garage steps is increased accessibility. Whether you have a loft or workspace above your garage, having safe and sturdy steps will make it easier to use and access the space.
2. Saves Money
Building your garage steps can save money compared to hiring a professional or purchasing pre-made steps. With some essential tools and materials, you can create functional and stylish steps at a fraction of the cost.
3. Customization
By building your steps, you can customize your steps to fit your specific needs and style. You can choose the type of wood, color, and design that best suits your home.
4. Adds Value to Your Home
Having well-constructed garage steps adds convenience and can increase your home’s value. If you ever decide to sell your house, potential buyers will appreciate having safe and attractive access to their garage space.
5. Durable and Long-lasting
DIY garage steps can be durable and long-lasting using sturdy materials. They will withstand heavy use and weather conditions, making them a worthwhile investment.
6. Fun DIY Project
Building garage steps can also be a fun and rewarding DIY project. It allows you to learn new skills and see the tangible results of your hard work.
7. Improves Home Aesthetics

Aside from functionality, well-built garage steps can also improve the overall aesthetics of your home. They add character and style, making your home more visually appealing.
8. Safe for Everyone
Lastly, having safe and sturdy steps ensures the safety of everyone who uses them – from family members to guests. This can help prevent accidents and injuries, making your home safer.
Building DIY garage steps is easier than it may seem. With the right tools and materials, you can create safe and stylish access to your garage space at a fraction of the cost. Following these step-by-step instructions and taking necessary safety precautions, you can enjoy all the benefits of having well-built garage steps.
Frequently Asked Questions
How Long Does It Take to Build Garage Steps?
The time it takes to build garage steps will vary depending on your experience level and the design’s complexity. Generally, it can take a few hours to a full day.
Do I Need a Building Permit to Build Garage Steps?
This will depend on local building codes and regulations. Before starting any construction project, checking with your local government or homeowner’s association is always best.
Can Garage Steps be Moved or Replaced?
Yes, garage steps can be moved or replaced if necessary. However, ensuring the new steps are securely attached and meet all safety requirements is essential. So, it is always best to consult a professional if you need clarification on any structural changes.
Do I Need to Have Carpentry Experience?
While some basic carpentry skills are helpful, extensive experience building garage steps is optional. Anyone can complete this DIY project with proper research and following instructions carefully.
What Tools Will I Need?
Some essential tools for building garage steps include a circular or hand saw, drill, level, carpenter’s square, and measuring tape. It’s also helpful to have safety equipment such as gloves and goggles.
Can I Build Garage Steps with Different Materials?
You can use different materials, such as concrete or metal, to build your garage steps. Just make sure they are sturdy and safe for use before installation. So go ahead and get creative with your design! Remember always to prioritize safety when choosing materials.
Conclusion
In conclusion, building the stairs for your garage can be a rewarding and cost-effective project. With the right supplies, some research, and planning – you can easily construct your own safe and secure staircase that looks great! Whether you go with prefabricated or fully custom steps, it is vital to have a finished product that matches your goals regarding strength and functionality.
Overall, creating steps on how to build garage steps to your garage is not a difficult or complex task, and with the right tools and materials, it can be done in no time. From making measurements and figuring out the size of your future steps to constructing them, this guide has given you all the tools you need to start this project.
Now it’s time for YOU to take action! Remember to wear protective gear when cutting lumber and sawing wood, and always double-check your measurements before you begin composing the actual steps. If you still need to determine what step comes next, consult an experienced builder for further guidance. So don’t waste any more time reading- it’s time to get out there and build those glorious garage steps!
I am Rick. I grew up helping my dad with his handyman service. I learned a lot from him about how to fix things, and also about how to work hard and take care of business. These days, I’m still into fixing things- only now, I’m doing it for a living.
I’m always looking for new ways to help people grow and develop. That’s why I have created this blog to share all my experience and knowledge so
that I can help people who are interested in DIY repair.