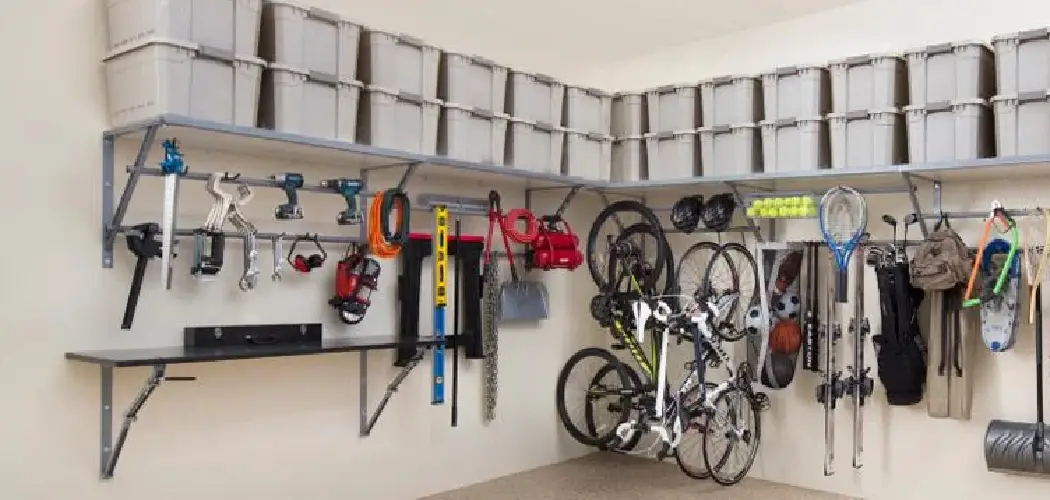
Does your garage feel like a catch-all for clutter with little storage? Creating order from chaos starts with the right shelving system. While store-bought shelves might seem like an easy solution, they often fall short either in durability or in making the most of your space. That’s where learning how to build garage shelving with 2x4s comes in—offering you long-lasting, custom-built storage that meets your specific needs. This step-by-step guide will walk you through designing, building, and finishing sturdy DIY shelves, making your garage safer, more organized, and easier to use.
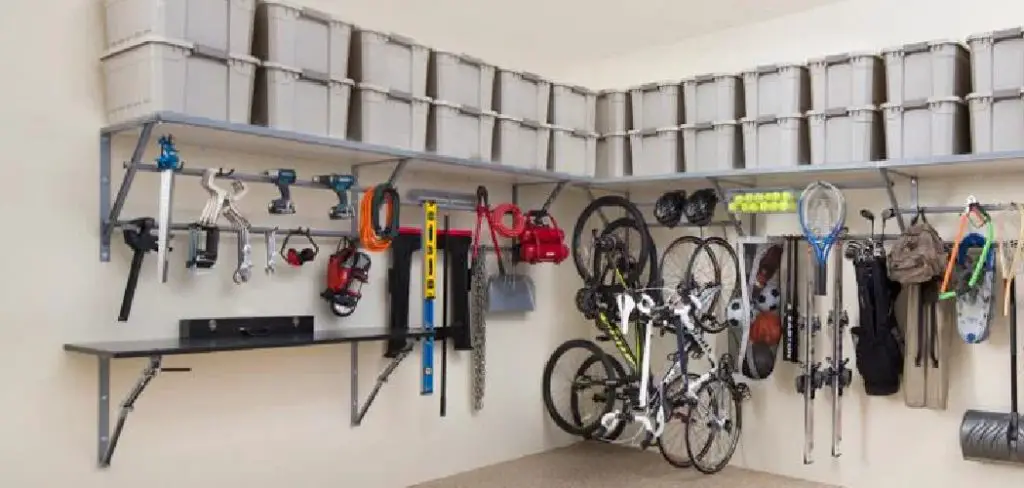
Why Build with 2x4s? The Benefits of DIY Shelving
Unbeatable Strength and Durability
When you build with 2x4s, your shelves will be strong enough to hold everything from paint cans to toolboxes or power tools—without sagging or shifting over time. This kind of strength is hard to find in mass-produced units.
Complete Customization
DIY garage shelving can be designed to fit your available space perfectly. Whether you need tall units for camping gear or narrower shelves to fit along a particular wall, tailoring your shelving is simple with 2×4 construction. You can work around outlets, windows, or even build shelves in a tricky corner, making the most of every inch.
Cost-Effectiveness
Store-bought shelves with comparable strength and size can be costly. By purchasing raw lumber (2×4 studs and plywood or OSB), you get better quality and pay much less per linear foot—and you can use higher-quality fasteners and hardware as needed.
Planning Your Shelving Project
Measuring Your Space
To get started, thoroughly measure your intended area for shelving—height from floor to ceiling, width along the wall, and desired shelf depth. Pay attention to the placement of wall studs, electrical outlets, or any fixtures that could affect shelf placement. Taking time for accurate measurements now prevents hassle later.
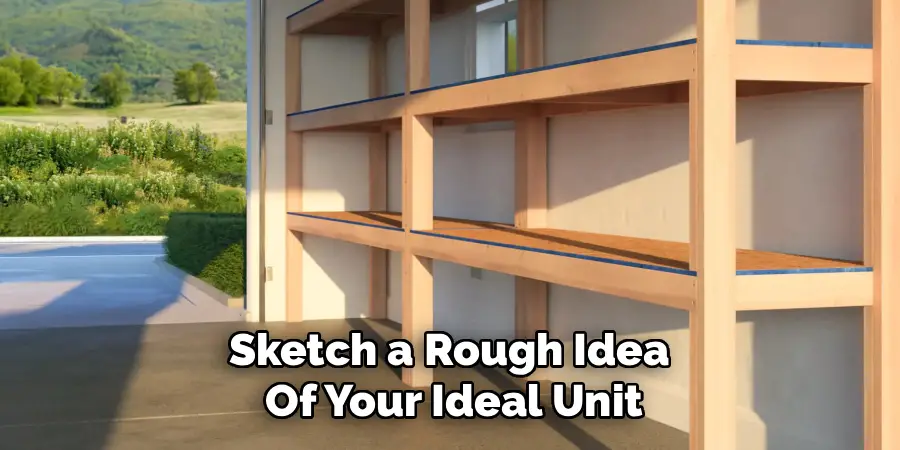
Designing Your Shelving Unit
Sketch a rough idea of your ideal unit. Decide how many shelves you need, spacing between them (for example, leaving enough clearance for large totes or bins), and the total depth. Consider what you plan to store most frequently and adjust the design for your needs. Visually planning things out helps ensure you’ll have something truly functional.
Creating a Cut List and Material List
Once you have your design, list the materials needed—including the total number of 2x4s, plywood or OSB for the shelves, and a tally of wood screws. Consider factoring in a bit of extra material for mistakes or future modifications—and always plan for screws or bolts appropriate for your chosen wall anchors if you’re fixing the unit to drywall or concrete.
Tools and Materials Checklist
Lumber and Fasteners
You’ll need an appropriate number of 2×4 studs for the frames and vertical legs, plus half-inch or three-quarter-inch plywood (or oriented strand board) cut to your desired shelf sizes. Choose 2.5-inch and 3-inch wood screws to ensure strong connections.
Essential Power Tools
A miter saw or circular saw allows for precise cutting. You’ll also need a power drill/driver for screwing everything together. Use a level to verify horizontal and vertical alignment throughout the build.
Measurement and Safety Gear
Don’t underestimate the importance of accurate measuring tools. A tape measure, pencil, speed square, and personal protection—such as safety glasses and work gloves—are critical for both safety and a clean, professional result.
Step-by-Step Guide on How to Build Garage Shelving with 2x4s
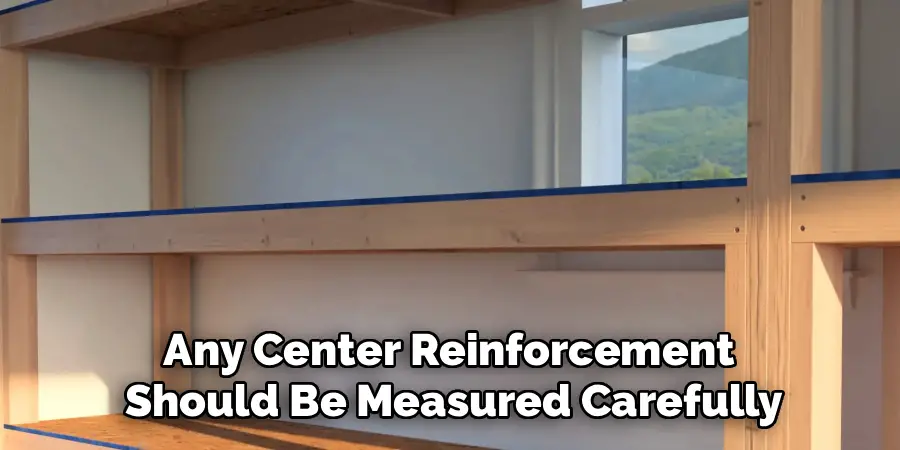
Step 1: Cut Your Lumber
Begin by cutting all 2×4 pieces according to your design. Each vertical leg, horizontal frame member, shelf support, and any center reinforcement should be measured carefully and cut to the same length where required. Lay out multiples together to confirm uniformity before proceeding.
Step 2: Assemble the Side Frames
Lay out two vertical legs side by side for each end of the unit. Mark shelf height positions, then attach horizontal supports between the legs at these marks, forming a ladder-like structure. Drive screws through the outer edges into each support, and double-check squareness with a speed square before tightening fully.
Step 3: Connect the Side Frames
Once you have two side frames ready, stand them upright and position them parallel to each other. Connect them by screwing in the long front and back horizontal 2x4s at each shelf level—these pieces create the basic framework for each shelf. Always check that the structure remains square and upright as you work.

Step 4: Add Center Supports for Wider Shelves
If your shelves are especially wide—more than four feet—it’s essential to add center reinforcements. Cut extra 2x4s and install them across the width of the frame, secured from front to back. Doing so helps distribute heavy loads evenly and prevents the shelf surface from bowing.
Step 5: Cut and Install the Plywood Shelves
Now, measure the tops of your completed shelf sections, then cut plywood or OSB to fit. Set each piece on top of its supporting frame, checking for a snug fit. If the shelf extends into a corner or works around obstacles, notch the plywood as needed using your saw to ensure seamless placement.

Step 6: Secure the Unit to the Wall
For stability and safety, anchor your shelving to the studs in the garage wall. Find and mark stud positions, then drive long screws through your unit’s rear supports into the wall. Take care to ensure the structure sits flush and doesn’t rock or tip—even heavy-duty shelves can be pulled forward by a load if not properly anchored.
Construction Tips for a Sturdier Build
Pre-Drilling to Prevent Splitting
Pre-drill holes in your 2×4 lumber, especially where screws come close to the end grain. This precaution prevents the wood from splitting, ensuring each screw holds tightly over time.
Using Wood Glue for Extra Strength
Where you want an extra-rigid frame, apply a line of wood glue to contact surfaces before screwing parts together. This technique is especially useful at joints that bear significant weight or lateral stresses.
Checking for Level and Square
At each stage of assembly, verify your shelves are level and frames are square. An uneven base can cause instability or difficulty in storing items down the line. Investing effort here pays dividends in both function and appearance.
Finishing Touches and Customizations
Painting or Staining
Consider painting or staining your finished shelves for additional protection against spills and humidity—plus a polished, professional appearance. If your garage is prone to dampness, prioritize finishes that offer a moisture barrier.
Adding Hooks and Accessories
For even greater functionality, attach hooks to the side uprights for hanging extension cords, tools, or bags. Small upgrades like these can make a big difference in how you use your space.
Labeling Bins and Totes
An often-overlooked touch is using labeled bins or totes to categorize contents on your new shelves. Keeping like-items together helps maintain the organization you’ve worked hard to create.
Common Mistakes to Avoid
Failing to anchor your shelving unit to the wall is a dangerous oversight, as it makes the structure susceptible to tipping, especially if loaded unevenly. It’s equally important to avoid building shelves that are too deep, since items can become difficult to reach or get lost. Additionally, always install center supports on longer shelves; skipping them risks bowing or collapsing under heavy loads.
Conclusion
Building your own storage with 2x4s transforms your garage into an organized, efficient space. The process—from precise measurement and careful planning to methodical assembly and finishing—not only results in a custom solution but also brings a genuine sense of accomplishment. Now that you know how to build garage shelving with 2x4s, you’re prepared to tailor storage exactly to your needs and enjoy the long-term benefits of a garage that truly works for you.
I am Rick. I grew up helping my dad with his handyman service. I learned a lot from him about how to fix things, and also about how to work hard and take care of business. These days, I’m still into fixing things- only now, I’m doing it for a living.
I’m always looking for new ways to help people grow and develop. That’s why I have created this blog to share all my experience and knowledge so
that I can help people who are interested in DIY repair.