If your garage door is uneven, it can cause problems when opening and closing. An uneven garage door can be caused by various factors, including weather changes and wear and tear. Luckily, a few easy ways to adjust a crooked garage door to open and close smoothly. Read on to learn how to adjust uneven garage door.
Garage doors are subject to a lot of wear and tear. Over time, the door can become warped, bent, or otherwise out of alignment. This can cause the door to stick when opening or closing or to make noise. If your garage door is uneven, you can do a few things to fix it.
What is Uneven Garage Door?
Most garage doors are not perfectly level. It is very common for them to be slightly off-kilter. This can be due to several factors, such as the door’s weight, the tracks being installed incorrectly, or simply settling over time. Whatever the cause, an uneven garage door can be a nuisance. It may make it difficult to open and close the door and can even cause damage to your car if left unchecked.
What Makes a Garage Door Balanced or Unbalanced?
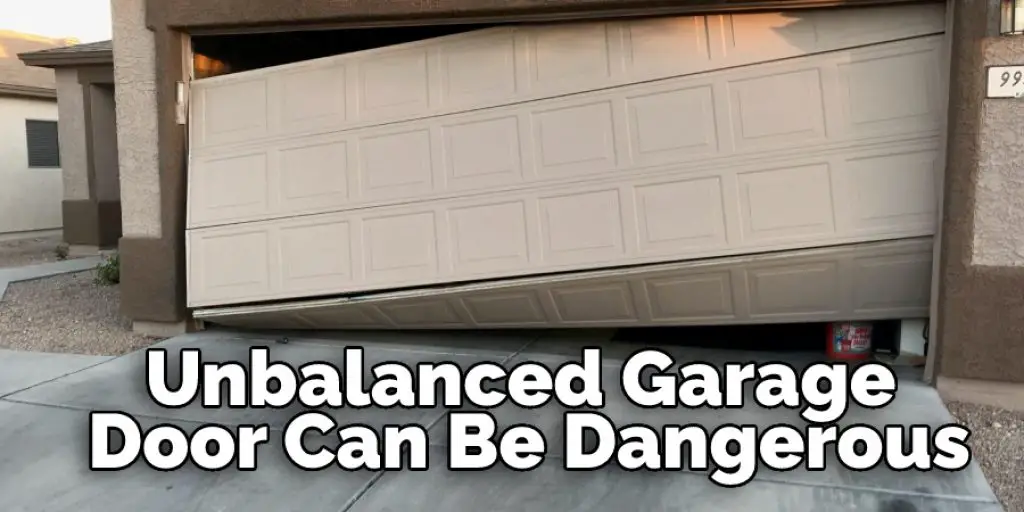
Some people might think that a garage door is just a big piece of metal that covers the opening of your house. However, the garage door is not only functional; it is also an essential part of your home’s appearance. A well-balanced garage door looks good, but it also functions smoothly and safely. On the other hand, an unbalanced garage door can be dangerous and can lead to costly repairs.
Several factors can make a garage door unbalanced. One of the most common reasons is unevenness in the weight of the panels. This can be caused by various factors, including damage, wear and tear, or simply differences in the manufacturing process. Another common cause of imbalance is improper installation. If the panels are not installed evenly, they will put uneven pressure on the springs, resulting in an unbalanced door.
Once you have determined that your garage door is unbalanced, you will need to take action to fix it. Depending on the severity of the problem, you may be able to make some simple adjustments to get your door back in balance. However, it may be necessary to replace one or more of the panels in some cases. Either way, it is essential to get your garage door balanced as soon as possible to avoid further damage and costly repairs.
Negative Consequences of an Unbalanced Door
An uneven garage door can cause several problems, including:
– premature wear and tear on the door and opener
– difficulty opening and closing the door
– noise when the door is in operation
– decreased energy efficiency
If you have an unbalanced garage door, it’s essential to take care of the problem as soon as possible to avoid these negative consequences.
What You’ll Need:
Level:
A level is a tool used to determine whether a surface is horizontal or vertical. You can use either a traditional bubble level or a digital level for this task.
Stepladder:
You will need access to the tracks and springs, which means you’ll need a stepladder to reach them safely.
Wrenches:
Adjusting an unbalanced garage door often requires using various sizes of wrenches.
Replacement Panels:
In some cases, you may need to replace one or more panels on your garage door to get it back in balance. If this is the case, you will need replacement panels that match your existing door.
A Step-by-Step Guide on How to Adjust Uneven Garage Door
Step 1: Determine How Much the Door Needs to Be Adjusted
To determine how much the door needs to be adjusted, you will need to measure the height of the garage door at its tallest and shortest points. Once you have these measurements, subtract the shortest height from the most elevated height. This will give you the amount that the door needs to be adjusted. For example, if your garage door is 8′ tall at its highest point and 7′ tall at its shortest point, your door needs to be adjusted to 1′. You can also use a level to determine how much the door is off-kilter.
Step 2: Start by Testing the Door
The best way to determine how much you need to adjust the door is by testing it. Please open the door and let it go all the way up. It should stay in place on its own. If it doesn’t, then you’ll need to adjust it.
If the door moves too far to one side or the other, use the adjustment screws to correct it. For example, turning the screws clockwise will move the door towards the center, while turning them counter-clockwise will move it away from the center.
Make minor adjustments until the door stays in place when you let go of it. Once you have it adjusted, please close the door and test it again. It should now open and close smoothly without any problems.
Step 3: Keep the Garage Door Open and Level
If the door is still uneven after you have adjusted the spring tension, you may need to make some minor adjustments to the door itself. First, open the door and prop it open with a 2×4 or another piece of lumber. Next, use a level to check the vertical position of the door. If it is not level, use a screwdriver or wrench to adjust the hinges on the door so that it is level. Once it is level, close and latch the door, then test its operation. If it is still uneven, repeat these steps until the door is level and operates smoothly.
Step 4: Adjust the Spring Within the Track Hanger
If the door is still uneven after adjusting the hinges, you may need to adjust the spring within the track hanger. This will require some basic carpentry skills.
With the door open, use a saw to cut a piece of wood 2″ wide and 8″ long. This will be used to adjust the position of the track hanger.
Next, use a square to draw a line across the top of the wood piece. This will help you ensure that the track hanger is adjusted evenly.
Using a chisel and hammer, remove some of the wood from the bottom of the piece to fit into the track hanger. Be sure to remove an equal amount of wood from each side of the line you drew earlier.
Fit the piece of wood into the track hanger and use it to adjust the position of the hanger until the door is level. Once you have it adjusted, use a screwdriver or wrench to tighten the screws on the track hanger. Finally, close and test the door to ensure it is now level and operates smoothly.
Step 5: Make Sure the Door Closes Evenly
Now that the door is level, it’s essential to make sure it closes evenly. You’ll need to adjust the cables on each side to do this.
Start by loosening the bolts on the brackets that hold the cables in place. Then, you should be able to turn them with your fingers.
Then, use a screwdriver to adjust the screws on the cable pulleys. Turn them clockwise to tighten the cables or counterclockwise to loosen them.
You’ll want to keep adjusting the screws until the door closes evenly. When you’re done, tighten the bolts on the brackets to hold the cables in place.
If you have a Genie opener, there are two adjustment screws on the motorhead that you can use to adjust the door. One is for the height, and the other is for the width.
Turn them clockwise to tighten or counterclockwise to loosen until the door closes evenly. When you’re done, make sure to tighten the screws.
Step 6: Adjusting the Lift Cable
If your garage door isn’t opening or closing evenly, the lift cable may be blamed. The lift cable helps raise and lower your garage door, and if it’s not functioning correctly, it can cause all sorts of problems.
Fortunately, adjusting the lift cable is a relatively simple process. First, you’ll need to locate the adjustment bar. This is usually located near the bottom of the garage door. Once you’ve found it, loosen the set screws that hold the adjustment bar in place. Next, you’ll need to adjust the tension on the lift cables. To do this, turn the adjustment bar clockwise or counterclockwise. Once you’ve made your adjustments, make sure to tighten the set screws before trying to operate your garage door again.
If you find that your garage door still isn’t operating correctly after adjusting the lift cable, there may be something else wrong with the door. In this case, it’s best to call a professional for help. These steps will help in how to adjust uneven garage door.
Tips and Warnings:
Tips:
- If the door has a lot of play and wobbles, tighten the bolts that attach the track to the wall studs.- If one side of the door is lower than the other, use a shim on that side’s roller bracket. This can be made from a piece of wood or metal. Ensure the opener is correctly balanced by following the manufacturer’s instructions. If it’s not working correctly, have you serviced it?
- Garage doors can be heavy, so use caution when adjusting them. Also, be sure to stand clear of the path of travel when the door is moving.
- Finally, always test the safety features of your garage door after making any adjustments. Make sure it will stop and reverse if something gets in its way. Suppose it doesn’t consult the door’s manual or call a professional for assistance.
Warnings:
- Do not attempt to adjust the garage door if it is not working properly. This could result in injury.
- Do not remove the springs or cables from the garage door. These are under high tension and can be dangerous.
- Do not make any adjustments to the garage door without first consulting the owner’s manual or a professional technician. Improper adjustments can cause the door to malfunction or become unsafe. Overall, adjusting an uneven garage door may seem like a daunting task, but with proper knowledge and caution, it can be done effectively. Follow these steps carefully, and if you encounter any issues or do not feel comfortable making adjustments yourself, it’s always best to call a professional for help.
Do You Need to Get Help From a Professional?
If you have attempted to adjust your uneven garage door and are still experiencing issues, it may be time to call in a professional for assistance. A trained technician will have the expertise and tools necessary to properly diagnose and fix any problems with your garage door. They can also provide regular maintenance to keep your door functioning smoothly and prevent future issues. It’s always better to seek help from a professional rather than risk causing further damage or injury to yourself.
Don’t let an uneven garage door inconvenience you any longer. With these steps and tips, you can easily adjust your garage door and have it operating smoothly in no time. Remember to always prioritize safety when working on your garage door and seek professional help if needed. So go ahead, make the necessary adjustments and enjoy a level, functional garage door!
Frequently Asked Questions:
Q: Why is My Garage Door Uneven?
A: Garage doors can become uneven due to normal wear and tear, improper installation, or shifting of the foundation. It’s essential to regularly check and adjust your garage door to ensure it operates smoothly and safely. The steps outlined in this guide will help you adjust an uneven garage door. You may also want to consider having a professional inspect and service your garage door if you notice recurring issues with its operation. You can also refer to the owner’s manual for information specific to your door model.
Q: Can I Adjust My Garage Door Without Professional Help?
A: It is possible to make minor adjustments to your garage door on your own, but it’s always best to consult the owner’s manual or a professional technician before attempting any adjustments. This will ensure that the door is adjusted correctly and safely. The steps outlined in this guide can be used as a general reference, but it’s always best to seek professional help if you’re unsure. You don’t want to risk causing further damage or injury while attempting to adjust your garage door.
Q: When Should I Call a Professional for Help?
A: If your garage door is not responding to adjustments or if you are unsure of what needs to be adjusted, it’s best to call a professional for help. Attempting to fix the issue on your own could result in further damage or injury. A professional technician will have the necessary skills and tools to properly adjust your garage door.
Q: Can I Use Lubricant to Help with Uneven Garage Door Operation?
A: Yes, lubricant can help with uneven garage door operation. Using a silicone-based lubricant on the moving parts of your garage door (such as rollers, hinges, and tracks) can help reduce friction and allow for smoother movement. Be sure to use a lubricant that is specifically designed for garage doors to avoid any potential damage. It’s important to note that lubricant should not be used as a solution for significant issues with garage door operation.
Q: How Often Should I Adjust My Garage Door?
A: It’s recommended to check and adjust your garage door at least every six months to ensure it is functioning properly. However, if you notice any issues with its operation or if the door becomes noticeably uneven, it’s best to make adjustments as soon as possible. Regular maintenance and adjustments can help prolong the lifespan of your garage door and prevent larger issues from occurring. The steps outlined in this guide can be used as a reference for adjusting your garage door regularly.
Q: What Should I Do If My Garage Door Is Still Uneven After Making Adjustments?
A: If your garage door is still uneven after making adjustments, there may be other underlying issues causing the problem. It’s best to consult a professional for help in this situation, as attempting to make further adjustments could potentially cause more damage. A professional technician will be able to diagnose and fix any underlying issues with your garage door.
Overall, regular maintenance and proper adjustments are essential for the safe and smooth operation of your garage door. Remember to always follow safety precautions, consult a professional if needed, and refer to the owner’s manual for specific instructions.
With these tips and warnings in mind, you can effectively adjust an uneven garage door and keep it functioning properly. So, regularly check your garage door for any signs of unevenness and make adjustments as needed to ensure its longevity and safety. Happy adjusting!
Conclusion
Garage door adjustment can be a simple process, but it’s essential to know how to do it properly. We hope our article on how to adjust uneven garage door has helped you understand the basics of this procedure. Remember to consult with a professional if you have any questions or concerns. Thanks for reading!
You Can Check It Out to How to Keep Room above Garage Warm
You may read also How to Fix a Sagging Garage Roof
I am Rick. I grew up helping my dad with his handyman service. I learned a lot from him about how to fix things, and also about how to work hard and take care of business. These days, I’m still into fixing things- only now, I’m doing it for a living.
I’m always looking for new ways to help people grow and develop. That’s why I have created this blog to share all my experience and knowledge so
that I can help people who are interested in DIY repair.