A garden hose is an essential tool for any homeowner, keeping lawns lush and cars clean. However, once the water is turned off, that helpful tool often transforms into a tripping hazard or a tangled mess on the garage floor.

Improper storage isn’t just an eyesore; it can actually shorten the lifespan of your hose, leading to kinks, cracks, and annoying leaks. Many people toss the hose into a corner, thinking they will deal with it later, only to find a frozen or molded mess months later. Taking the time to organize your watering equipment protects your investment and keeps your workspace safe. Whether you are prepping for winter or just tidying up for the weekend, learning the proper technique is simple. This guide will walk you through how to store garden hose in garage setups of all sizes, ensuring your gear remains in peak condition and ready for the next watering season.
Properly storing your garden hose not only extends its lifespan but also saves you time and money in the long run. A well-maintained hose ensures efficient watering and minimizes the risk of damage, such as cracks or leaks. By dedicating just a little time to organizing and storing your hose correctly, you can avoid common issues and keep your gardening tools in top-notch shape.
How to Store Garden Hose in Garage: A Step-by-Step Guide
Step 1: Disconnect and Drain All Water
The absolute first priority before storing any watering equipment is removing every drop of liquid from the interior. Water left inside a hose is heavy, making it difficult to move, but more importantly, it poses a severe risk during colder months. If trapped water freezes, it expands and can burst the lining of even the most durable rubber or vinyl. Start by unscrewing the hose from the outdoor spigot.
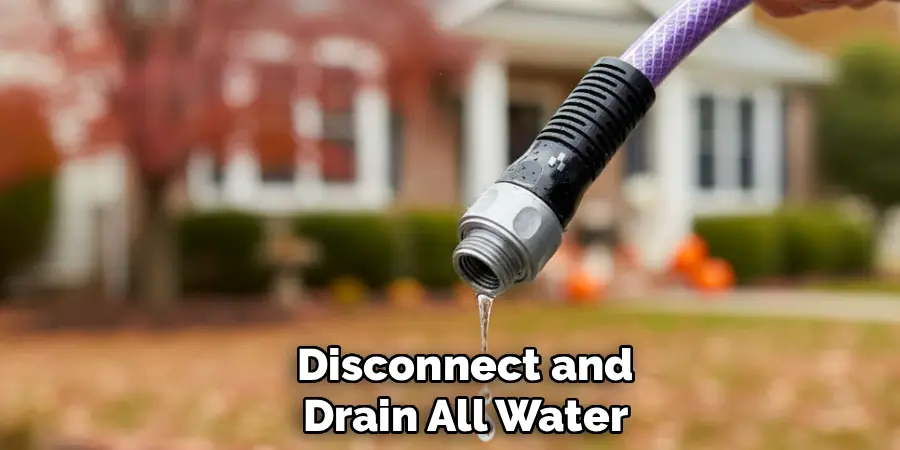
Lay the entire length out on a sloped driveway or lawn to let gravity do the work. Lift one end and walk the length of the tubing, keeping it elevated to force the remaining liquid out the other end. This draining process is the foundation of proper maintenance and ensures no mold or mildew grows inside while it sits in storage.
Step 2: Clean and Inspect the Exterior Surface
Before you bring outdoor equipment into your clean garage, you need to remove the dirt, mud, and debris it has collected. A dirty hose can introduce pests or mold spores into your storage area. Take a damp rag or a bucket of mild soapy water and wipe down the entire length of the tubing as you coil it.
As you clean, perform a thorough visual inspection of the material. Look closely for any small cracks, abrasions, or kinks that might have formed during use. Checking the washers at the coupling ends is also vital; dry-rotted washers are the number one cause of leaks. Identifying these issues now allows you to repair them with a simple kit before you pack everything away, saving you a headache when spring arrives.
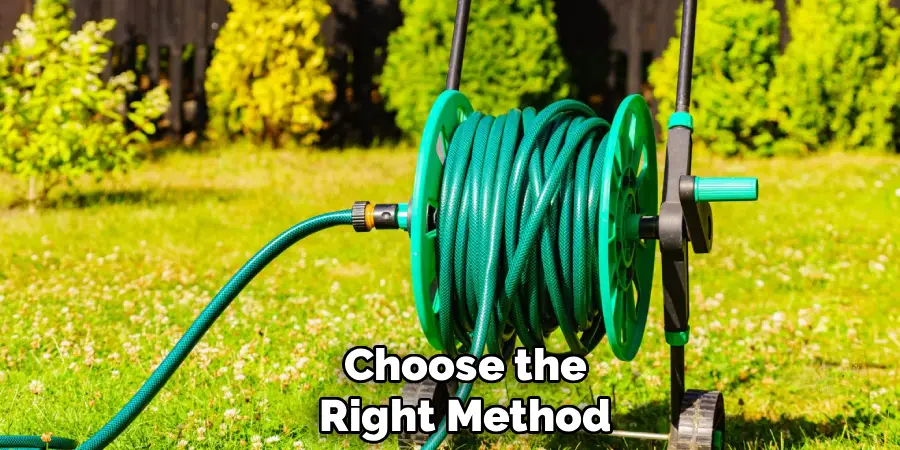
Step 3: Choose the Right Method
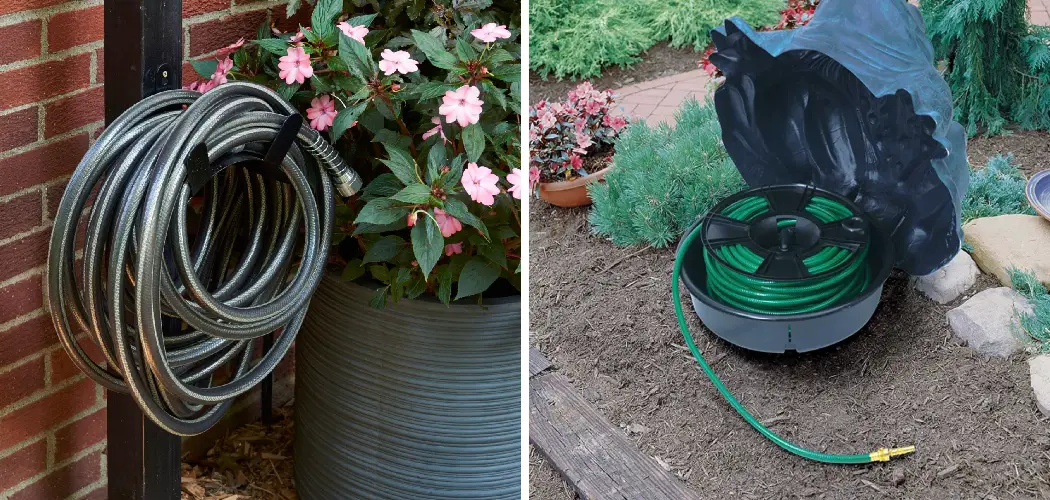
Selecting the correct storage vessel or hanger depends entirely on your available space and the type of hose you own. You have several options ranging from simple wall hooks to elaborate reel carts. For smaller garages where floor space is at a premium, a heavy-duty wall-mounted hanger is usually the best choice.
These brackets keep the coils off the ground and prevent tripping hazards. If you have a very long or heavy rubber hose, a portable reel cart with wheels might be superior, allowing you to roll the equipment right to where you need it. Consider a large bucket or a decorative pot if you prefer to hide the coils completely. The goal is to find a dedicated spot that keeps the tubing organized and protected from accidental damage like being run over by a car.
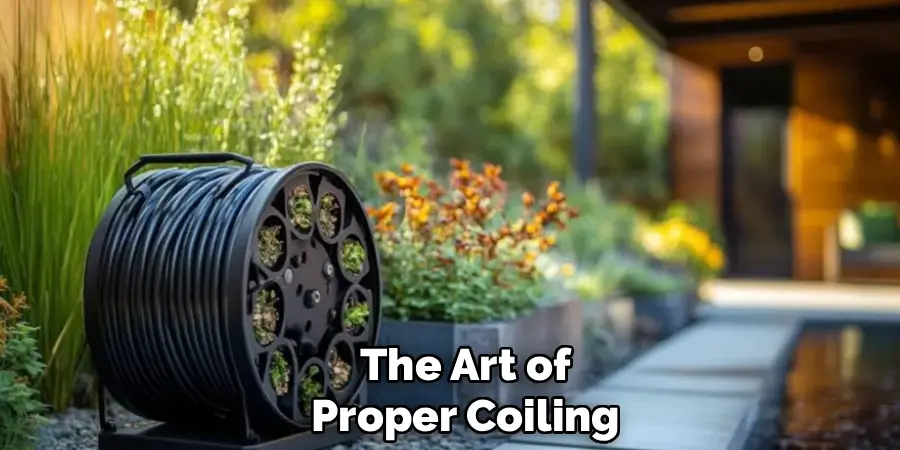
Step 4: The Art of Proper Coiling
Coiling is where most people go wrong, leading to frustration and permanent kinks. Do not try to force the hose into a tight circle against its natural shape. Instead, use a technique often called “over-under” or simply follow the natural memory of the material. Lay the hose flat and form a large loop, roughly three feet in diameter. As you create the next loop, twist the tubing slightly with your wrist to help it lie flat against the previous coil.
If you are using a reel, guide the hose back and forth evenly across the drum to prevent bunching in one spot. Proper coiling prevents the material from twisting and ensures that when you pull it out next time, it unspools smoothly without fighting you.
Step 5: Secure the Coils for Transport
Once you have created a neat, manageable circle of tubing, you need to ensure it stays that way. A loose coil can easily spring apart like a slinky the moment you try to pick it up. Use specialized hose straps, large velcro ties, or even a simple piece of rope to bind the loops together. Place ties at three or four intervals around the circle to keep the bundle tight and secure.
If you are using a wall mount for your solution on how to store garden hose in garage walls, these ties might be temporary just to get it onto the hook, but for shelf storage, they are essential. Securing the bundle makes it much easier to lift and hang without the risk of it unravelling into a chaotic mess at your feet.
Step 6: Connect the Ends to Prevent Contamination
A pro tip often overlooked by casual gardeners is to connect the male and female ends of the hose together once it is coiled. Screwing the two ends together creates a closed loop system. This serves two important purposes. First, it prevents any residual droplets of water from dripping onto your garage floor or other stored items.
Second, and perhaps more importantly, it keeps insects, spiders, and dust from finding their way inside the tubing. There is nothing worse than turning on the water in the spring and having a clog caused by a bug nest. By closing the circuit, you ensure the interior remains clean and clear, ready for immediate use when the weather warms up.
Step 7: Store in a Climate-Controlled Area if Possible
While the garage is a standard storage location, temperature fluctuations can still affect the longevity of your equipment. Extreme cold can make vinyl brittle and prone to cracking, while extreme heat can cause rubber to degrade or become sticky. Ideally, store your coiled hose in a corner of the garage that is insulated or away from direct sunlight and drafty doors.
If you live in a region with severe winters and your garage is unheated, consider placing the coiled hose inside a plastic storage bin or even moving it to a basement if space allows. Keeping the material at a relatively stable temperature prevents the degradation of the polymers, ensuring your hose remains flexible and leak-free for many years to come.
Frequently Asked Questions (FAQ)
Can I Leave My Hose Attached to the Reel All Winter?
Yes, you can leave the hose on the reel, provided the reel is disconnected from the water source.
- Disconnect: You must unscrew the leader hose that connects the reel to the outdoor faucet.
- Drain: Ensure the reel itself is drained of water to prevent internal freezing damage.
- Cover: If the reel is portable, move it into the garage. If it is wall-mounted outdoors, consider buying a protective cover, though bringing the hose inside is always safer for the material.
What Is the Best Way to Fix a Kinked Hose?
If your hose has developed a memory kink from improper storage, heat is your friend.
- Sunlight: On a warm, sunny day, lay the hose out completely straight on a driveway or sidewalk. The heat will soften the rubber or vinyl.
- Pressure: Close the nozzle and turn the water on to pressurize the hose. The internal pressure combined with the heat will help force the material back into its original round shape.
- Reset: Allow it to cool in this straight, pressurized state before coiling it correctly.
Is It Better to Hang a Hose or Store It Flat?
Both methods work, but they depend on the hose type and space.
- Hanging: Great for saving floor space. Use a wide, curved hanger (saddle) to prevent the hose from creasing at the hanging point. Avoid hanging it on a single nail, which creates a sharp pressure point.
- Flat: Storing it flat on a shelf or in a bin eliminates stress on the material entirely but takes up more surface area. This is often better for heavy-duty rubber hoses.
How Do I Prevent Dry Rot on Rubber Hoses?
Dry rot is caused by UV exposure and extreme dryness.
- UV Protection: The most important step is keeping the hose out of direct sunlight when not in use. The garage is perfect for this.
- Conditioning: Occasionally wiping down rubber hoses with a specialized rubber conditioner can help maintain flexibility.
- Temperature: Avoid storing the hose near heat sources like a furnace or water heater, which can accelerate the drying process.

Why Is My Hose Leaking at the Connection?
Leaks at the connection point are almost always caused by a worn-out washer.
- Inspect: Look inside the female coupling. Is the round rubber gasket missing, cracked, or flattened?
- Replace: These washers cost pennies. Pop the old one out with a flathead screwdriver and press a new O-ring firmly into place.
- Tighten: Sometimes simply tightening the connection with a pair of pliers (gently) can solve the issue.
Conclusion
Properly organizing your gardening tools is about more than just aesthetics; it is about extending the life of your equipment and maintaining a safe home environment. By taking the time to drain, clean, and coil your watering gear, you prevent common issues like freezing, cracking, and kinking that can ruin expensive equipment. Whether you choose a simple wall hook or a robust reel system, the key is consistency and care.
A tidy garage floor is a safer place to walk, and a well-maintained hose is a joy to use rather than a chore. Now that you have mastered the essentials of how to store garden hose in garage spaces efficiently, you can look forward to a hassle-free start to your next gardening season, with equipment that works perfectly the moment you turn on the tap.
I am Rick. I grew up helping my dad with his handyman service. I learned a lot from him about how to fix things, and also about how to work hard and take care of business. These days, I’m still into fixing things- only now, I’m doing it for a living.
I’m always looking for new ways to help people grow and develop. That’s why I have created this blog to share all my experience and knowledge so
that I can help people who are interested in DIY repair.