
Do you have a constantly damp garage? Does the moisture build up on the floor make it difficult for you to work in your space? If so, then sealing your garage floor may be just what you need! Sealing your garage floor from moisture can protect it against water damage and provide you with a comfortable workspace.
In this blog post, we’ll cover everything you need to know about how to seal a garage floor from moisture; from preparation steps through the finishing touches – by following these easy steps, anyone can get their garage looking great again!
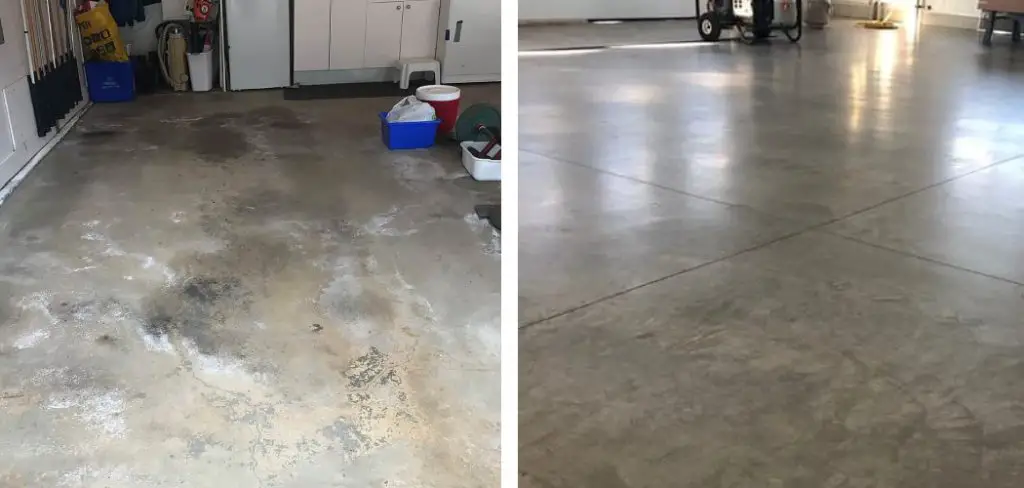
Summary: Garage floors are prone to moisture, which can lead to mold, mildew, and water damage. To prevent this from occurring, it is important to seal the garage floor with a waterproof coating. Sealing the floor helps to keep out moisture and protect the underlying concrete from damage caused by water. One way to do this is by applying a clear acrylic sealer to the concrete.
Tools You Will Need
- Broom or Vacuum
- Putty Knife
- Masonry Trowel
- Mortar Mixer
- Concrete Sealant
- Sponge or Rag
Top 5 Steps Guide on How to Seal a Garage Floor From Moisture
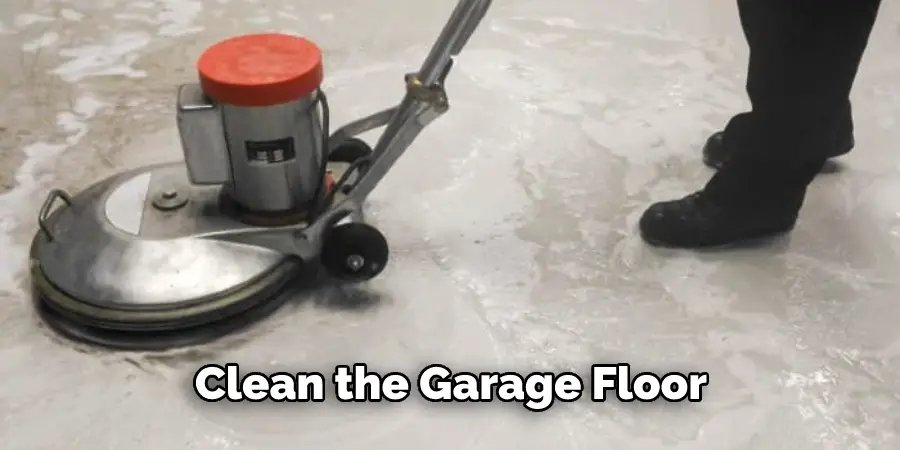
1. Clean the Floor
The first step is to make sure that the floor is clean and free of any oils, grease, or dirt. Use a broom or vacuum to remove any debris before beginning.
Cleaning the floor is an effective way to ensure your garage remains moisture-free. By removing debris, dirt, and debris build-up you’re preventing water from accumulating on the surface, which can cause damage to the concrete and lead to deterioration.
Careful attention should be paid to any cracks or divots in the floor, as these areas corral debris and create a haven for moisture seepage. Regular sweeping, vacuuming, or pressure washing will all help keep your garage floor free of moisture, preventing potentially costly problems down the line.
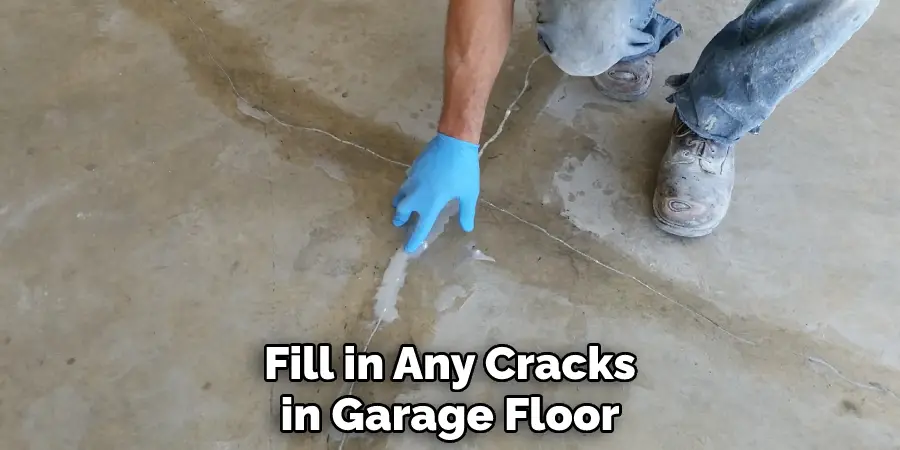
2. Fill in Cracks
It’s important to fill in any cracks or gaps with concrete; this will help keep moisture out of your garage and make it easier to apply the sealant. Use a putty knife or masonry trowel to fill in cracks with mortar mix.
Taking on the task of pouring cement to fill in cracks in a garage floor is not as daunting as it may sound. It is an important preventative measure that should be done annually to seal out moisture, dirt, and other elements from entering the garage.
To do this, begin by cleaning the area; sweep up any loose debris and then scrub away any remaining dirt with a stiff bristle brush. After the area is completely clean and dry, use a caulk gun to fill in all cracks with an appropriate mildew-resistant sealant specifically made for concrete.
Leave 12-24 hours before driving over the newly filled surface to give it ample time for drying and curing.
Keeping your garage floor areas crack-free will help maintain a healthy structure and also provide an attractive foundation for additional projects such as tile installation or painting.
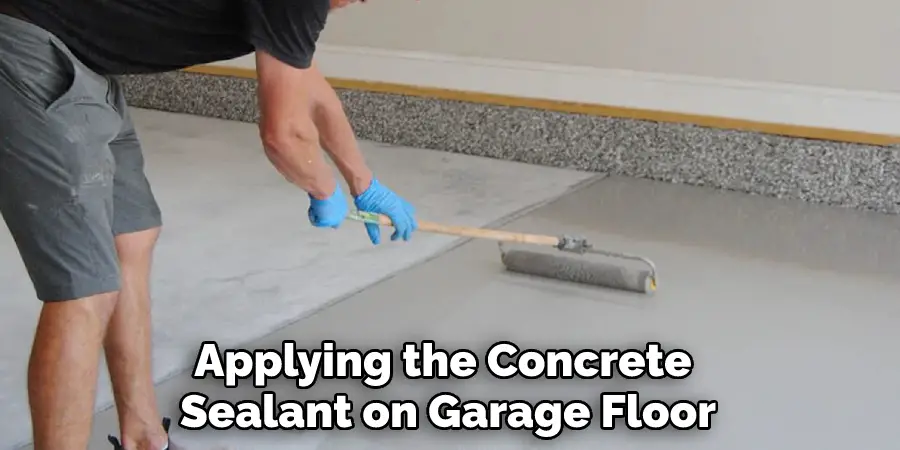
3. Apply Sealant
Once the floor is ready, you can begin applying the concrete sealant. Start by mixing it according to the instructions on the package and then use a sponge or rag to spread it evenly across the entire floor. Allow the sealant to dry before moving on.
Keeping a garage floor from becoming damp due to ground moisture is essential for many reasons. Sealing the floor with a high-quality sealant is the best solution as it will help prolong the life of the concrete and inhibit debris from getting stuck in cracks.
The sealant also helps protect against mold and mildew, which can potentially be dangerous and detrimentally impact air quality. When applying a sealant, always follow the manufacturer’s instructions closely.
Make sure to mask off any areas you wish to not be impacted by the product. Make sure to utilize an adequate amount of sealant while spreading it evenly across the surface in a single direction. Allow it to dry before walking on or driving over the garage floor; this step ensures that your hard work won’t go to waste!
4. Cover and Test the Sealant
Once the sealant is completely dry, use a brush to apply a layer of sealant around the edges of your garage floor. This will help keep moisture from seeping in through these areas. Before you consider your project complete, it’s important to make sure that the sealant is doing its job.
Pour a small amount of water on the floor and watch to see if it beads up or absorbs into the surface; if it beads up, then you’ve done a great job!
Sealing a garage floor every few years is an important part of preventive maintenance in any home. Not only does it protect concrete surfaces from oil and other chemicals, but it also helps to prevent moisture buildup, which can cause cracking and chipping. Testing the sealant is essential to ensure that the floor remains properly sealed when exposed to different levels of moisture.
Applying a water test before applying a sealant will help determine if your particular sealant brand is moisture-resistant enough for your specific garage situation. This test can be done by taping a plastic sheet to one small section of the floor and then filling the plastic with water.
If after 24 hours, there is no moisture seeping out from underneath the plastic, you know that you have the right product for the job.
5. Touch Up
Once you’ve confirmed that the sealant is working properly, you can touch up any areas that may need it and clean off any excess sealant.
For garage owners looking to seal their concrete flooring against moisture, a touch-up coat of sealer can be applied for extra protection. Different types of sealers are available depending on the existing conditions and material of the garage floor.
For maximum benefit, apply a solvent-based acrylic sealer with a soft broom in thin coats and let dry before applying another. Opting for several thinner coats provides better coverage than just one or two thicker layers, resulting in improved adhesion and better protection against spills, moisture deterioration, staining, and other damage over time.
With these easy steps, anyone can get their garage looking great again by sealing their floor from moisture. Keep your space dry and comfortable – start sealing today!
Tips to Seal a Garage Floor From Moisture
- Check for cracks and holes in the floor.
- Clean the floor thoroughly with a pressure washer.
- Apply a concrete primer to the floor.
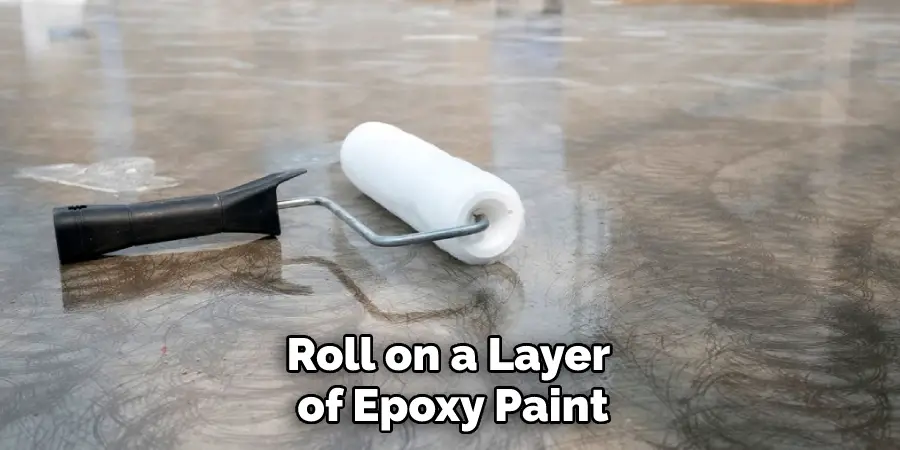
- Roll on a layer of epoxy paint.
- Add a topcoat of polyurethane for extra protection.
- Allow the floor to dry completely before using it.
- Repeat the process every few years as needed.
- Store any chemicals or other flammable materials in a safe place away from the garage floor.
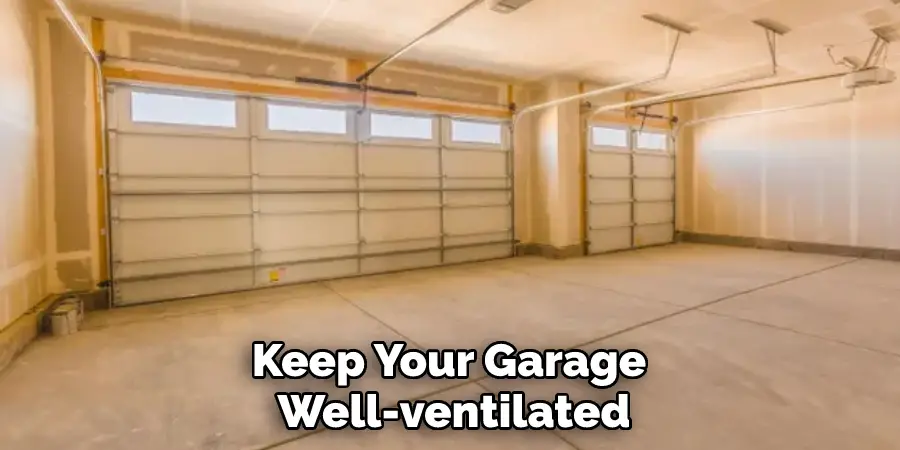
- Keep your garage well-ventilated to prevent moisture buildup.
- Inspect the floor regularly for any signs of moisture damage.
How Often Should I Seal My Garage Floor For Optimal Protection?
Sealing your garage floor is an important part of protecting it and keeping it in great condition. When done regularly, sealing can help protect against several things that could damage the floor such as oil, gas spills, grease, and other chemicals or liquids.
Generally speaking, it’s recommended to seal the garage floor every year since that’s enough to create a good barrier to keep these substances away from the concrete underneath.
However, if your garage sees heavier usage or more exposure to harsh elements due to weather, then you may want to consider sealing more often for better protection. Ultimately it’s up to you and how often you are willing to do maintenance work for your garage floor to stay well-preserved and last longer than expected.
DIY Tips for Sealing a Concrete Floor From Moisture
Concrete floors are a popular choice for many homeowners, but they can be susceptible to moisture and water damage. If you’re looking to keep your concrete floor sealed from moisture and make it last, here are some great DIY tips. Start by cleaning the area before applying sealer with an industrial-grade pressure washer. Allow the surface to dry fully before applying the sealer.
Choose a penetrating sealer over a topical one as it will offer better protection against water migration and staining of the concrete floor. Apply multiple thin coats of sealer rather than one thick coat for best results and be sure to follow all instructions on the product label.
Doing so will help ensure that you have successfully sealed your concrete floor from moisture, preserving its beauty and extending its life.
Frequently Asked Questions
How Do I Know If My Garage Floor Has Been Sealed?
After sealing your garage floor, you’ll be able to tell if it has been done properly by looking for a glossy sheen on the surface. This indicates that the sealer has been applied correctly and is protecting the concrete from moisture and other elements.
Additionally, you can test it by pouring a few drops of water on the floor. If the sealer has been applied, the water should bead up and stay on the surface rather than soaking into the concrete. This is evidence that your garage floor is properly sealed and better protected against moisture damage.
How Long Does it Take to Seal a Garage Floor?
How long it takes to seal a garage floor will depend on the size of the space and how much preparation work is needed. Generally speaking, you can expect the sealing process to take around 3-4 hours from start to finish if all goes as planned.
However, if there is a lot of repair work that needs to be done before sealing, this could take longer. Make sure to plan accordingly and give yourself plenty of time for the job so you can do it properly and get the desired results.
Finally, if you’re looking for additional advice and tips on how to seal your garage floor from moisture, it’s best to consult with a professional. They will be able to provide guidance based on the specific needs of your project and help ensure that you have done everything correctly for optimal protection from moisture.
How Can I Maintain The Seal On My Garage Floor?
To keep the seal on your garage floor in good condition, it’s important to clean the floor regularly and remove any dirt or debris that could inhibit its performance.
Additionally, you should inspect the seal every few years to make sure it is still doing its job and protecting against moisture infiltration. If necessary, apply a new coat of sealer for added protection. This will help keep your garage floor looking great for years to come.
By taking the time to properly seal your concrete garage floor from moisture, you can ensure that it remains well-protected and free from damage. With proper maintenance and occasional touch-ups, your sealed garage floor will last longer than expected, so you can enjoy its beauty for years to come.
Conclusion
Sealing your garage floor can be a daunting task, but with the right preparation and materials, it can be an easy process. You should carefully determine how to seal a garage floor from moisture.
By following these simple steps, you can keep your garage floor looking its best for years to come. If you have any questions about sealing your garage floor, or if you need help selecting the right sealant for your needs, contact us today. Our team of experts would be happy to assist you in finding the perfect solution for your home.
I am Rick. I grew up helping my dad with his handyman service. I learned a lot from him about how to fix things, and also about how to work hard and take care of business. These days, I’m still into fixing things- only now, I’m doing it for a living.
I’m always looking for new ways to help people grow and develop. That’s why I have created this blog to share all my experience and knowledge so
that I can help people who are interested in DIY repair.